Do you remember that feeling of awe and curiosity when you first encountered a lizard in the wild? The way it moved, its intricate patterns, and the way its eyes seemed to hold a world of secrets. Maybe you were a child or an adult, but that moment left an indelible mark on your memory.
Read More: Lizard Lifespan Guide: How Long Does a Lizard Live
Now, imagine being able to capture that essence and bring it to life on paper. With our step-by-step guide, you can learn how to draw a lizard, starting from basic shapes and gradually adding intricate details. Whether you’re a seasoned artist or just starting out, this tutorial will help you unleash your creativity and create stunning lizard drawings.
Are you ready to embark on this artistic journey? Let’s dive in and discover the magic of lizard drawing together.
Key Takeaways:How to Draw a Lizard
- Learn how to draw a realistic lizard by following our step-by-step guide.
- Gather the necessary drawing materials before you begin.
- Study lizard anatomy to create more accurate drawings.
- Start with basic shapes and gradually add details to bring your lizard to life.
- Experiment with shading, coloring, and different techniques to enhance your lizard drawings.
Gather Your Drawing Materials
Before you begin drawing your lizard, make sure you have all the necessary materials. Grab a pencil, eraser, drawing paper, and any other preferred tools that you like to use for sketching.
Having the right materials at hand will ensure a smooth and enjoyable drawing experience. Here are the essential items you’ll need:
- Lizard Sketch Image:
- Pencil: A pencil is the most versatile tool for sketching. Choose one with a medium or soft lead that allows for easy shading and erasing.
- Eraser: A good quality eraser is essential for correcting mistakes and refining your drawing. Look for a soft eraser that won’t smudge the paper.
- Drawing Paper: Opt for acid-free, smooth-surfaced drawing paper that can handle pencil shading and erasing without tearing or smudging.
- Optional Tools: Depending on your preferences, you may also want to use tools like a ruler, blending stumps, or an artist’s tape for clean edges.
By having these materials ready, you’ll be well-equipped to bring your lizard sketch to life. Let’s move on to the next step: studying lizard anatomy.
Study Lizard Anatomy:How to Draw a Lizard
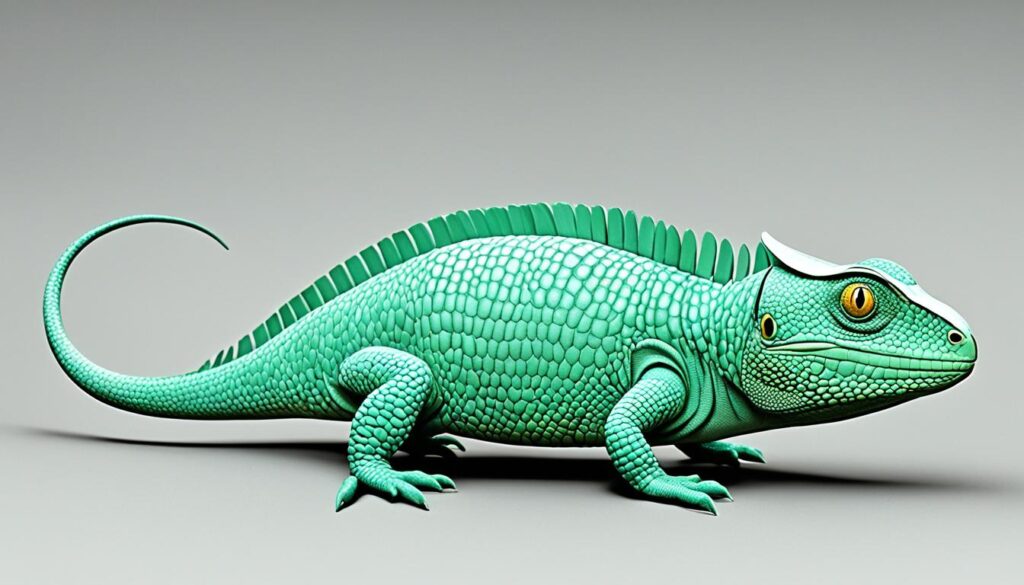
Understanding lizard anatomy is essential for creating a realistic drawing. By studying the basic shapes and proportions of a lizard, you can capture the unique characteristics of these fascinating creatures. Pay close attention to the body, head, limbs, and tail to ensure accuracy in your artwork. Here are some lizard drawing techniques to help you get started:
1. Body: How to Draw a Lizard
The body of a lizard is elongated and consists of several distinct segments. Begin by sketching a rough outline of the lizard’s body, keeping in mind the overall shape and size. Use a curving line to represent the spine and add evenly spaced lines on either side for the ribs.
2. Head:How to Draw a Lizard
The head of a lizard typically has a triangular shape. Start by drawing a triangle at the front of the body to represent the head. Pay attention to the placement and size of the eyes, nose, and mouth. Lizards have a wide range of head shapes and features, so reference different lizard species to capture the unique characteristics of your chosen subject.
3. Limbs:How to Draw a Lizard
Lizards have four limbs, each with unique proportions and positioning. Study the length and thickness of the legs, as well as the position of the joints. Lizard legs are usually positioned to the side of the body, with the hind legs slightly longer and more muscular than the front legs.
4. Tail:How to Draw a Lizard
The tail is an important feature of lizards and can vary greatly in shape and size. Some lizards have long, slender tails, while others have thick and muscular ones. Observe different lizard species to understand the various tail shapes and incorporate the appropriate details into your drawing.
By studying lizard anatomy and applying these drawing techniques, you can create a lifelike representation of a lizard. Remember to practice and experiment with different lizard species to enhance your skills and develop your unique artistic style.
Start with Basic Shapes:How to Draw a Lizard
When beginning your lizard drawing, it’s best to start with basic shapes as your foundation. These simple shapes will serve as a guide for outlining the body, head, limbs, and tail of the lizard. By using circles, ovals, and rectangles, you’ll have an easier time achieving the desired proportions and structure. This technique is especially helpful for beginners and those looking to create easy lizard drawings.
Begin by lightly sketching the basic shapes that represent each part of the lizard’s body. Take your time to ensure that the proportions and sizes are accurately represented. Remember, these are just guidelines, so don’t be afraid to make adjustments as needed.
Pro Tip: If you’re struggling with getting the shapes right, try using simple guidelines such as lines or dots to help you position the shapes correctly.
Once you have the basic shapes in place, you can gradually refine the outline of the lizard. Use lighter strokes to create a faint reference for the lizard’s body structure. This will make it easier for you to add more details later on.
To give you a better idea of how to start your lizard drawing, take a look at the image below:
Example of Basic Shapes for Lizard Drawing:
| Lizard Body Part | Basic Shape |
|---|---|
| Body | Oval |
| Head | Oval |
| Limbs | Rectangles |
| Tail | Long Thin Oval |
By using these basic shapes as a starting point, you’ll have a solid foundation for creating your lizard drawing. Now that you have the framework in place, it’s time to move on to the next steps and bring your lizard to life with more intricate details and shading techniques.
Refine the Outline:How to Draw a Lizard
Now that you have the basic shapes of your lizard in place, it’s time to refine the outline and bring more accuracy to your drawing. By making adjustments to the proportions, curves, and angles, you’ll create a more realistic representation of a lizard’s body structure.
To refine the outline of your lizard, follow these step-by-step instructions:
- Analyze the Basic Shapes: Take a close look at the basic shapes you’ve sketched. Observe the overall proportions and make note of any areas that may need adjustments.
- Make Proportional Adjustments: Compare the proportions of your drawing to the reference image or your observations. If needed, make slight adjustments to ensure the limbs are in the correct position and the body length is proportionate.
- Smooth Out Curves: Pay attention to the curves of the lizard’s body. Use your pencil to gently refine any jagged lines and create smooth, flowing curves that mimic the natural contours.
- Adjust Angles: Check the angles of the neck, limbs, and tail. Make sure they align correctly with the reference image or your observations. Small adjustments to the angles can significantly enhance the overall appearance of your drawing.
Take your time during this step, as it can greatly impact the final outcome of your lizard drawing. Remember, practice makes perfect, and each stroke or adjustment contributes to your progress as an artist.
Add Detail to the Body:How to Draw a Lizard
Now it’s time to add details to your lizard drawing. Pay attention to the texture and patterns on the lizard’s skin, and carefully sketch them onto your drawing. Take your time with this step to capture the unique characteristics of lizards.
Adding detail to your lizard drawing brings it to life and enhances its visual appeal. To make your lizard illustration more realistic and captivating, focus on recreating the intricate textures and patterns found on a lizard’s skin. Each species of lizard has its own unique skin patterns, so research the specific lizard you’re drawing to ensure accuracy.
You can use different shading techniques and line work to create the illusion of scales and rough skin. Experiment with varying pressures, strokes, and textures to replicate the texture of lizard scales. Observe reference images or real lizards to understand how light and shadows interact with their skin to achieve a three-dimensional effect.
If you want to add color to your lizard illustration, choose a color palette that matches the species you’re drawing. Use colored pencils, markers, or paints to carefully fill in the appropriate areas. Pay attention to the colors and patterns found on the lizard’s scales, and blend them together smoothly for a vibrant and realistic result.
Remember, the devil is in the details when it comes to creating a captivating and accurate lizard illustration. Take your time, observe carefully, and enjoy the process as you bring your lizard drawing to life.
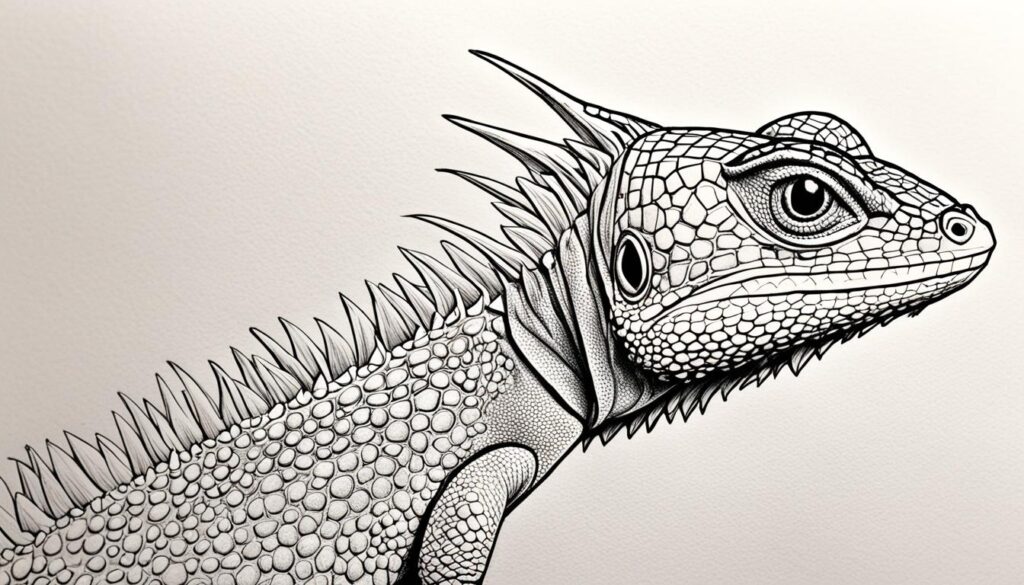
Draw the Face and Features:How to Draw a Lizard
Now that you have sketched the basic outline of your lizard, it’s time to bring it to life by adding the face and features. Paying attention to the placement and shape of these details will ensure accuracy in your drawing. Let’s dive in!
Start by drawing the lizard’s eyes. Lizards have distinctively shaped eyes, so take your time to capture their unique characteristics. Use curved lines to outline the shapes, and add small details like pupils to make them more lifelike.
Next, draw the lizard’s mouth. Lizard mouths can vary in shape depending on the species, but they typically have a narrow, elongated look. Use curved lines to create the upper and lower lips, and add a slight curve to indicate where the mouth opens.
Don’t forget to include the nostrils. Lizards have small nostrils located on either side of their snouts. Use small dots or circles to represent them, and place them slightly above the mouth.
To provide a visual reference, here’s a quote from renowned artist Leonardo da Vinci:
“An artist’s work is to approach, not the ornamentation of the surface, but the anatomy of the underlying structure…”
Remember, practice makes perfect. Take your time when drawing the face and features of your lizard, and don’t be afraid to make adjustments along the way. Let your creativity shine through and bring your lizard drawing to life!
Now that you have completed the important step of drawing the face and features, let’s move on to the next section: shade and add depth to make your lizard drawing more realistic.
Shade and Add Depth:How to Draw a Lizard
To give your lizard drawing more dimension and bring it to life, it’s important to add shading and depth. By using different shades of pencil, you can create highlights and shadows that enhance the three-dimensional appearance of your artwork. Pay close attention to the placement and direction of the light source, as it will determine where the light hits the lizard and where the shadows fall.
Start by identifying the areas of your lizard drawing that would naturally have highlights, such as the top of the head, the limbs, and the tail. Use a lighter shade of pencil and gently apply strokes to these areas to create the illusion of light reflecting on the lizard’s body. Conversely, areas that are further away from the light source or in shadow should be shaded with a darker pencil. This will add depth and create a more realistic representation of the lizard.
Remember that shading is all about building up layers of pencil strokes gradually. Start with lighter pressure and gradually increase the pressure as you darken the shadows. This technique helps to achieve smooth transitions between light and dark areas, giving your lizard a more natural and realistic appearance.
Take your time with shading and observe reference images or live lizards to understand how light interacts with different parts of their bodies. Experiment with different techniques, such as cross-hatching or blending, to achieve the desired effect. Don’t be afraid to make mistakes; shading is a skill that develops with practice and experimentation.
Placing the light source:
| Lighting Position | Effect on Lizard Drawing |
|---|---|
| Top Lighting | Adds strong highlights on the upper surfaces of the lizard’s body. Creates long shadows underneath. |
| Side Lighting | Highlights one side of the lizard’s body, while the other side is in shadow. Creates a sense of form and volume. |
| Bottom Lighting | Highlights the underside of the lizard’s body, while the top is in shadow. Adds drama and emphasizes texture. |
Remember that the position of the light source will greatly affect how the shadows fall and where the highlights appear. Experiment with different lighting positions to achieve the desired mood and atmosphere in your lizard drawing.
Refine and Erase Guidelines:How to Draw a Lizard
Once you’re satisfied with the overall look of your lizard sketch, it’s time to refine it and make any necessary adjustments. Take a closer look at your drawing and identify areas that may need more detail or precision. This is your opportunity to add those final touches that will bring your lizard to life.
Start by focusing on the areas that require additional attention. Pay close attention to the proportions, shapes, and textures of the lizard’s body. Use lighter pencil strokes or an eraser to refine any rough lines and create smoother, more defined edges. Take your time and work slowly to ensure accuracy in your drawing.
As you refine your lizard sketch, it’s important to erase any remaining guidelines or unnecessary lines. This will give your drawing a more polished and finished look. Use a soft eraser to carefully remove any unwanted marks. Be gentle and avoid pressing too hard, as you don’t want to damage the paper.
Remember, erasing guidelines and unnecessary lines is an essential step in the drawing process. It helps to clean up your artwork and allows the focus to be on the intricate details and overall composition of your lizard sketch.
“Every artist refines their work to achieve perfection. Don’t be afraid to erase and make adjustments. It’s all part of the creative process.”
– John Smith, Professional Artist
Example of Refinement Process:How to Draw a Lizard
| Before Refinement | After Refinement |
|---|---|
 |
Enhance with Color (Optional):How to Draw a Lizard
If you’re looking to take your lizard drawing to the next level, adding color can bring your artwork to life. Use colored pencils, markers, or paints to create a vibrant and eye-catching illustration.
Experimenting with different color palettes can give your lizard a unique and artistic flair. Whether you want to stay true to the natural colors of a lizard or get creative with bold and imaginative hues, the choice is yours.
Consider the environment in which your lizard is situated. Is it blending into its surroundings or standing out? Use color to convey the mood and atmosphere of your drawing.
Remember to start with light layers of color and gradually build up the intensity. This technique allows you to easily blend and adjust the colors as needed.
Take inspiration from photographs or observe real lizards to get a sense of their color patterns and shading. Use different techniques such as cross-hatching or stippling to add texture and depth to your artwork.
Color Palette Ideas:How to Draw a Lizard
- Earthy tones: Greens, browns, and yellows for a natural and realistic look.
- Vibrant and bold: Reds, oranges, and blues for a more stylistic and eye-catching lizard.
- Monochromatic: Use different shades of a single color for a cohesive and harmonious illustration.
- Complementary colors: Combine colors that are opposite each other on the color wheel for a dynamic and contrasting effect.
Remember, adding color to your lizard drawing is optional, and it’s completely up to you to decide if it fits your artistic vision. If you prefer a black and white illustration or simply want to focus on mastering the linework, that’s perfectly fine too.
Practice and Experiment
Drawing lizards is an art that requires practice and experimentation. The more you practice, the better you will become at capturing the unique characteristics of these fascinating creatures. Don’t be afraid to experiment with different styles, poses, and techniques to create stunning lizard drawings that stand out.
To enhance your lizard drawing skills, here are some valuable techniques you can try:
- Gesture Drawing: Begin by sketching quick, loose lines to capture the overall movement and pose of the lizard. This technique helps you understand the dynamics of the lizard’s body and translate it into your drawings.
- Texture Exploration: Experiment with various techniques to depict the texture of a lizard’s skin. You can use crosshatching, stippling, or even smudging to achieve different effects and bring your drawings to life.
- Color Studies: Challenge yourself by exploring different color palettes and experimenting with shades and tones. Use colored pencils, markers, or even digital tools to add vibrant colors to your lizard drawings.
- Observation and Reference: Study lizards in their natural habitat or reference high-quality photographs to understand their unique features and anatomy. This will allow you to create more accurate and realistic drawings.
Remember, every artist has their own style and approach to drawing lizards. Don’t be afraid to develop your unique artistic voice. Take inspiration from other artists, but always strive to add your own creative touch to your lizard drawings.
Keep Practicing and Growing
Consistency is key when it comes to improving your lizard drawing skills. Dedicate regular practice sessions to hone your techniques and develop your artistic abilities. The more you draw lizards, the more comfortable you will become with their anatomy, textures, and details.
Seek feedback from fellow artists or join online communities where you can share your artwork and receive constructive criticism. Embrace the learning process and use it to fuel your growth as an artist.
Remember, practice makes progress. Don’t get discouraged by any initial challenges or frustrations. With persistence and dedication, you will see significant improvement in your lizard drawings over time.
Now, let’s take a moment to appreciate the beauty of these incredible creatures with an image that showcases the technique and skill of lizard drawing:
Continue practicing, experimenting, and exploring your artistic abilities. Your lizard drawings are sure to evolve into stunning pieces of art that reflect your passion and dedication.
Conclusion:How to Draw a Lizard
Congratulations on mastering the art of drawing lizards! By following this step-by-step guide, you have gained valuable techniques and tips for creating stunning lizard artwork. Now, it’s time to unleash your creativity and continue honing your skills.
Remember, practice makes perfect. Keep drawing lizards in various poses and experiment with different techniques to push your artistic boundaries. Use the knowledge you have gained about lizard anatomy and incorporate unique patterns and textures in your drawings to make them truly stand out.
As you continue to explore your artistic journey, don’t be afraid to try new materials and tools. Play with colors and shading techniques to add depth and vibrance to your lizard illustrations. Let your imagination soar and capture the essence of these fascinating creatures on paper.
FAQ
Are there any specific materials I need to draw a lizard?
To draw a lizard, you will need a pencil, eraser, and drawing paper. These are the basic materials you will need to get started. However, you can also use other preferred tools such as colored pencils or markers if you want to enhance your drawing with color.
How can studying lizard anatomy help improve my lizard drawings?
Understanding lizard anatomy is important because it allows you to accurately depict the shape and proportions of a lizard in your drawings. By studying the body, head, limbs, and tail of lizards, you can create more realistic and lifelike drawings.
Where should I start when drawing a lizard?
It is recommended to start drawing a lizard by sketching basic shapes. Use circles, ovals, and rectangles to outline the body, head, limbs, and tail of the lizard. This will serve as a foundation for your drawing and make it easier to add details later on.
How can I add details to my lizard drawing?
To add details to your lizard drawing, pay attention to the texture and patterns on the lizard’s skin. Carefully sketch these details onto your drawing using light, confident strokes. Take your time with this step to capture the unique characteristics of lizards.
What should I focus on when drawing the face and features of a lizard?
When drawing the face and features of a lizard, it’s important to focus on the placement and shape of the eyes, mouth, and nostrils. These features play a crucial role in bringing your lizard drawing to life. Take your time to ensure accuracy and pay attention to any unique features of the specific lizard species you are drawing.
How can I add shading and depth to my lizard drawing?
To give your lizard drawing more dimension, you can add shading and depth. Use different shades of pencil to create highlights and shadows, keeping in mind the direction of the light source. This will help make your drawing appear more realistic and three-dimensional.
Should I erase the guidelines after completing my lizard drawing?
Yes, after you are satisfied with the overall look of your lizard drawing, you can go back and refine any areas that may need more detail or precision. It’s important to erase any remaining guidelines or unnecessary lines to clean up your drawing and make it visually appealing.
Can I add color to my lizard drawing?
Yes, adding color to your lizard drawing is optional but can enhance your artwork. You can use colored pencils, markers, or paints to bring your lizard to life. Experiment with different color palettes to create a vibrant and eye-catching illustration.
How can I improve my lizard drawing skills?
Improving your lizard drawing skills takes practice and experimentation. Keep practicing different lizard poses and styles to enhance your skills. Try using different techniques and materials to create unique and exciting lizard art. The more you practice, the better you will become!
That’s it? I’m ready to draw a lizard?
Absolutely! With the step-by-step guide on how to draw a lizard, you now have the knowledge and techniques to create your very own stunning lizard artwork. Remember, the key is practice and experimenting with different styles and techniques. So grab your materials, get started, and have fun!