Have you ever looked at a sheep and felt captivated by its gentle nature and fluffy appearance? Sheep have long been symbols of innocence, warmth, and comfort. If you’ve ever wanted to capture the essence of these adorable creatures on paper, you’ve come to the right place.
In this comprehensive sheep drawing tutorial, we will take you on a creative journey, guiding you step-by-step through the process of drawing a sheep. Whether you’re a beginner seeking to learn the basics or an experienced artist looking to refine your skills, this guide will provide you with the knowledge and techniques to create a stunning sheep drawing that is both realistic and captivating.
Get ready to unleash your artistic potential and embark on a delightful adventure into the world of sheep drawing. Let’s dive in!
Key Takeaways:
- Learn how to draw a sheep step-by-step, from basic shapes to intricate wool textures.
- Understand the key features of a sheep’s anatomy and how to accurately depict them in your drawing.
- Discover techniques for adding depth, volume, and realistic shading to bring your sheep to life.
- Enhance your drawing with details such as facial expressions, hooves, and surrounding elements.
- Gain confidence in your artistic abilities and enjoy the process of creating beautiful sheep drawings.
Materials You'll Need
Before we begin, let’s make sure you have all the necessary materials for your sheep drawing. Here’s what you’ll need:
- Paper
- Pencil
- Eraser
- Additional drawing supplies (optional)
We’ll be exploring various sheep drawing techniques throughout this tutorial, so make sure you have these basic materials ready. Feel free to use any additional drawing supplies or tools that you prefer.
| Materials | Description |
|---|---|
| Paper | Choose a smooth, white paper suitable for drawing. You can use sketching paper, drawing paper, or even printer paper. |
| Pencil | Use a standard graphite pencil or a mechanical pencil with a soft lead (e.g., 2B or 4B) for sketching. |
| Eraser | A good quality kneaded eraser or a soft vinyl eraser will be handy for making corrections and lightening pencil lines. |
| Additional drawing supplies | These can include fine liners, colored pencils, markers, or any other materials you’d like to experiment with to add more depth and color to your drawing. |
Having the right materials at your disposal will ensure a smooth and enjoyable drawing experience. Now that you’re prepared, let’s dive into the world of sheep drawing techniques!
Observing Sheep Anatomy
When it comes to drawing a realistic sheep, having a solid understanding of its anatomy is crucial. By breaking down the key features, you can gain valuable insights and sheep sketching tips to accurately capture the essence of these adorable animals.
The Head
The head of a sheep is a prominent feature that sets it apart. Take note of the shape and size of the head, the positioning of the eyes, and the structure of the ears. To create a lifelike depiction, focus on these details, using light, confident strokes.
The Body
The body of a sheep is characterized by curved lines and various contours. Pay attention to the shape of the torso, distinguishing between the back, sides, and belly. Take note of the proportions, ensuring the body is proportional to the head. By mastering these details, you can add depth and dimension to your sheep drawing.
The Limbs
Sheep have slender and nimble legs, defining their overall stance and posture. Observe the length and position of the limbs, including the joints and hooves. Emphasize the angles and curves, capturing the delicate nature of the sheep’s legs as they support its woolly body.
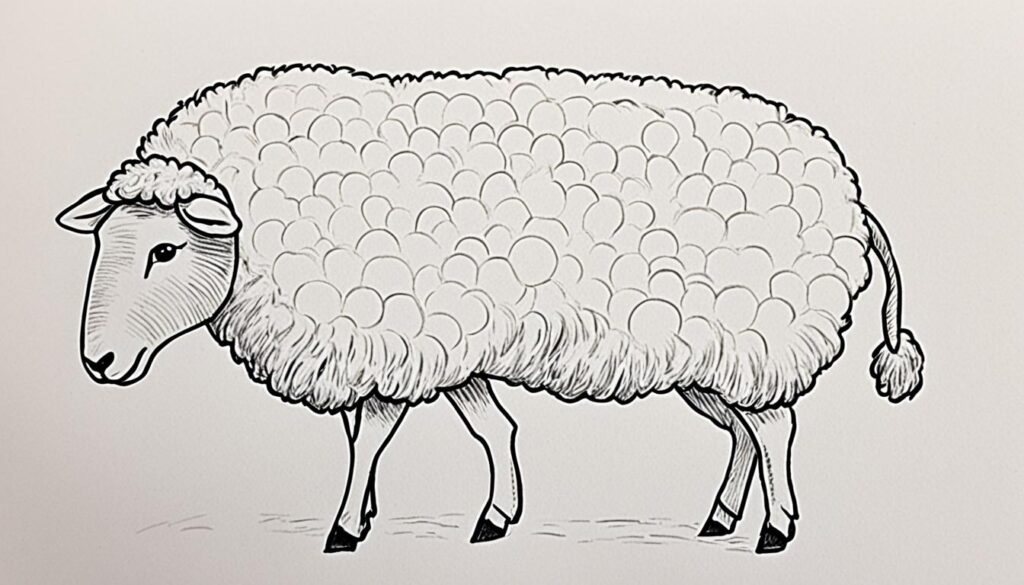
The Wool
The wool of a sheep is a defining characteristic that adds texture and visual interest to your drawing. Study the pattern and flow of the wool, noticing how it drapes over the body and creates natural creases and folds. Use short, overlapping lines to represent the individual strands, gradually building up the texture and volume.
By keenly observing the anatomy of sheep and incorporating these sheep sketching tips into your drawing, you can create realistic and captivating sheep illustrations. Now, let’s move on to the next section and learn how to use basic shapes to establish the foundation of your sheep drawing.
Starting with Basic Shapes
Begin your easy sheep drawing by establishing the basic shapes that form the foundation of the sheep’s body. This step-by-step approach will guide you through the process, ensuring a successful outcome.
First, grab your paper, pencil, eraser, and other preferred drawing supplies. Having everything ready will make the process smoother and more enjoyable.
- Start by drawing a medium-sized oval for the body of the sheep. This oval will serve as the core shape.
- Next, sketch a smaller oval at the top of the medium-sized oval. This smaller oval will represent the head of the sheep.
- Now, draw a small, elongated oval towards the bottom of the body shape to depict the sheep’s legs.
- For the ears, create two small triangles on top of the head oval.
- Lastly, add two rounded rectangles at the bottom of the body shape to illustrate the sheep’s hooves.
Remember, these shapes serve as a framework for your sheep drawing, so don’t worry about getting them perfect at this stage. They will provide a reference for adding details and refining the drawing later.
Here’s an example of the basic shapes you can create for your sheep:
| Basic Shapes for Sheep Drawing | |
|---|---|
Now that you have established the foundation of your sheep drawing with basic shapes, you’re ready to move on to adding details to bring your sheep to life!
Adding Details to the Face
Now it’s time to bring your sheep to life by adding facial features. Creating expressive eyes, a cute nose, and fluffy ears will capture the adorable essence of a sheep’s face. Follow these simple steps to add the finishing touches to your easy sheep drawing.
Step 1: Sketching the Eyes
To start, draw two almond-shaped eyes slightly angled towards the center. Leave some space in between for the nose. Add small curved lines for eyelashes, giving your sheep those charming, innocent eyes.
Step 2: Shaping the Nose and Mouth
Next, sketch a small rounded triangle below the eyes for the nose. Extend a short line downwards from the nose to represent the mouth. Keep the mouth simple, with a slight curve to indicate a gentle smile.
Step 3: Drawing the Fluffy Ears
Gently curve two elongated ears on either side of the head. Make them tapered at the top and wider at the base. Add some inner curves to show the folds in the ears, and don’t forget to give them a soft, fuzzy texture.
Remember to use light and gentle pencil strokes as you add these details, allowing you to make adjustments if needed. Feel free to reference the image below as a visual guide.

With these facial features in place, your sheep drawing is starting to come to life! The next section will teach you how to add texture and shading to make the wool look realistic.
Shading and Texturing the Wool
The wool is a defining characteristic of sheep and plays a crucial role in creating a realistic sheep drawing. Mastering the techniques to add texture, depth, and shading to the wool will bring your drawing to life, making it look fluffy and soft. Let’s explore some effective techniques to enhance your realistic sheep drawing.
Create Realistic Texture
To replicate the appearance of the sheep’s wool, use short, quick strokes with your pencil to create small, overlapping lines. Varying the length and direction of these strokes will give the wool a textured and tangled appearance, mimicking the natural look of sheep’s fleece.
Add Depth and Dimension
To make the wool look three-dimensional, use shading techniques. Identify the light source in your drawing and imagine how it would interact with the sheep’s wool. Darken the areas that would naturally be in shadow, such as areas between the wool strands or on the undersides of the sheep’s body. Gradually lighten the areas that would catch more light, such as the top surfaces of the wool. This contrast will give your drawing depth and make the wool appear more realistic.
Experiment with Cross-Hatching
Cross-hatching is a technique that involves creating layers of parallel lines in different directions, allowing you to add texture and shading simultaneously. Use this technique sparingly to create shadows and darker areas within the wool, emphasizing the three-dimensional quality of your drawing.
Pro tip: Don’t be afraid to blend and smudge your pencil strokes with a blending stump or tortillon. This technique can help soften the appearance of the wool and create a smoother, more realistic texture.
Showcase the Fine Details
Pay attention to the smaller details of the wool, such as individual strands, curls, or clumps. Use thin, delicate lines to define these details and add intricacy to your drawing. Remember, it’s the subtle details that contribute to the overall realism of your sheep drawing.
| Technique | Effect |
|---|---|
| Short, overlapping lines | Replicates the textured appearance of wool |
| Shading | Adds depth and dimension to the wool |
| Cross-hatching | Creates texture and shadows simultaneously |
| Delicate lines for details | Enhances realism and intricacy |
By incorporating these techniques into your sheep drawing, you’ll be able to create a realistic and visually captivating representation of wool. Experiment with different approaches and find the style that brings your sheep’s wool to life on paper.
Bring the Body to Life
Now that you’ve mastered the foundational aspects of sheep drawing, it’s time to breathe life into the body of your sheep. This section will guide you through adding volume, dimension, muscle definition, and the all-important wool texture that will make your sheep drawing come alive. Let’s explore some sheep drawing techniques to bring depth and realism to your artwork.
Mastering Body Shape and Proportions
Before diving into the details, it’s essential to get the body shape and proportions just right. Start by outlining the body with gentle curves, making sure to retain the rounded silhouette that characterizes a sheep. Pay attention to the size of the head and how it relates to the body. Take your time during this step as it forms the foundation for the rest of your drawing.
Defining Muscle Structure
Sheep have a visible muscle structure, especially around the legs and neck. Use light sketching techniques to indicate the underlying muscles and create a sense of depth and movement. Observe references or images of sheep to understand how the muscles create folds and contours in their bodies. By incorporating these details, you’ll give your sheep a realistic and lively appearance.
Creating Realistic Wool Texture
Sheep’s wool is one of their most distinctive features. To recreate its fluffy texture, start by drawing small, curved lines or squiggles in the direction of the wool growth. Use varying pencil pressure to add depth and dimension to the wool. Remember to observe the reference images closely to capture the intricacies of wool formation on different parts of the sheep’s body.
Adding shading to the wool can further enhance your drawing. Use subtle hatching and cross-hatching techniques to create shadows and highlights, giving the wool a three-dimensional look. Practice layering and blending techniques to achieve a soft and realistic texture.
Now, let’s see how these techniques come together in an easy sheep drawing:
| Sheep Body Techniques | Key Points |
|---|---|
| Body Shape | Use gentle curves to outline the body and retain a rounded silhouette for a sheep-like appearance. |
| Muscle Definition | Indicate the underlying muscles, paying attention to the legs and neck, to add depth and realism. |
| Wool Texture | Draw small, curved lines or squiggles in the direction of wool growth, vary pencil pressure for depth, and add shading to create a fluffy texture. |
With these techniques, you can bring volume and dimension to your sheep’s body, making it visually appealing and lifelike. Now that you have the body of your sheep in place, it’s time to focus on fine-tuning the details to complete your drawing.
Fine-Tuning the Details
Now that the main features are in place, it’s time to refine your drawing. Pay attention to small details like the hooves, tail, and additional wool strands, ensuring your sheep drawing looks complete.
When depicting the hooves, remember to give them the proper shape and texture. Study reference images or observe real sheep to accurately capture the details. Use short, curved lines to outline the hooves, adding a sense of realism to your drawing.
The tail is another important detail that adds character to your sheep drawing. Depending on the sheep’s breed, the tail can be short or long, fluffy or sleek. Take note of the tail’s shape and direction, and use light, feathery strokes to mimic its texture.
To bring out the texture of the wool even more, you can add additional strands or tufts of wool. These small details can make a big difference in the overall appearance of your drawing. Use curving lines or short strokes to create the appearance of individual strands of wool, giving your sheep a more textured and dynamic look.
Remember to step back and assess your drawing as you refine the details. Look for areas that may need further adjustments or enhancements to achieve the desired result. Take your time and be patient, as fine-tuning the details can greatly enhance the overall quality and realism of your sheep drawing.
| Detail | Technique |
|---|---|
| Hooves | Use short, curved lines to outline the hooves and mimic their texture. |
| Tail | Observe the shape and direction of the tail, and use light, feathery strokes. |
| Additional Wool Strands | Add individual strands or tufts of wool using curving lines or short strokes. |
Background and Surroundings
Enhance your sheep drawing by creating a suitable background and surroundings for your sheep. To give your drawing context and elevate its visual appeal, consider adding elements such as grass, fences, or a barn. These background elements will bring life to your cute sheep drawing, making it more engaging and captivating. Let’s explore how you can incorporate these elements effectively.
Start by sketching a gently rolling landscape with tufts of grass peaking through the ground. Use short, curved lines to depict the blades of grass, adding depth and texture to the scene. You can vary the height and density of the grass to create a more realistic and dynamic environment.
Next, draw a simple wooden fence to enclose the area where your sheep will roam. Use parallel horizontal lines for the fence rails and vertical lines for the posts. Add small details, such as nails or knots, to give the fence a realistic touch. Remember to leave an opening or gate to make the scene feel accessible and welcoming.
For a more rural atmosphere, you can include a barn in the background. Draw a rectangular structure with a sloping roof and add details like doors, windows, and weathered textures. Apply shading techniques to create depth and give the barn a three-dimensional appearance.
Remember to adjust the scale and positioning of the background elements to maintain the focus on your adorable sheep. Avoid overwhelming the drawing with intricate details or overpowering colors. Balance is key to create a harmonious composition that accentuates the cuteness of your sheep.
Once you have sketched the background and surroundings, you can further enhance the scene by applying shading and highlighting techniques. Play with light and shadow to create a sense of depth and realism. Add additional elements like trees, clouds, or a distant landscape to complete the overall ambiance of your cute sheep drawing.
Now, your sheep drawing is not only adorable but also set within an engaging environment. Let your creativity soar as you bring your cute sheep to life against a charming backdrop, making it a truly captivating piece of art.
Keep reading as we move on to the next section to explore how to add color and apply final touches to your cute sheep drawing.
If you prefer using colors in your drawings, we have some tips on selecting and applying appropriate colors to bring your cute sheep drawing to life. Color can add vibrancy and depth to your artwork, making it even more visually appealing.
When it comes to selecting colors for your sheep, consider the shades and tones that closely resemble real sheep. Typically, off-white or light gray tones work well for the body, while a slightly darker shade can be used for the wool. You can also add a touch of pink to the ears and nose for a realistic touch.
Apply colors gradually and lightly, building up the intensity as needed. Experiment with blending and layering different colors to create texture and dimension. Don’t be afraid to add a few lighter or darker shades within the same color family to add depth and shading.
To make your cute sheep drawing pop, you can also add some final touches. Here are a few ideas:
- Use a white gel pen or a small brush dipped in white paint to add highlights to the eyes, nose, and wool. This adds a subtle shine and brings attention to these areas.
- Consider adding a soft background to your drawing. It could be a simple grassy meadow or a peaceful farm landscape. The background will provide context and make your sheep stand out.
- You can also use colored pencils or pastels to create additional texture and details in the wool, such as individual strands or tufts.
- Remember to step back and assess your drawing from a distance. This will help you identify any areas that need further refinement or adjustments.
By experimenting with colors and adding those final touches, you’ll elevate your cute sheep drawing from a simple sketch to a vibrant and captivating artwork.
Example of a Cute Sheep Drawing:
Below is an example of a cute sheep drawing that incorporates color and final touches:
“`
Insert the code snippet for the table here.
“`
In this example, colors were used to bring the sheep and its surroundings to life. The subtle blend of gray shades adds depth to the sheep’s wool, while the soft pastel background creates a peaceful ambiance.
Conclusion
Congratulations on completing this beginner’s guide to drawing a sheep! Now that you have followed the step-by-step instructions and learned various techniques, you are well-equipped to create beautiful sheep drawings with confidence.
Unleash your creativity and enjoy the process of bringing adorable sheep to life on paper. Remember, drawing is a skill that improves with practice, so don’t be afraid to experiment and try different approaches.
With the knowledge you’ve gained from this guide, you have the foundation to explore more advanced sheep drawing techniques and develop your own unique style. Whether you want to create cute and cartoonish sheep or realistic and detailed representations, the possibilities are endless.
So grab your pencil, gather your materials, and start drawing! The world of sheep art awaits, and with your newfound skills, you can create stunning artworks that capture the charm and beauty of these beloved animals.
FAQ
How do I draw a sheep?
To draw a sheep, start by sketching basic shapes to create the body. Then, add details to the face, such as the eyes, nose, mouth, and ears. Next, focus on shading and texturing the wool to make it look realistic. Bring the body to life by adding volume and dimension, refining the small details, and creating a suitable background. Finally, add color and final touches to complete your sheep drawing.
What materials do I need for drawing a sheep?
You’ll need paper, a pencil, an eraser, and any other drawing supplies you prefer. These are the basic materials required to start drawing a sheep.
How can I make my sheep drawing look realistic?
To make your sheep drawing look realistic, pay attention to the details of the sheep’s anatomy, such as the head, body, limbs, and wool. Use shading techniques to create depth and texture in the wool. Additionally, focus on capturing the features of the sheep’s face accurately.
Are there any tips for beginners drawing a sheep?
Yes, if you’re a beginner, start by sketching basic shapes and gradually add details. Take your time and practice different techniques to develop your skills. Don’t be afraid to make mistakes, as they are part of the learning process. Enjoy the journey of learning to draw sheep!
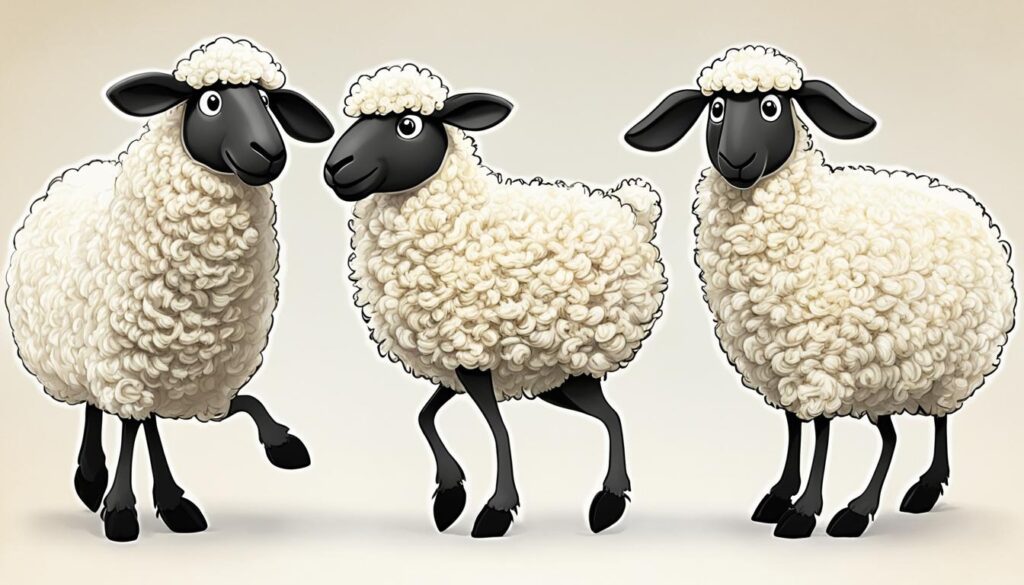
What are some cute sheep drawing ideas?
For cute sheep drawing ideas, you can add playful expressions to the sheep’s face or portray it in a charming pose. You can also create a whimsical background with elements like flowers or butterflies to enhance the cuteness factor.
Can I use colors in my sheep drawing?
Yes, you can use colors in your sheep drawing. Select colors that complement the wool, such as shades of white, gray, and brown. You can also use different tones to add depth and dimension to the wool. Experiment with color combinations to make your sheep drawing stand out.
How long does it take to master drawing a sheep?
The time to master drawing a sheep varies for each individual. With consistent practice and dedication, you can improve your skills over time. Enjoy the process of learning and allow yourself to grow as an artist!