Have you ever found yourself captivated by the mysterious allure of bats? Their graceful flight and enigmatic nature have fascinated humans for centuries. Whether you’re an aspiring artist, a nature enthusiast, or simply someone looking for a new creative outlet, learning to draw bats can be a thrilling and fulfilling experience.
Imagine the joy of bringing these nocturnal creatures to life on paper, capturing their intricate details and unique personalities. With a few simple techniques and a touch of inspiration, you can unlock your artistic potential and create stunning bat drawings that truly reflect your passion for these fascinating creatures.
In this easy guide, we will take you on an artistic journey, unveiling the secrets of bat drawing step by step. Whether you’re a beginner or looking to enhance your skills, these instructions will empower you to create realistic and captivating bat illustrations. So, grab your pencil, unleash your creativity, and let’s dive into the mesmerizing world of bat drawing.
Key Takeaways:
- Learn the step-by-step process of drawing bats, from basic shapes to intricate details.
- Discover beginner-friendly tutorials and techniques to improve your bat drawing skills.
- Explore creative ideas and inspiration to bring your bat illustrations to life.
- Get valuable tips and tricks to enhance your bat drawings with shading, texture, and more.
- Learn how to showcase your bat artwork and share it with the world.
Bat Drawing Tutorial for Beginners
If you’re new to the world of drawing bats, fear not! This tutorial is tailored just for you. By following these simple steps, you’ll learn the basic techniques to create your very own bat artwork. So grab your pencil and let’s get started!
Gather Your Materials
Before we dive into the tutorial, gather the essential materials you’ll need:
- Pencil
- Eraser
- Drawing paper
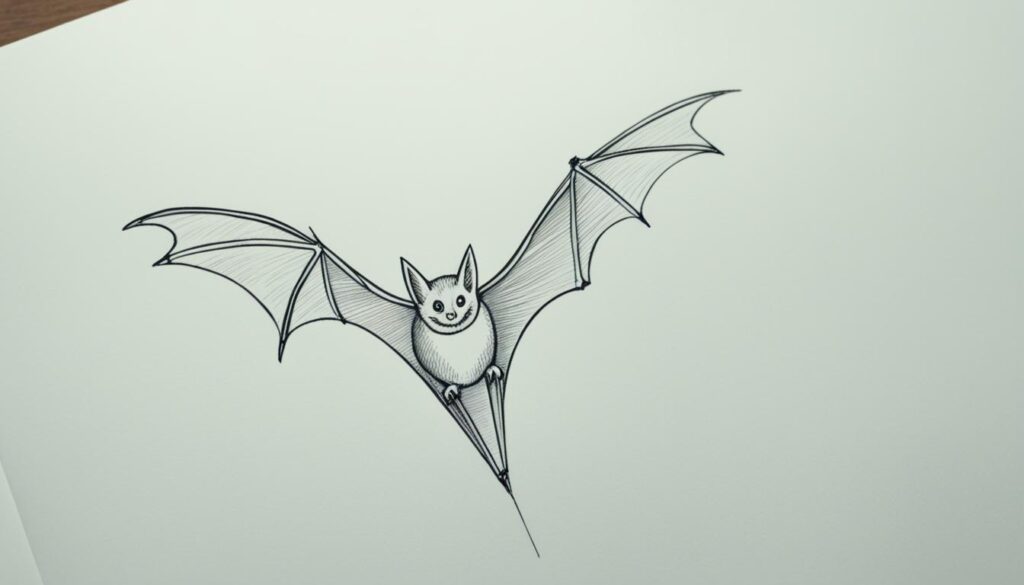
Step 1: Basic Shapes
Start by sketching the basic shapes that form the foundation of your bat drawing. Begin with an oval for the body and add two triangles on top for the ears. Use light, loose lines at this stage, as we’ll refine them later.
Step 2: Outlines and Details
Once you’re satisfied with the basic shapes, it’s time to outline the bat’s body and add details. Draw the wings, making sure to capture their distinctive structure. Add small, triangular shapes for the fingers and emphasize the bat’s facial features, such as the eyes and mouth.
Step 3: Shading and Texture
To give your bat drawing depth and dimension, incorporate shading and texture. Use cross-hatching or gentle strokes to add shadows to the wings and body, giving them a realistic appearance. Pay attention to the fur-like texture on the body and wings, adding small, curved lines to mimic the texture of bat fur.
Step 4: Final Touches
Now it’s time to add the final touches to your bat artwork. Erase any unnecessary lines and refine the details to make them more defined. For a finishing touch, you can experiment with different drawing techniques to add depth and highlights to your drawing.
Pro Tip: Don’t be afraid to add your own personal style and creativity to your bat drawing. Whether it’s adding patterns to the wings or incorporating unique colors, let your imagination soar!
Step 5: Practice Makes Perfect
Remember, practice is crucial when it comes to improving your drawing skills. Keep experimenting, trying new techniques, and exploring different bat poses and angles. The more you practice, the better you’ll become at drawing bats!
Step-by-Step Bat Drawing
Are you ready to bring your bat drawings to life? In this section, we will guide you through the step-by-step process of drawing a bat. From the initial sketch to the final details, you’ll learn the techniques to create a realistic bat illustration. Let’s get started!
Gathering Your Materials
Before you begin, make sure you have the following materials:
- Pencil
- Paper
- Eraser
- Black pen or marker
Step 1: Sketching the Basic Shapes
Start by sketching the basic shapes of the bat. Begin with an oval for the body and a smaller oval or circle for the head. Then, draw curved lines to outline the wings and ears. Don’t worry about adding details just yet; focus on getting the proportions and overall shape right.
Step 2: Adding Details
Now, it’s time to add details to your bat drawing. Start by defining the wings with curved lines. Next, draw the face by adding eyes and a mouth. Don’t forget to include the bat’s iconic ears! Once the primary features are in place, you can also add claws and fur texture to make your bat drawing more realistic.
Step 3: Shading and Texture
To add depth and dimension to your bat drawing, incorporate shading and texture. Use hatching or cross-hatching techniques to create shadows and give the illusion of volume. Pay attention to the areas where light would hit and cast shadows. Additionally, add texture to the bat’s wings by varying the pressure and direction of your pencil strokes.
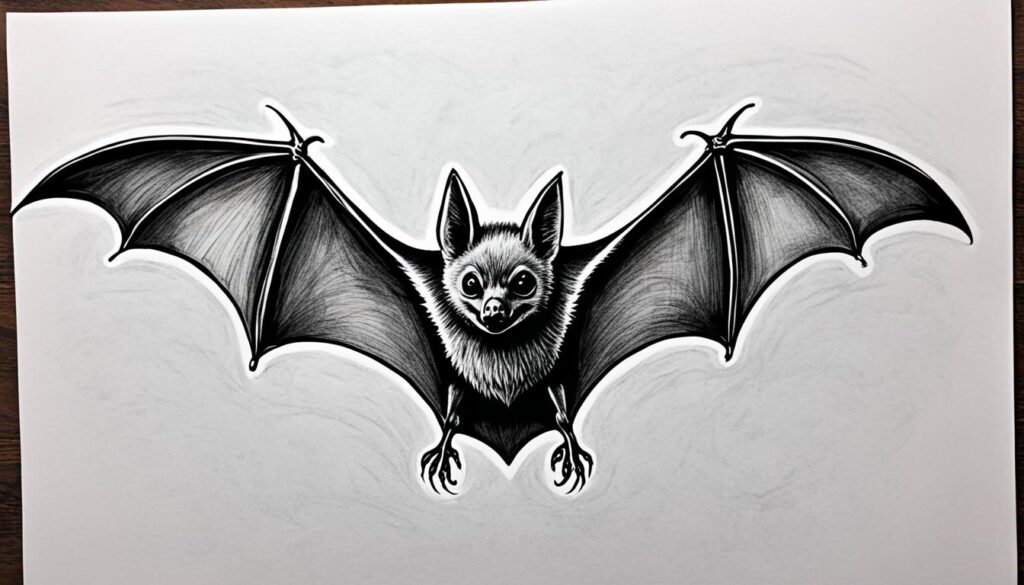
Step 4: Inking Your Drawing
Once you’re satisfied with your pencil drawing, it’s time to ink it. Trace over the finalized lines with a black pen or marker to make them stand out. Be careful and take your time while inking to ensure smooth and clean lines. You can erase any remaining pencil lines after the ink has dried.
Step 5: Coloring Your Bat
If you want to add color to your bat drawing, use colored pencils, markers, or watercolors to bring it to life. Select shades of gray or black for a realistic look, or get creative with vibrant colors. Remember to blend and layer the colors to achieve a smooth and professional finish.
Step 6: Final Touches
Lastly, it’s time for final touches and refinements. Take a step back and assess your bat drawing. Are there any areas that need more detail or adjustments? Use your eraser to remove any stray marks, and add any additional shading or highlights to enhance the overall appearance of your bat illustration.
With practice and patience, you’ll soon master the art of drawing bats. Remember, don’t be afraid to experiment and develop your unique style. Have fun and let your creativity soar!
| Materials | Techniques | Tips |
|---|---|---|
| Pencil | Sketching | Start with light pressure and gradually darken your lines. |
| Paper | Shading | Practice blending techniques to achieve smooth gradients. |
| Eraser | Inking | Use a kneaded eraser for precision erasing. |
| Black pen or marker | Coloring | Experiment with different coloring techniques, such as stippling or cross-hatching. |
Easy Bat Drawing Techniques
Discover simple techniques to make bat drawing easier and more enjoyable. By incorporating these easy bat drawing techniques, you’ll be able to add depth and dimension to your bat illustrations.
Shading for Realistic Effect
Adding shading to your bat drawing can make it appear more realistic. Start by identifying the light source in your artwork, then use darker shades of gray or black to create shadows on the areas furthest from the light. Gradually lighten the shading as you move towards the light source. This technique will give your bat drawing a three-dimensional quality.
Creating Texture
Textures can bring your bat drawings to life. To create texture, use varying line thicknesses to indicate different surfaces and details on the bat’s body and wings. For example, you can use thin, delicate lines to depict the texture of the wing membrane, while thicker lines can be used for the bat’s fur or claws. Experiment with different line techniques to achieve the desired texture.
Pro Tip: Observing reference images of bats can help you understand their unique textures and incorporate them into your drawings.
Playing with Proportions
Playing with proportions can add a fun twist to your bat drawings. Consider elongating the bat’s wings, exaggerating the size of its ears, or even giving it an anthropomorphic appearance. By adapting the proportions, you can infuse your drawings with your own unique style and creativity.
Adding Background Elements
A well-crafted background can enhance the overall impact of your bat drawing. Consider incorporating elements such as a moonlit sky, trees, or a spooky cave to create a captivating environment for your bat. The background can set the mood and add context to your artwork.
Incorporating Color
While bats are often associated with a dark color palette, don’t be afraid to experiment with colors in your bat drawings. Playing with shades of deep blues, purples, or greens can add visual interest and evoke a sense of mystery. You can also use contrasting colors to highlight specific features or create a focal point in your drawing.
Adding Details
Small details can make a big difference in your bat drawings. Pay attention to the bat’s facial features, such as its eyes, nose, and mouth. Add fine lines or dots to represent the fur texture. Don’t forget to capture the bat’s unique wing structure, including the bones and membranes, to make your drawing more realistic.
By incorporating these easy bat drawing techniques into your artwork, you’ll be able to create captivating and visually stunning bat illustrations. Now, let’s move on to the next section where we will explore how to create even more realistic bat drawings.
Creating Realistic Bat Drawings
Once you’ve mastered the basics of bat drawing, it’s time to take your artwork to the next level by adding realistic details. Whether you’re drawing a vampire bat or a fruit bat, capturing the essence of the bat’s anatomy and features is essential for creating lifelike illustrations.
1. Study the Wing Structure
One of the key elements to master in creating realistic bat drawings is accurately depicting the wing structure. Take the time to observe reference images of bat wings to understand the placement and shape of the bones, joints, and membranes. Pay attention to the unique features of different bat species and incorporate them into your drawings.
2. Focus on Facial Features
The face of a bat is another crucial aspect to consider when aiming for realism. Study the details of a bat’s face, including the shape of the ears, eyes, and nose. Pay attention to the positioning of the facial features on the head and the overall expression of the bat. These small details can make a big difference in creating a lifelike bat drawing.
3. Use Shadow and Light
Shading is a powerful technique that can add depth and dimension to your bat drawings. Observe how light interacts with the bat’s body and wings and use shades and highlights to create contrast. Experiment with different shading techniques, such as cross-hatching or stippling, to achieve a realistic texture.
4. Pay Attention to Texture
Bats have unique fur and wing textures that can greatly enhance the realism of your drawings. Use fine lines or small strokes to mimic the texture of the fur and emphasize the intricacies of the wing membranes. Adding these details will make your bat drawings more visually appealing and authentic.
“A great artist can bring a bat to life on paper, capturing its intricate details and unique characteristics.” – David Robertson
By focusing on the wing structure, facial features, shading, and texture, you can create stunningly realistic bat drawings. Remember to practice regularly and experiment with different techniques to develop your own style. Keep pushing yourself to improve, and soon, your bat illustrations will be truly mesmerizing.
Creative Bat Drawing Ideas
Looking for some inspiration? Get ready to unleash your creativity with these imaginative bat drawing ideas. Whether you prefer whimsical and cute or spooky and intense, you’ll find plenty of ideas to spark your imagination and take your bat drawings to new heights.
1. Bat Characters: Create adorable bat characters with unique personalities. Give them cute expressions, fancy outfits, or even superhero powers. Let your imagination soar!
2. Bat Silhouettes: Experiment with creating dramatic bat silhouettes against a colorful background. Play with contrasting colors to make your bat drawings stand out.
3. Bat Patterns: Design intricate bat patterns using repetitive bat shapes. Use different sizes and angles to create captivating and hypnotic patterns.
“Bat drawing is all about unleashing your creativity and exploring different styles. Don’t be afraid to experiment and try something new.”
4. Bat Collage: Cut out bat shapes from colored papers or magazines and create a beautiful bat collage. Experiment with different textures and arrange the bats in an interesting composition.
5. Bat Landscapes: Draw a night sky filled with bats flying amidst stars or perched on trees. Add spooky moonlight and mysterious elements to create an enchanting bat-filled landscape.
| Style | Description |
|---|---|
| Whimsical | Create cute, friendly bats with colorful details. |
| Spooky | Draw eerie bats with sharp features and dark shades. |
| Abstract | Experiment with unusual shapes and patterns to create unique bat-inspired artworks. |
| Realistic | Bring your bat drawings to life with intricate details and accurate proportions. |
6. Bat Transformations: Give your bats a twist by incorporating different elements or objects. Draw bats disguised as other animals or add bat-themed accessories.
Remember: The possibilities are endless when it comes to creative bat drawing ideas. Let your imagination take flight and have fun exploring different styles and techniques!
Bat Drawing Tips and Tricks
If you want to improve your bat drawing skills, you’ve come to the right place! In this section, we’ll share some valuable tips and tricks that will take your bat artwork to the next level. From selecting the right tools to mastering key techniques, these insights will help you create impressive bat drawings. Let’s dive in!
1. Choose the Right Tools
Before you start drawing, make sure you have the right tools at your disposal. Here are some essentials:
- Pencils: Use a range of graphite pencils to achieve different shades and depths in your drawings.
- Erasers: Keep a soft eraser handy to correct mistakes and smudges.
- Paper: Opt for smooth, high-quality paper that allows your pencils to glide effortlessly.
- Ink Pens: Experiment with ink pens for adding fine details and outlines.
2. Practice Basic Shapes
Mastering the basic shapes is crucial for drawing bats accurately. Start with simple circles, ovals, and triangles to create the framework of your bat. This will help you establish the correct proportions and layout before adding details.
3. Pay Attention to Anatomy
Understanding bat anatomy is essential for creating realistic drawings. Study the structure of bat wings, ears, and facial features. Pay attention to the proportions and how they differ across bat species. The more you learn about bat anatomy, the more accurate your drawings will become.
4. Add Depth with Shading
Shading is an effective technique that adds depth and dimension to your bat drawings. Experiment with various shading techniques, such as hatching, cross-hatching, and stippling. Practice different degrees of pressure with your pencil to create light and shadow.
5. Use Reference Images
Reference images are invaluable when it comes to drawing bats. Gather a collection of high-quality bat photographs or illustrations to inspire and guide your drawings. Pay attention to details like wing shape, fur texture, and facial expressions.
6. Experiment with Styles
Don’t be afraid to experiment with different art styles to bring your bat drawings to life. Whether you prefer a realistic approach or want to explore a more stylized or whimsical style, let your creativity flow. Trying different styles will help you discover your unique artistic voice.
7. Practice, Practice, Practice
The key to improving any skill is consistent practice. Set aside regular dedicated practice sessions to hone your bat drawing skills. Challenge yourself by drawing bats in different poses, from different angles, and in various environments. The more you draw, the better you’ll become!
By following these tips and tricks, you’ll be well on your way to creating incredible bat drawings. Remember, the journey to becoming a skilled artist takes time and effort, so be patient with yourself and enjoy the process. Happy drawing!
Exploring Different Bat Species
Bats are fascinating creatures that come in various species, each with its own unique characteristics. When capturing the essence of these remarkable animals in your drawings, understanding their distinct features is key. In this section, we will delve into the world of different bat species and explore how to depict their individual traits in your bat drawings.
1. The Fruit Bat
With its large wingspan and adorable facial features, the fruit bat is a popular subject for bat drawings. To accurately portray a fruit bat, focus on drawing its oversized eyes, elongated snout, and pointy ears. Use shading techniques to capture the texture and intricacies of its wings, which are often translucent and veined. Impressive attention to detail will bring your fruit bat drawing to life.
2. The Vampire Bat
The vampire bat is known for its blood-sucking abilities and menacing appearance. When depicting a vampire bat in your artwork, emphasize its sharp fangs, pointed ears, and slim body structure. Use cross-hatching techniques to create a sense of depth and add a touch of eeriness to your drawing. A well-executed vampire bat drawing can evoke both fear and fascination.
3. The Flying Fox
The flying fox, also known as the megabat, is one of the largest bat species in the world. To capture the essence of a flying fox, focus on its fox-like face with large, round eyes and a cute button nose. Pay attention to the intricate details of its fur, which is often darker at the top and lighter underneath. Including the unique wing structure of a flying fox in your drawing will add authenticity to your artwork.
4. The Bulldog Bat
The bulldog bat, named for its stout and stocky appearance, boasts a distinctive face and short, rounded ears. When recreating a bulldog bat drawing, emphasize its muscular body and broad wings. Pay attention to its small eyes and wrinkled snout, which give it a rugged charm. Capturing the essence of a bulldog bat in your artwork requires attention to its unique facial structure and body proportions.
5. The Wrinkle-faced Bat
The wrinkle-faced bat is characterized by its exceptionally wrinkled and folded face, which sets it apart from other bat species. To accurately depict a wrinkle-faced bat, focus on its distinct, creased facial features and elongated snout. Add fine lines and shading to highlight the texture and depth of its unique facial structure. A well-rendered wrinkle-faced bat drawing will showcase the intricacies of this remarkable bat species.
| Bat Species | Distinct Features |
|---|---|
| Fruit Bat | Oversized eyes, elongated snout, pointy ears, translucent wings |
| Vampire Bat | Sharp fangs, pointed ears, slim body structure, sense of eeriness |
| Flying Fox | Fox-like face, large round eyes, intricate fur, unique wing structure |
| Bulldog Bat | Stocky appearance, broad wings, small eyes, wrinkled snout |
| Wrinkle-faced Bat | Wrinkled and folded face, elongated snout, unique facial structure |
By exploring different bat species and understanding their distinguishing characteristics, you can elevate your bat drawings to a new level of realism. Next, we will delve into techniques for adding captivating backgrounds and enhancements to your bat artwork.
Adding Background and Enhancements
A great drawing isn’t just about the subject, but also the overall composition. In this section, you will learn bat drawing techniques to create captivating backgrounds and enhance your bat drawings with additional elements. By adding context and visual interest, you can elevate your artwork and make it truly stand out.
Creating a Dynamic Background
An impactful background can drastically transform the mood and atmosphere of your bat drawing. Consider the setting in which you want your bats to appear and choose a background that complements the theme. Here are a few ideas to get you started:
- Create a moonlit night scene with a silhouette of trees and a cloudy sky.
- Depict bats flying over a spooky abandoned castle surrounded by mist.
- Add bats in a natural habitat like a cave entrance with an underground landscape.
Experiment with different colors, textures, and lighting techniques to achieve the desired effect. Don’t be afraid to get creative and let your imagination guide you.
Enhancing with Additional Elements
While bats are fascinating creatures on their own, you can take your drawings to the next level by incorporating additional elements. These enhancements can add visual interest and narrative depth to your artwork. Here are a few ideas:
- Include silhouettes of other nocturnal animals, such as owls or wolves, to create a wildlife tableau.
- Add moonlit clouds or stars to enhance the atmosphere of a night scene.
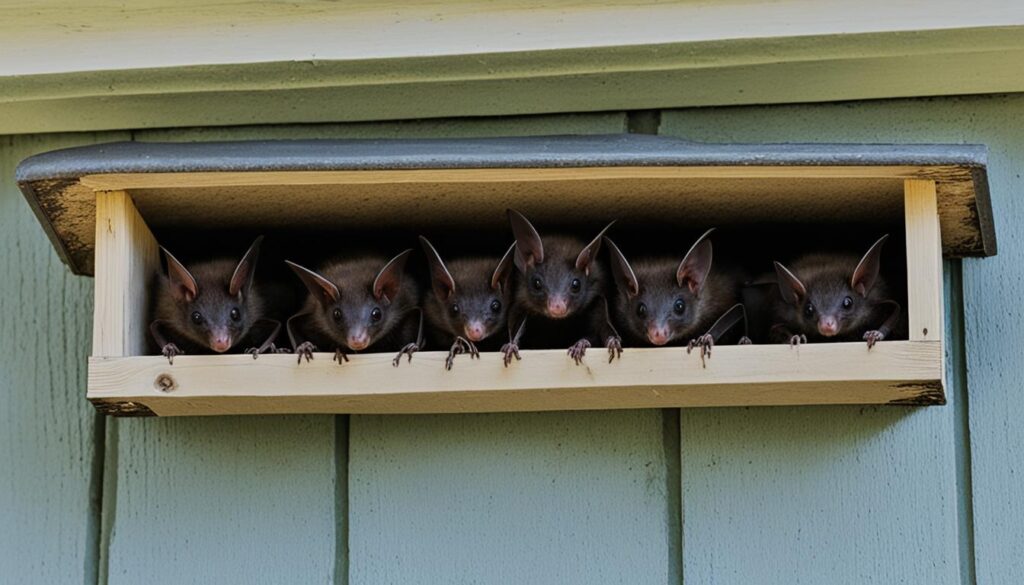
- Introduce a bat colony in a unique formation, showcasing their social dynamics.
By carefully selecting and placing these elements, you can create a visually engaging composition that tells a captivating story through your bat drawings.
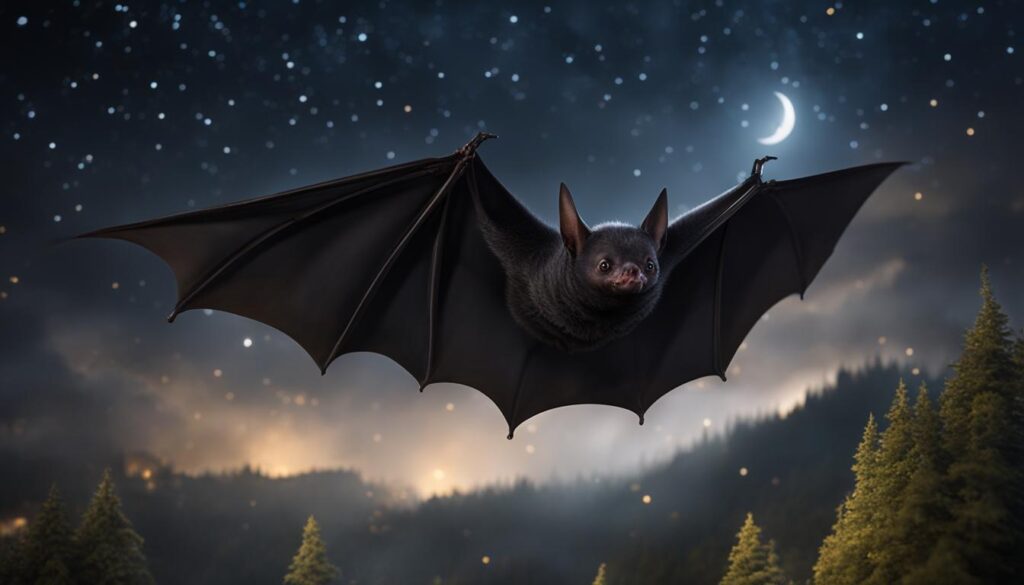
“The background brings life and context to your bat drawings, allowing them to truly shine. Don’t be afraid to experiment and let your creativity soar.” – Jane Adams, Professional Illustrator
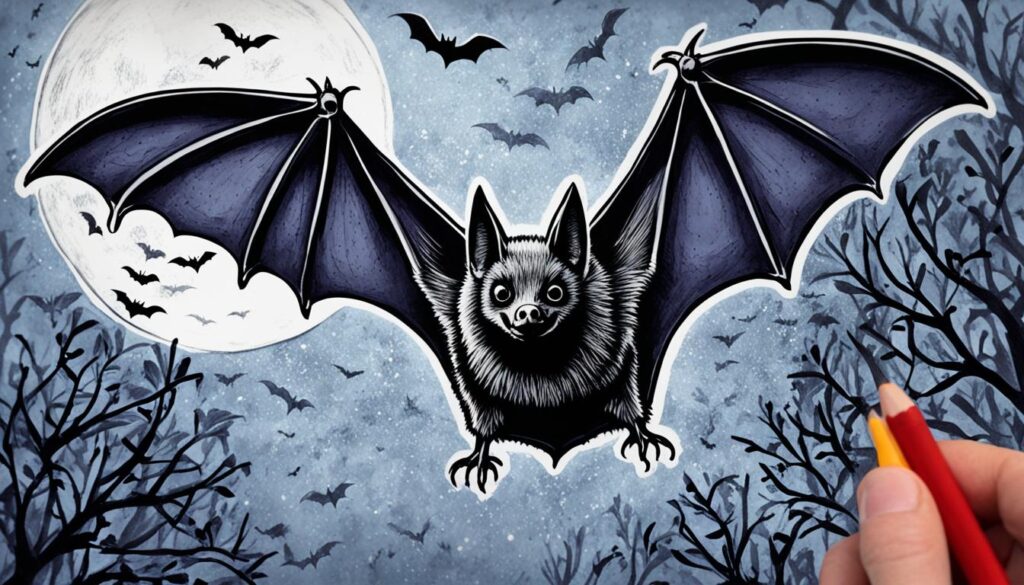
Use the image above as inspiration for incorporating background elements into your bat drawings. Notice how the moon, clouds, and trees add depth and atmosphere to the artwork. Let this serve as a guide as you bring your own bat drawings to life with captivating backgrounds and enhancements.
Showcasing Your Bat Artwork
Now that you’ve mastered the art of drawing bats, it’s time to showcase your stunning artwork! Here are some valuable tips to help you present and share your bat drawings in the best possible way:
- Choose the Right Display: Consider the size and format of your bat drawings when deciding how to showcase them. You can opt for traditional methods like framing your artwork or exploring modern options like creating a digital portfolio.
- Create an Engaging Presentation: When displaying your bat drawings, think about how you can make them visually appealing and captivating. Experiment with different arrangements, lighting techniques, and backgrounds to enhance the overall aesthetic.
- Online Sharing: In today’s digital age, sharing your artwork online can expose it to a wider audience. Utilize social media platforms, online art communities, and personal websites to share and promote your bat drawings. Don’t forget to add relevant hashtags and descriptions to attract art enthusiasts.
- Art Exhibitions and Events: Participating in local art exhibitions, galleries, or events can provide excellent opportunities to showcase your bat drawings. Research nearby art shows or consider organizing your own exhibition to gather art lovers and enthusiasts.
- Collaborate and Network: Connect with other artists or individuals passionate about bats or wildlife art. Collaborating on joint projects, featuring each other’s artwork, or participating in artist communities can create valuable exposure and collaboration opportunities.
- Consider Selling Prints or Merchandise: If you’re interested in monetizing your bat drawings, consider offering prints or merchandise featuring your artwork. This can include items like posters, t-shirts, phone cases, and more. Explore online marketplaces or set up your own e-commerce shop to reach potential buyers.
Remember, showcasing your bat artwork is an exciting step towards sharing your talent and passion with the world. With creativity, persistence, and a touch of marketing, you can build an audience who appreciates and supports your love for bats and art.
| Benefits of Showcasing Your Bat Artwork | Tips for Effective Art Presentation |
|---|---|
|
|
Conclusion
In conclusion, drawing bats can be a fun and rewarding artistic endeavor. Whether you’re a beginner or an experienced artist, this step-by-step guide has provided you with the techniques and tips necessary to create your own bat artworks. By following the simple instructions and exploring different bat drawing ideas, you can unleash your creativity and bring bats to life on paper.
Throughout this guide, we have emphasized the importance of practice and experimentation. Don’t be afraid to try new techniques and add your own personal touch to your bat drawings. Remember that art is subjective, and each artwork is an expression of your unique style and perspective.
Now that you have learned how to draw bats, it’s time to let your imagination soar! Take what you have learned and continue to refine your skills, pushing the boundaries of your creativity. Whether you’re drawing bats for personal enjoyment or to showcase your talent, have confidence in your abilities and most importantly, have fun!
FAQ
How do I draw bats?
To draw bats, start by sketching the basic shapes of their body and wings. Then, add details such as ears, eyes, and fangs. Finally, shade the drawing to add depth and create a realistic look. Follow our step-by-step bat drawing guide for more detailed instructions.
Are there any easy bat drawing techniques for beginners?
Yes, there are plenty of easy techniques to make bat drawing more accessible for beginners. One simple technique is to break down the bat into basic shapes and gradually add details. Another technique is to use references or trace existing bat images to get a feel for the proportions and anatomy. Check out our bat drawing tutorial for beginners for more tips and techniques.
How can I make my bat drawings look more realistic?
To make your bat drawings look more realistic, pay attention to details such as the texture of the wings, the facial features, and the body proportions. Use shading techniques to add depth and create a three-dimensional appearance. Study reference images of bats or observe real bats to capture their unique characteristics. Our guide on creating realistic bat drawings will provide more in-depth tips and techniques.
What are some creative ideas for bat drawings?
There are endless creative possibilities when it comes to bat drawings. You can explore different styles, such as whimsical or spooky, or experiment with different mediums and techniques. You can also create bat-themed artwork by incorporating bats into different scenes or scenarios. Discover inspiration and ideas in our section on creative bat drawing ideas.
Can you provide some tips to improve my bat drawing skills?
Absolutely! Here are a few tips to enhance your bat drawing skills: practice regularly, study bat anatomy, experiment with different techniques and styles, and seek feedback from other artists. Additionally, take breaks when needed to avoid fatigue and frustration. For more detailed tips and tricks, check out our section on bat drawing tips and tricks.