Have you ever wanted to capture a funny moment on your iPhone and share it with your friends? Or maybe you’ve discovered a new trick or technique on your favorite app that you want to show off to the world. Whatever the reason, learning how to screen record on your iPhone can open up a world of possibilities.
Imagine being able to save and share videos of your gameplay, create tutorials for your favorite apps, or even capture important moments that you want to treasure forever. With just a few simple steps, you can become the director of your own digital world.
But I know what you’re thinking. Screen recording sounds complicated. It must involve intricate settings and technical know-how, right? Wrong! I’m here to tell you that screen recording on your iPhone is quick, easy, and accessible to everyone.
In this article, I’ll guide you through the process of screen recording on your iPhone, from adding the screen recording feature to your Control Center, to saving and sharing your recordings. Whether you’re a tech-savvy expert or a beginner, you’ll be able to master the art of screen recording in no time.
Key Takeaways:
- Screen recording on your iPhone can be a powerful tool for capturing and sharing important moments, tutorials, or gameplay.
- The process of screen recording on your iPhone is quick and easy, requiring just a few simple steps.
- By customizing your Control Center settings, you can easily access the screen recording feature.
- Once you’ve captured your screen recording, you can save and share it via the Photos app or through messaging and social media platforms.
- Screen recording is available on iOS 11 and later versions, including the latest iOS 15 release.
Adding Audio to Your Screen Recording
If you want to enhance your screen recordings with audio, you can easily do so on your iPhone. By following a few simple steps, you’ll be able to capture both your voice and the screen video, making your recordings more informative and engaging.
To begin, navigate to the Control Center on your iPhone by swiping up from the bottom of the screen (for older iPhones) or swiping down from the top-right corner (for newer iPhones). Once in the Control Center, locate the Screen Recording button and long-press it.
An options menu will appear, allowing you to customize your screen recording settings. Look for the “Microphone Audio” button and tap it to enable your phone’s microphone. This will ensure that your voice is recorded along with the screen video.
Now that you have enabled audio recording, you’re ready to start your screen recording. Simply tap the Screen Recording button once to initiate the countdown. Once the countdown is complete, your iPhone will begin capturing both the audio and the screen video.
Pro Tip: Position your microphone close to your mouth for optimal audio quality and clarity.
To stop the screen recording, tap the red status bar at the top of your screen and select “Stop.” Your recording will be saved to the Photos app on your iPhone, where you can easily access and share it with others.
Why Adding Audio Makes a Difference
By including audio in your screen recordings, you can provide valuable context and explanations to your viewers. Whether you’re creating a tutorial, sharing a demonstration, or showcasing gameplay, adding your voice brings the content to life and makes it easier for your audience to follow along.
Expert Tip: Consider using a high-quality microphone or a headset for the best audio experience and clarity.
Next, we’ll explore how to save and share your screen recording, ensuring that your valuable content reaches the intended audience.
Saving and Sharing Your Screen Recording
Once you stop recording, you’ll be prompted to save the video to the Photos app. From there, you can view, edit, crop, and share the video via Messages, email, or social media. Screen recordings can be a great way to share tutorials, demonstrations, or gameplay with others.
If you want to make your screen recording more engaging or informative, you can use the built-in editing tools in the Photos app. Trim the beginning or end of the recording to remove unwanted content, or cut out specific sections to create a shorter, focused video.
| Editing Features in Photos App | How to Use |
|---|---|
| Trimming | Select the video in the Photos app, tap “Edit” in the top-right corner, and drag the ends of the yellow handles to adjust the start and end points of the video. |
| Cropping | Choose the video in the Photos app, tap “Edit,” then tap the crop icon. Drag the edges of the frame to crop the video and tap “Done” when finished. |
| Adding Text or Captions | After selecting the video in the Photos app, tap “Edit,” then tap the three-dot icon. Choose “Markup” and select the text icon to add text or captions to your video. |
Once you’ve finished editing your screen recording, you can easily share it with others. Simply open the Photos app, select the edited video, and tap the share icon. Choose the desired sharing method, such as Messages, email, or social media platforms like Instagram or TikTok.
Remember, before sharing your screen recording on social media, consider the privacy of yourself and others. Make sure you have permission to share any sensitive or personal information that may be visible in the video.
Screen Recording on iOS 14 and Later
If you have an iPhone running iOS 14 or later, the process for screen recording is slightly different. Follow the steps below to start screen recording on your iPhone effortlessly:
- Open the Settings app on your iPhone.
- Scroll down and tap on Control Center.
- Tap on Customize Controls.
- In the More Controls section, find Screen Recording and tap the green plus button next to it to add it to your Control Center.
- Swipe down from the top-right corner (for newer iPhones) or swipe up from the bottom (for older iPhones) to open Control Center.
- Tap the Screen Recording button (a circle within a circle) to start recording your screen.
- A red status bar at the top of your screen indicates that the recording is in progress.
- To stop recording, tap the Screen Recording button in Control Center or tap the red status bar and then tap Stop.
Your screen recording will be automatically saved to the Photos app on your iPhone.
Screen Recording Tips:
- Before starting a screen recording, make sure you have sufficient storage space available on your iPhone.
- Ensure you have the latest iOS update installed to access the screen recording feature.
- If you encounter any issues with screen recording, try restarting your device or resetting your settings.
- If you prefer additional features or advanced editing options, consider exploring third-party screen recording apps available on the App Store.
âScreen recording on iOS 14 and later is a convenient way to capture and share your iPhone screen. Follow the simple steps provided above to quickly record any important moments or tutorials from your device.â
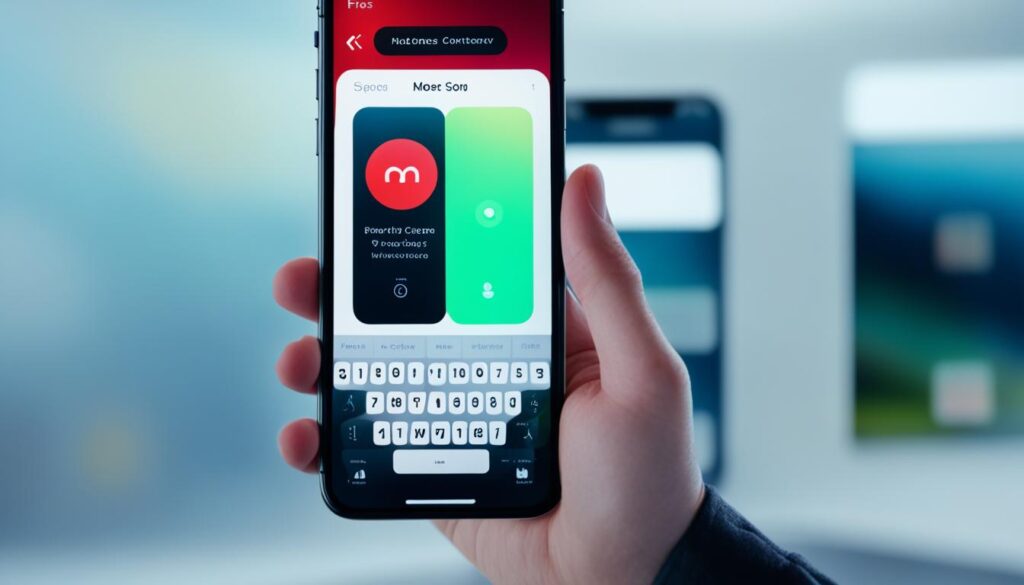
For a visual guide on screen recording on iOS 14 and later, refer to the image below:
| Pros | Cons |
|---|---|
| Easy to access and use | No built-in editing features |
| Automatically saves recordings to Photos app | No option to record specific app audio |
| No additional cost as it is a built-in feature | Limited customization options |
Record your iPhone Screen with iOS 14
On an iPhone running iOS 14, capturing your screen has never been easier. By following these simple steps, you can effortlessly record your iPhone screen and save memorable moments or create helpful tutorials.
Here’s how:
- Open Control Center by swiping down from the top-right corner of your screen.
- Locate the Screen Recording button, which looks like a white circle within a larger circle.
- Tap the Screen Recording button and wait for the countdown to begin.
- Once the countdown ends, your screen recording will automatically start.
- To end the recording, simply tap the red status bar at the top of your screen.
- A small menu will appear â tap “Stop” to finish recording.
- Voila! Your screen recording will be saved to your Photos library.
With iOS 14, the screen recording feature puts the power of capturing your iPhone screen at your fingertips. Whether you want to demonstrate a new app, share funny moments from a game, or save a video for future reference, this feature makes it quick and convenient to record and review.
Pro Tip: iPhone screen capture is a valuable tool for documenting and sharing important information or troubleshooting steps. Use it to help a friend or family member with tech issues, showcase your creative talents, or keep a visual record of those special moments.
Capturing your iPhone screen with iOS 14 is an effortless process that enables you to save and share the moments that matter most to you. Whether you’re a tech enthusiast, content creator, or simply want to keep a visual archive of important events, the screen recording feature will undoubtedly enhance your iPhone experience.
Screen Recording on iPhone with iOS 15
In iOS 15, Apple has introduced additional features for screen recording on your iPhone. With these new updates, capturing your screen has become even easier and more convenient. Follow the simple steps below to start recording your iPhone screen effortlessly.
- Open Control Center on your iPhone by swiping down from the top-right corner of the screen.
- Locate and tap the Screen Recording button, which looks like a circle with a dot inside it.
- The screen recording will begin with a short countdown, indicating that it’s actively capturing your iPhone screen.
- If you want to include audio in your screen recording, long-press the Screen Recording button.
- A menu will appear, allowing you to enable the microphone for audio recording.
- Once you’ve finished recording, tap the red bar at the top of your screen.
- A confirmation message will appear, asking if you want to stop the screen recording.
- Tap “Stop” to end the recording and save the video to your Photos app.
By following these steps, you can easily capture and save screen recordings on your iPhone using iOS 15. The recorded videos can then be accessed and shared directly from your Photos app.
If you encounter any issues while trying to screen record on your iPhone, make sure you have iOS 15 or a later version installed. Additionally, ensure that you have enough storage space available on your device. Restarting your iPhone or resetting your settings can also help resolve any screen recording glitches you may experience.
Screen recording on your iPhone with iOS 15 allows you to capture and share important moments, tutorials, or gameplay with ease. With the added option to record audio, you can provide detailed explanations and commentary along with the visual content. Whether you’re demonstrating a new feature, creating instructional videos, or simply sharing exciting moments from your favorite games, screen recording on iOS 15 offers a powerful tool that enhances your iPhone experience.
Example: Screen Recording with Audio
Let’s say you’re playing a game on your iPhone and want to guide your friends through a challenging level. With screen recording on iOS 15, you can easily record your gameplay and add audio commentary to provide helpful tips and tricks. Simply follow the steps mentioned earlier, ensure the microphone is enabled, and begin your recording. Your voice will be captured along with the screen video, enhancing the overall quality and value of your recording.
Now that you know how to screen record on your iPhone with iOS 15, you can unlock a world of possibilities. Whether it’s for educational purposes, entertainment, or sharing memorable moments, screen recording allows you to capture and share your iPhone experiences in a whole new way.
Adding Screen Recording to Control Center
If you don’t see the Screen Recording button in Control Center, don’t worry! It’s easy to add it and have quick access to this powerful feature on your iPhone. Just follow these simple steps:
- Open the Settings app on your iPhone.
- Scroll down and tap on Control Center.
- Under the “INCLUDE” section, tap on Customize Controls.
- In the “MORE CONTROLS” list, find and locate Screen Recording.
- Tap the green plus button next to Screen Recording to add it to your Control Center.
And that’s it! Now you have successfully added the Screen Recording button to your Control Center, giving you instant access to record your iPhone screen whenever you need to. Let’s move on to the next section to explore some troubleshooting tips in case you encounter any issues.
Troubleshooting Screen Recording Issues
If you’re experiencing problems with screen recording on your iPhone, don’t worry! There are a few simple steps you can take to resolve these issues and get back to recording your screen effortlessly.
Ensure Your iOS is Up to Date
First and foremost, make sure that your iPhone has the latest iOS update installed. Apple regularly releases updates that include bug fixes and performance improvements, which can help resolve screen recording problems. To check for updates, go to Settings > General > Software Update and follow the prompts to install any available updates.
Free Up Storage Space
Insufficient storage space on your iPhone can also cause screen recording issues. To free up space, delete any unnecessary apps, photos, or videos from your device. You can also offload unused apps or enable iCloud Photos to store your media in the cloud. By freeing up storage space, you’ll create a smoother experience for screen recording.
Restart Your Device
If you’re still encountering issues, try restarting your iPhone. Sometimes, a simple restart can clear any temporary glitches or conflicts that may be affecting screen recording functionality. To restart your device, press and hold the power button until you see the “slide to power off” option. Slide the power button to turn off your iPhone, then press and hold the power button again to turn it back on.
Reset Your Settings
If a restart doesn’t solve the problem, you can try resetting your settings. This won’t delete any of your data but will revert your device’s settings to their default state. To do this, go to Settings > General > Reset and choose “Reset All Settings”. Keep in mind that you’ll need to reconfigure any preferences or customizations after the reset.
Consider Third-Party Apps
If you’ve exhausted all troubleshooting steps and you’re still unable to screen record on your iPhone, you can explore third-party screen recording apps available on the App Store. These apps offer additional features and flexibility that may suit your needs. Just search for “screen recording” in the App Store and read reviews to find a reliable and user-friendly app.
Remember, troubleshooting screen recording issues on your iPhone shouldn’t be a daunting task. By following these steps, you’ll be able to resolve most common problems and enjoy the convenience of screen recording on your device.
Conclusion
Screen recording on your iPhone can be a valuable tool for capturing and sharing important moments, creating tutorials, or showcasing gameplay. Whether you have iOS 11 or the latest iOS update, the process is straightforward and accessible through the Control Center. By following the steps outlined in this guide, you can effortlessly start screen recording on your iPhone.
With just a few taps, you can add the screen recording feature to your Control Center and begin recording your screen. This capability allows you to share informative content, troubleshoot technical issues, or capture memorable moments on your device.
Remember, if you encounter any issues with screen recording, ensure that you have the latest iOS update installed and sufficient storage space. You can also try restarting your device or resetting your settings. In case of persistent problems, explore third-party screen recording apps from the App Store as an alternative solution.
FAQ
How do I screen record on my iPhone?
To screen record on your iPhone, make sure you have iOS 11 or a later update installed. Add the screen recording feature to your Control Center by going to Settings > Control Center > Customize Controls. Open Control Center (swipe up from the bottom or down from the top-right corner depending on your iPhone model) and tap the Screen Recording button. Tap the button again or the red button/bar to stop recording.
How can I add audio to my screen recording?
Long-press the Screen Recording button in Control Center and tap the Microphone Audio button to turn on your phone’s microphone. Start recording, and your voice will be captured along with the screen video.
How do I save and share my screen recording?
After you stop recording, you’ll be prompted to save the video to the Photos app. From there, you can view, edit, crop, and share the video via Messages, email, or social media.
How do I screen record on iOS 14 and later?
On an iPhone running iOS 14 or later, open the Control Center, tap the Screen Recording button, wait for the countdown, and tap the red bar/status bar to stop recording. The recording will be saved to your Photos library.
How do I screen record on my iPhone with iOS 14?
Open Control Center, tap the Screen Recording button, wait for the countdown, and tap the red status bar. Tap Stop to end the recording. The video will be saved to your Photos library.
How do I screen record on iPhone with iOS 15?
Open Control Center, tap the Screen Recording button to start recording. To enable audio recording, long-press the button and toggle on the microphone. Tap the red bar and tap Stop to end the recording. The recorded video will be saved to the Photos app.
How can I add the Screen Recording button to Control Center?
If you don’t see the Screen Recording button in Control Center, go to Settings > Control Center > Customize Controls. Find Screen Recording in the list and tap the green plus button to add it. Now, you’ll have quick access to the screen recording feature in Control Center.
What should I do if I have screen recording issues on my iPhone?
Make sure you have the latest iOS update installed and sufficient storage space available. Restart your device or reset your settings to resolve any issues. If problems persist, consider using a third-party screen recording app from the App Store.
How can screen recording on iPhone be useful?
Screen recordings can be a great way to share tutorials, demonstrations, or gameplay with others. It allows you to capture and share important moments easily.

