Tech Archives -

Tech

Secure Your Data: How to Backup iPhone Easily

how to backup iphone

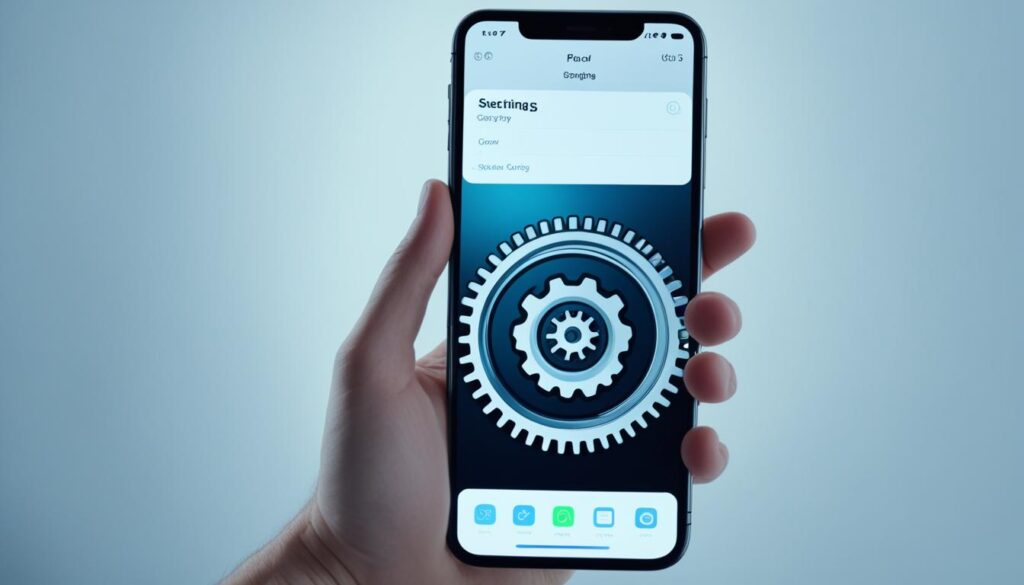
Imagine this – your iPhone holds precious memories, important documents, and your entire digital life. But what if something unexpected happens? What if your iPhone gets lost, damaged, or stolen? All your data could be gone in an instant, leaving you devastated and helpless. But fear not, because there’s a simple solution that can protect your valuable information – backing up your iPhone. It’s like creating a digital safety net that ensures your data is secure, no matter what happens to your device. In this article, we will guide you through the different methods of backing up your iPhone and show you just how easy it can be. Whether you prefer the convenience of iCloud or the reliability of your computer, we’ve got you covered with step-by-step instructions and expert tips. So, let’s dive in and learn how to safeguard your data and gain peace of mind. Because when it comes to your iPhone, ensuring its protection is essential. Key Takeaways: Backing up your iPhone is crucial for protecting your data from loss or damage. There are two primary methods for backing up your iPhone: iCloud and your computer. iCloud backups offer convenience, while computer backups provide reliability. Regularly performing backups is essential to ensure the safety of your valuable information. By following our step-by-step instructions, you can easily back up your iPhone and gain peace of mind. Backing Up with iCloud To ensure the safety of your iPhone data, backing up your device is crucial. iCloud provides a convenient and automatic way to back up your iPhone seamlessly. By using iCloud Backup, you can protect your valuable information and easily restore it if needed. To start backing up your iPhone to iCloud, follow these simple steps: Open your iPhone’s Settings app. Tap on [your name], located at the top of the Settings menu. Scroll down and select ‘iCloud’. Tap on ‘iCloud Backup’. Toggle the ‘iCloud Backup’ switch to the ‘On’ position. Enabling iCloud Backup ensures that your iPhone automatically creates backups whenever it’s connected to power, locked, and connected to Wi-Fi. This feature eliminates the need for manual backups and provides peace of mind knowing that your data is continuously protected. Did You Know? iCloud backups are stored securely in the cloud, making them accessible from anywhere. This means that even if you lose or break your iPhone, you can easily restore your data to a new device. If you prefer to create a manual backup instead, you can do so by tapping the ‘Back Up Now’ option in the iCloud Backup settings. This allows you to initiate a backup on-demand, ensuring that your latest data is safeguarded. Managing your iCloud backups and storage is also straightforward. To view your backups and free up space if needed, follow these steps: Open your iPhone’s Settings app. Tap on [your name], located at the top of the Settings menu. Scroll down and select ‘iCloud’. Tap on ‘Manage Storage’. Choose ‘Backups’ to access your iCloud backups and manage their storage. In the ‘Manage Storage’ section, you’ll be able to see a list of your backups and their sizes. From here, you can delete old backups to free up space or even upgrade your iCloud storage plan if necessary. Benefits of Backing Up with iCloud Benefits of Backing Up with iCloud Automatic backups ensure your data is always protected Access and restore backups from anywhere using any iOS device Eliminate the need for manual backups Free up storage space on your iPhone Securely store backups in the cloud with data encryption Easily manage backups and storage settings With iCloud Backup, keeping your iPhone data safe has never been easier. Whether it’s automatic backups or the flexibility of creating manual backups, iCloud offers a seamless and reliable solution for protecting your valuable information. Backing Up with a Mac If you prefer to back up your iPhone to your Mac, you can easily do so using a cable and the Finder. Follow these simple steps to back up all of your iPhone data to your computer: Connect your iPhone to your Mac using a cable. Open the Finder application. In the Finder sidebar, select your iPhone under the Devices section. Click on the “General” tab. Choose the option “Back up all of the data on your iPhone to this Mac.” If you want to add an extra layer of security, you can encrypt your backup by selecting the checkbox. To initiate the backup process, simply click the “Back Up Now” button. By following these steps, you’ll be able to backup all of your important iPhone data directly to your Mac. Ensuring the safety and security of your data has never been easier. Remember, it’s always important to have a backup of your iPhone data. Whether you accidentally delete something or your device gets lost or damaged, having a backup gives you peace of mind knowing that your data is safe and can easily be restored. Backing Up with a Windows PC Backing up your iPhone to a Windows PC is a simple and effective way to safeguard your important data. By connecting your device using a cable and utilizing the iTunes app on your PC, you can easily create a backup of your iPhone. Here’s how: Connect your iPhone to your Windows PC using a compatible cable. Open the iTunes app on your PC. Click on the iPhone button located in the top-left corner of the iTunes window. Navigate to the Summary tab. Under the Backups section, click on the “Back Up Now” button. If you want to enhance the security of your backup, you can choose to encrypt it. To do this, select the “Encrypt local backup” option and set a password. This ensures that your data remains protected even if someone gains unauthorized access to your computer or iCloud account. To view and manage your backups in the future, you can access the iTunes preferences under Devices. By following these simple steps, you can easily create a backup of your iPhone on

Secure Your Data: How to Backup iPhone Easily Read More »

Stream Seamlessly: How to Cast Laptop to TV

how to cast laptop to tv

Imagine this: It’s a cozy evening, and you’re settled comfortably on your couch, ready to binge-watch your favorite series. You can already feel the excitement building up. But as you start the first episode on your laptop, you realize that the screen feels a bit too small, and you long for the immersive experience of watching it on a larger screen. Sound familiar? If so, you’re in luck, because casting your laptop to your TV can make that dream a reality. Streaming content from your laptop to your TV opens up a whole new world of entertainment possibilities. Whether it’s enjoying the latest movies, sharing your favorite photos, or even giving presentations on a bigger screen, casting allows you to elevate your viewing experience. In this article, we’ll explore different methods and tools that will help you seamlessly cast your laptop screen to your TV, whether you prefer a wired or wireless connection. Get ready to transform your living room into a personal cinema and take your entertainment to the next level! Key Takeaways: Streaming content from your laptop to your TV enhances your viewing experience. There are various methods and tools available for casting, including screen mirroring and connecting to a smart TV. In this article, we’ll provide step-by-step instructions on how to cast your laptop screen to your TV. Prepare your devices by checking compatibility, ports, and cables. Wired connection methods involve using an HDMI cable, while wireless options include screen mirroring apps and built-in casting features on smart TVs. Preparing Your Devices for Casting Before you can cast your laptop screen to your TV, it’s important to ensure that both devices are properly prepared. In this section, we will guide you through the necessary steps to set up your laptop and TV for casting. 1. Check TV Compatibility The first thing you need to do is determine whether your TV is compatible with casting. Check if your TV has built-in casting capabilities or if it supports the necessary ports for a wired connection. Look for HDMI or other input ports that can be used to connect your laptop to the TV. If your TV doesn’t have built-in casting features or the required ports, you may need to consider alternative methods such as using a streaming device or an adapter. 2. Verify Port and Cable Compatibility Next, you need to check the available ports and cables on both your laptop and TV. Ensure that they are compatible with each other to establish a successful connection. The most commonly used cable for laptop-to-TV casting is an HDMI cable. Laptop Port TV Port Cable Type HDMI HDMI HDMI Cable DisplayPort HDMI DisplayPort to HDMI Cable USB-C HDMI USB-C to HDMI Cable VGA VGA VGA Cable Make sure you have the appropriate cable for your specific laptop and TV configuration. 3. Wireless Connection: Same WiFi Network If you prefer a wireless connection, ensure that your laptop and TV are connected to the same WiFi network. This is necessary for screen mirroring functionality and enables the seamless transmission of audio and video data between devices. 4. Keep your Software and Drivers Updated For a smooth casting experience, it’s important to keep your laptop’s software and drivers up to date. Check for any available updates and install them before attempting to cast your screen to the TV. This ensures compatibility and minimizes the risk of technical issues during the casting process. Note: Always follow the manufacturer’s instructions for updating software and drivers specific to your laptop and TV models. Once you have completed these preparations, you are ready to move on to the next section, where we will explore the wired method of casting using an HDMI cable. Wired Connection: HDMI Cable One of the easiest ways to cast your laptop to your TV is by using an HDMI cable. Simply connect one end of the HDMI cable to your laptop’s HDMI port and the other end to your TV’s HDMI port. Select the HDMI input on your TV and your laptop’s screen will be mirrored on the TV. This method provides a high-quality connection and supports audio transmission as well. If you are unsure about the location of the HDMI ports on your laptop and TV, refer to your device’s user manual or search for the specifications online. Here is a step-by-step guide on how to cast your laptop to your smart TV using an HDMI cable: Locate the HDMI ports on your laptop and TV Connect one end of the HDMI cable to your laptop’s HDMI port Connect the other end of the HDMI cable to your TV’s HDMI port Switch on your TV and select the corresponding HDMI input Your laptop’s screen will now be mirrored on your TV Ensure that both your laptop and TV are powered on and connected properly. Adjust the display settings on your laptop if necessary to optimize the viewing experience on your TV. With the HDMI cable, you can enjoy streaming movies, videos, presentations, and more from your laptop directly on your TV screen. It’s a straightforward and reliable method for casting your laptop to a smart TV. In the next section, we will explore another option for casting your laptop to your TV using a wireless connection and screen mirroring apps. Wireless Connection: Screen Mirroring Apps If you prefer a wireless connection, screen mirroring apps like Google Chromecast or Miracast are the perfect solution. These apps allow you to effortlessly cast your laptop screen to your TV without the need for any cables. By downloading the app on both your laptop and TV, connecting them to the same WiFi network, and following the simple on-screen instructions, you can quickly start enjoying your laptop content on the big screen. Screen mirroring apps offer the convenience of wireless connectivity and eliminate the hassle of dealing with cables and wires. With just a few taps, you can mirror your laptop screen and enjoy your favorite movies, videos, photos, and more with a larger audience. The

Stream Seamlessly: How to Cast Laptop to TV Read More »

Safe Laptop Screen Cleaning Tips | Expert Guide

how to clean laptop screen

Imagine this: you wake up early on a beautiful morning, excited to start your day. As you sit down with a cup of coffee, ready to make the most of your laptop, you’re greeted by a frustrating sight – smudges and fingerprints all over your screen. It’s a small annoyance, but it’s enough to dampen your enthusiasm and make you question the cleanliness of your laptop. Your laptop screen is not just a window to the digital world; it’s a reflection of your productivity, creativity, and connection to others. Keeping it clean and clear is crucial for an optimal visual experience. But how do you clean your laptop screen without causing damage? In this expert guide, we will provide you with safe and effective laptop screen cleaning tips that will leave your display looking crystal clear. Whether you’re a student, a professional, or a tech enthusiast, these tips will help you maintain the clarity of your laptop screen and protect your investment. Key Takeaways: Regularly cleaning your laptop screen is essential for maintaining its performance and longevity. Use microfiber cloths and screen-friendly cleaners like distilled water to safely remove dust, smudges, and fingerprints. Power down and unplug your laptop before cleaning, and always follow the dos and don’ts to avoid damage. Different types of computer screens require different cleaning methods, so make sure to know your screen type. Implement preventive measures to minimize the risk of laptop screen damage, such as avoiding direct contact with the screen and storing your laptop properly. The Importance of Proper Laptop Screen Maintenance Proper maintenance of your laptop screen is crucial for a clear and vibrant display. Neglecting regular cleaning can lead to a buildup of dirt and debris, which can affect the performance and longevity of your screen. By using the right cleaning tools, such as microfiber cloths, and following the recommended cleaning process, you can keep your laptop screen in optimal condition. Regular cleaning helps prevent dust buildup, smudges, and marks, ensuring a better visual experience and prolonging the lifespan of your laptop screen. Cleaning your laptop screen with a screen cleaning cloth is the safest and most effective method. These soft and lint-free cloths are specifically designed to remove fingerprints, dust, and other particles without scratching or damaging the screen surface. Tips for Proper Laptop Screen Maintenance: Power down and unplug your laptop before cleaning the screen. Use a dry microfiber cloth to remove any dry debris from the screen. Gently wipe the screen with a screen cleaning cloth dampened with a small amount of distilled water or a screen-friendly cleaning solution. Dry the screen thoroughly with a clean, dry microfiber cloth to prevent watermarks or streaks. Repeat this cleaning process regularly to keep your laptop screen in top condition. Regular maintenance and cleaning of your laptop screen will not only enhance your visual experience but also protect your investment. Take the time to care for your laptop screen, and you’ll enjoy a clear and vibrant display for years to come. Benefits of Proper Laptop Screen Maintenance Consequences of Neglecting Screen Maintenance Clear and vibrant display Dim and dull screen Improved visibility Blurry or distorted images Prevention of dust buildup Increased risk of overheating Reduced smudges and fingerprints Difficult-to-remove marks and stains Extended screen lifespan Shortened screen lifespan due to damage The Dos and Don’ts of Cleaning a Laptop Screen When it comes to keeping your laptop screen clean and free from smudges, following the right cleaning techniques is essential to avoid damage. By following these dos and don’ts, you can safely and effectively remove smudges from your laptop screen and maintain its pristine condition. The Dos: Do power down and unplug your laptop: Before starting the cleaning process, it is crucial to turn off your laptop and unplug it from any power source. This ensures your safety and prevents any potential damage. Do remove dry debris with a gentle, dry microfiber cloth: Use a soft microfiber cloth to gently remove any dry debris, such as dust or dirt, from the screen. This helps avoid scratching the surface during the cleaning process. Do use screen-friendly cleaners: Opt for screen-friendly cleaning solutions like distilled water. Avoid using harsh chemicals or abrasive cleaners that can damage the screen. Do apply cleaning solutions to a microfiber cloth: Instead of spraying cleaning solutions directly onto the screen, apply them to a microfiber cloth. This allows you to control the amount of moisture and prevents any excess liquid from seeping into sensitive areas of your laptop. Do gently wipe the screen: When using a microfiber cloth, make sure to gently wipe the screen in a circular motion or from top to bottom. Apply light pressure to avoid scratching the surface. The Don’ts: Avoid using rags, paper towels, or tissues: These materials can be abrasive and leave lint or scratches on your laptop screen. Stick to soft microfiber cloths specifically designed for screen cleaning. Avoid using excessive moisture: Using too much cleaning solution or moisture can seep into the edges of the screen and cause damage to internal components. Use a minimal amount of screen-friendly cleaning solution to prevent this. Avoid spraying cleaning solutions directly onto the screen: Spraying cleaning solutions directly onto the screen can lead to excessive moisture and potential damage. Always apply the solution to a microfiber cloth first before gently wiping the screen. Avoid using harsh cleaners: Harsh cleaners, such as ammonia-based or alcohol-based solutions, can strip the protective coating off your laptop screen. Stick to screen-friendly cleaners to ensure the longevity of your screen. By following these dos and don’ts, you can effectively remove smudges and keep your laptop screen looking as good as new. Now let’s explore more tips and techniques for cleaning different types of computer screens in the next section. Different Types of Computer Screens and How to Clean Them Computer screens come in different types, such as LCD screens and those with glass coatings. Each type requires a specific cleaning approach to maintain a clean and clear

Safe Laptop Screen Cleaning Tips | Expert Guide Read More »

Capture Tips: How to Screenshot on Lenovo Laptop

how to screenshot on lenovo laptop

Have you ever stumbled across something on your Lenovo laptop screen that you wished you could capture and save? Perhaps it was a hilarious meme, an important piece of information, or a beautiful image that touched your heart. Whatever it was, you wanted to hold onto that moment forever. Well, I’ve been there too. As a Lenovo laptop user, I understand the frustration of not knowing how to capture those precious moments. But fear not! In this article, I will guide you through the simple secrets of screenshotting on your Lenovo laptop, so you can capture and cherish those special moments anytime, anywhere. Whether you’re a tech-savvy individual or a casual laptop user, screenshotting is a valuable skill that can make your life easier. From sharing important information with colleagues to capturing memories with loved ones, the ability to screenshot on your Lenovo laptop opens up a world of possibilities. So, are you ready to unlock the power of screenshotting? Let’s dive in and discover how you can capture and save the moments that matter most to you. Key Takeaways: Master the art of screenshotting on your Lenovo laptop with these simple tips. Capture and save important information, hilarious memes, and beautiful images from your laptop screen. Screenshotting is a valuable skill that can enhance your productivity and communication. Whether you’re using Windows 10 or an older version, we’ve got you covered. Don’t miss out on capturing and cherishing the moments that matter most to you. How to Take a Screenshot on Windows 10 Lenovo Laptop On your Lenovo laptop running Windows 10, capturing a screenshot is a quick and simple process. There are a couple of methods you can use, depending on your preference and the desired outcome. Method 1: Windows Key + PrtSc (Print Screen) Key To capture the entire screen, press and hold the Windows key, then press the PrtSc key. This will instantly take a screenshot and save it in the “Screenshots” folder on your laptop. You can easily access this folder by going to File Explorer > Pictures > Screenshots. Method 2: Windows Key + W Key If you prefer more flexibility and the ability to edit your screenshots before saving them, you can use the built-in Snipping Tool called “ScreenSketch” on your Lenovo laptop. Simply hold down the Windows key, then press the W key to open the ScreenSketch app. Once the app is open, you can use your mouse or touchpad to select the specific area of the screen you want to capture. After capturing the screenshot, the app will provide various editing options like cropping, highlighting, and annotating. When you’re satisfied, click on the save icon to save your edited screenshot. Don’t be afraid to explore and try out different methods to find the one that suits your needs the best. You can also experiment with shortcut combinations, software applications, or third-party tools that offer additional features for capturing and editing screenshots on your Lenovo laptop. “Taking screenshots on a Lenovo laptop running Windows 10 is a breeze. With just a few key presses, you can save and share important information from your screen with ease.” Next, we’ll explore how to capture screenshots on older Lenovo laptops that are not running Windows 10. How to Take a Screenshot on Older Lenovo Laptops If you have an older Lenovo laptop that is not running Windows 10, capturing screenshots is still possible using the PrtSc (Print Screen) key. Follow these simple steps: Press the PrtSc key on your keyboard. This will capture a screenshot of your entire screen. Open the Paint application. Select “Paste” from the Edit menu or use the Ctrl + V keyboard shortcut to insert the screenshot into Paint. Utilize the editing tools in Paint to annotate or mark up the screenshot as desired. Once you are finished editing, click on File and choose Save As to save the screenshot. By using the PrtSc key and Paint application, you can easily capture, edit, and save screenshots on your older Lenovo laptop. Paint: Simple and Versatile Image Editor “Paint is a user-friendly image editing software that comes pre-installed on Windows operating systems. It offers essential tools for cropping, resizing, and annotating screenshots, making it a valuable tool for anyone needing basic image editing capabilities.” — Robin Smith, Graphic Designer Lenovo Laptop Screenshot Shortcut Comparison Table Windows 10 Older Versions Shortcut Windows key + PrtSc PrtSc Save Location Screenshots folder N/A Editing Tools ScreenSketch app Paint application While capturing screenshots on older Lenovo laptops may require using the PrtSc key and the Paint application, it remains a simple and effective method to capture and save important information. How to Capture a Full-Screen Screenshot on HP Laptops Capturing a full-screen screenshot on an HP laptop is a simple process. Just locate the “Print Screen” key, which may be labeled as PrtScn or Prt SC, and press it along with the Windows key. This will copy the screenshot to the clipboard. Then, open an image editing program like Paint and press Ctrl + V to paste the screenshot. Finally, save the file in your desired format. How to Capture a Partial Screenshot on HP Laptops If you only want to capture a portion of the screen on an HP laptop, you can use a keyboard shortcut. Press the Windows key, Shift key, and S key simultaneously. This will fade the screen into a white overlay and allow your cursor to become a crosshair. Use the crosshair to select the area of the screen you want to capture. Then, open an image editing program and press Ctrl + V to paste the screenshot. Save the file in your preferred format. By using this handy shortcut, you can easily capture specific portions of your HP laptop screen. Whether you want to highlight an important section of a webpage, demonstrate a software feature, or capture an error message, this method provides a quick and efficient way to capture exactly what you need. Step-by-Step Guide: How to Capture

Capture Tips: How to Screenshot on Lenovo Laptop Read More »

Factory Reset HP Laptop Guide | Quick & Easy Steps

how to factory reset hp laptop

Imagine this: you’ve been using your trusty HP laptop for a while now, relying on it for work, entertainment, and everything in between. But lately, you’ve noticed some performance issues, glitches, and slowdowns that just won’t go away. It’s frustrating, isn’t it? It feels like your reliable companion has let you down. Well, I’m here to tell you that there’s a solution, a way to give your HP laptop a fresh start and rejuvenate its performance. It’s called a factory reset, and it can work wonders in resolving those nagging issues. So, how can you factory reset your HP laptop? Don’t worry, I’ve got you covered. But before we dive into the step-by-step process, let’s explore why a factory reset is necessary and what it can do for you. Think of it as clearing away the clutter, erasing the accumulated junk, and restoring your HP laptop to its initial state, just like the day you brought it home. Whether you’re dealing with a sluggish system, persistent errors, or simply want a clean slate, a factory reset can be the answer you’re looking for. Are you ready to give your HP laptop the makeover it deserves? Let’s get started! Identify Your Operating System Before performing a factory reset on your HP laptop, it’s crucial to identify the operating system it runs on. Different operating systems may have different steps for a full factory reset. Most HP laptops use the Windows operating system, but it’s important to verify the version to ensure the reset process is accurate and effective. Identifying your operating system is easy. Simply follow these steps: Power on your HP laptop and wait for it to boot up. Once the laptop is fully powered on, locate the “Start” button at the bottom left corner of the screen. Click on the “Start” button, and a Start menu will appear. In the search bar within the Start menu, type “This PC” or “My Computer.” Click on “This PC” or “My Computer” to open the file explorer window. Within the file explorer window, you’ll find the information about your operating system, including the version of Windows installed on your HP laptop. Make a note of the operating system and its version for future reference. Once you have identified your operating system, you can proceed with the appropriate factory reset method based on your specific system requirements. Remember to always backup your files before initiating a factory reset to avoid permanent data loss. Here’s an example of what you might see in your file explorer window: Back Up Your System Before proceeding with a factory reset, it’s crucial to back up your system to safeguard your important data. In the event of a hard drive failure or any unforeseen issues during the reset process, having a backup ensures that you don’t lose any valuable files or documents. Regularly scheduling backups will give you peace of mind and protect your data from unexpected mishaps. One popular method to back up your HP laptop is to utilize cloud storage. Cloud storage offers an extra layer of security by storing your data remotely, allowing you to access it from anywhere with an internet connection. Services like Google Drive, Dropbox, or Microsoft OneDrive offer free or subscription-based cloud storage options with varying storage capacities to accommodate your needs. By saving your files to the cloud, you ensure that your data is safely stored off-site, protecting it from local hardware malfunctions. Cloud storage also offers the convenience of easy file sharing and retrieval, making it an ideal choice for backing up your HP laptop. Factory Reset HP Laptop with Windows 10 To factory reset an HP laptop with Windows 10, you have two options: accessing the reset option through the Start menu or the Settings menu. Let’s explore both methods in detail: Reset through the Start menu Click on the Start button located at the bottom-left corner of your screen. From the Start menu, select Settings (the gear icon). In the Settings window, click on Update & Security. Choose the Recovery tab from the left-side menu. Under the Reset this PC section, click on the Get started button. Reset through the Settings menu Press the Windows key + I on your keyboard to open the Settings menu directly. In the Settings window, click on Update & Security. Choose the Recovery tab from the left-side menu. Under the Reset this PC section, click on the Get started button. Regardless of the method you choose, a new window will appear with reset options. In the reset window, you’ll have two options: Keep my files: This option will remove all installed applications and settings, but keep your personal files intact. Remove everything: This option will remove all personal files, applications, and settings, providing a clean slate for your HP laptop. Choose the option that best suits your needs and follow the on-screen instructions to complete the factory reset process. Factory Reset HP Laptop with Windows 7 or 8 If you have an HP laptop running on Windows 7 or 8, performing a factory reset can help resolve software issues and restore your device to its original state. There are two methods you can use to perform a factory reset: using recovery discs or utilizing the recovery partition. Using Recovery Discs If you have recovery discs provided by HP, here are the steps to reset your HP laptop: Connect the recovery discs to your HP laptop. Restart your laptop and press the appropriate key to access the boot menu. Select the CD/DVD drive option from the boot menu. Follow the on-screen instructions to initiate the factory reset. Using Recovery Partition If your HP laptop doesn’t come with recovery discs, you can still perform a factory reset using the recovery partition: Restart your laptop. Press the appropriate key (usually F11) repeatedly to enter the recovery mode. In the recovery menu, select the option to perform a factory reset. Follow the on-screen instructions to complete the reset process. Note: Before proceeding with a

Factory Reset HP Laptop Guide | Quick & Easy Steps Read More »

Capture Your Screen: How to Screenshot on Dell Laptop

how to screenshot on dell laptop

Do you ever find yourself wanting to capture a special moment on your screen? Maybe it’s a funny meme, an important message, or a beautiful image that you want to save and share. I know the feeling. There have been countless times when I’ve come across something that I just had to capture and keep. That’s why I’m excited to share with you the simple and intuitive way to screenshot on your Dell laptop. Whether you’re using Windows 11, Windows 10, Windows 8.1, or Windows 8, Dell laptops offer convenient methods for capturing screenshots that will help you preserve those memorable moments forever. With just a few keystrokes, you can capture anything on your screen and save it as an image file. The possibilities are endless – from capturing important information for work or school, to capturing cherished memories with family and friends. In this article, we’ll explore different methods for screenshotting on Dell laptops, including using the Print Screen key, the Snipping Tool, and even third-party screenshot software. You’ll learn the keyboard shortcuts, how to customize your screenshots, and troubleshoot any issues you may encounter along the way. So get ready to unlock the power of screen capture on your Dell laptop. Let’s dive in and start capturing those special moments! Key Takeaways: Learn how to screenshot on your Dell laptop using the Print Screen key. Discover alternative methods for capturing screenshots, such as using the Snipping Tool. Explore third-party screenshot software for advanced features and customization options. Master troubleshooting techniques for resolving screenshot issues on your Dell laptop. Follow best practices for organizing, editing, and sharing your screenshots. Using the Print Screen Key in Windows 11, Windows 10, Windows 8.1, and Windows 8 In Windows 11, Windows 10, Windows 8.1, and Windows 8, capturing screenshots is made easy using the Print Screen key in combination with other keys. Whether you want to capture the entire screen, all active windows, or a single active window, there are simple keyboard shortcuts you can use. Keyboard Shortcuts for Windows 11 and Windows 10 To capture the entire screen in Windows 11 and Windows 10, simply press the Windows logo key + PrntScrn key together. You’ll notice a brief screen dimming effect, indicating that the screenshot has been taken. The captured screenshot is automatically saved to your Screenshots folder in the Pictures directory. If you’re using a tablet, press the Windows logo button + volume down button together to capture the entire screen. To capture all active windows instead of the entire screen, press the PrntScrn key. If you only want to capture a single active window, tap or click on the window you wish to screenshot and then press the Alt + PrntScrn keys together. This will capture the active window and save it to your clipboard. Keyboard Shortcut for Windows 8.1 and Windows 8 In Windows 8.1 and Windows 8, the process is similar to Windows 11 and Windows 10. Use the Windows logo key + PrntScrn key combination to capture the entire screen. Again, the captured screenshot will be saved to the Screenshots folder in the Pictures directory. To capture all active windows, press the PrntScrn key. If you want to capture a single active window, tap or click on the window and press the Alt + PrntScrn keys simultaneously to capture and save it to your clipboard. Once you have captured a screenshot, you can open an image editor or a document and paste the screenshot. From there, you can edit, crop, annotate, or save the screenshot as desired. Using the Print Screen key and its combinations in Windows makes it quick and convenient to capture screenshots on your Dell laptop running Windows 11, Windows 10, Windows 8.1, or Windows 8. Windows Version Capture Entire Screen Capture All Active Windows Capture Single Active Window Windows 11 and Windows 10 Windows logo key + PrntScrn PrntScrn Alt + PrntScrn Windows 8.1 and Windows 8 Windows logo key + PrntScrn PrntScrn Alt + PrntScrn By utilizing the Print Screen key and its combinations, you can easily capture valuable moments on your Dell laptop’s screen, whether you’re running Windows 11, Windows 10, Windows 8.1, or Windows 8. Try it out and start capturing screenshots effortlessly. Taking Screenshots on Dell Laptops with Print Screen Key On most Dell laptops, the Print Screen key is located at the top of the keyboard on the right side. It may also be one of the Function keys, such as F10. To capture a screenshot, simply press the Print Screen key. If the Print Screen key is combined with F10, you may need to hold down the Fn key while pressing the Print Screen key. The captured screenshot will be saved to the clipboard, and you can paste it into an image editor or document. If you prefer using a keyboard shortcut to quickly capture screenshots on your Dell laptop, the Print Screen key is your best friend. Just press the key, and your screenshot data will be saved to the clipboard, ready to be shared or edited. It’s a straightforward and efficient way to document your screen moments with ease. Visual learners might appreciate the simplicity of how screenshots can be taken on Dell laptops using the Print Screen key. With just one press, the entire screen is captured and ready for further use. Whether you’re saving a memorable online conversation, capturing an important article, or creating a step-by-step tutorial, the Print Screen key makes it effortless to preserve moments that matter to you on your Dell laptop. If you encounter difficulty locating the Print Screen key on your Dell laptop keyboard, consult your device’s user manual or the Dell support website for detailed instructions specific to your model. Once you become familiar with the location and functionality of the Print Screen key, capturing screenshots on your Dell laptop becomes second nature. Now that you know how to take screenshots on your Dell laptop using the Print Screen key, let’s explore alternative methods in

Capture Your Screen: How to Screenshot on Dell Laptop Read More »

Capture Your Screen: How to Screenshot on HP Laptop

how to screenshot on hp laptop

Have you ever come across an incredible image or important information on your computer screen that you wanted to save and share? I know I have. Whether it’s a hilarious meme that you want to send to your friends or a pertinent screenshot for work, knowing how to capture your screen is a valuable skill that can come in handy in various situations. If you own an HP laptop running Windows or Chrome operating systems, you’re in luck! HP laptops offer simple and convenient built-in methods for taking screenshots. In this article, I’ll guide you through the default ways to capture your entire screen or a specific portion of it using keyboard shortcuts and built-in software. Let’s get started! Key Takeaways: There are default ways to capture your entire screen or a specific portion of it on HP laptops. You can use keyboard shortcuts like the Print Screen key or the Snip & Sketch feature on Windows 10. The built-in Snipping Tool and third-party applications like Snagit offer advanced screenshot capturing and editing features. HP tablets also have their own methods for capturing screenshots. Knowing how to take screenshots on an HP laptop or tablet can enhance your productivity and communication. Default Way for Full Screen on HP Laptop If you’re looking to capture your entire screen on an HP laptop, there’s a default and straightforward method you can use. All you need is the Print Screen key, which is usually located at the top right of your keyboard, labeled as either PrtScn or Prt SC. To take a screenshot of the full screen, simply press the Windows key and the Print Screen key simultaneously. This keyboard combination will instantly capture your screen, but the image will be copied to the clipboard and not immediately saved as a file. To save the screenshot, open an image editing program like Microsoft Paint, and paste the screenshot into the program. From there, you can save the screenshot as either a JPG or PNG file. Note: To paste the screenshot into an image editing program, you can use the keyboard shortcut Ctrl + V, or right-click and select Paste. By following this simple step-by-step guide, you’ll be able to effortlessly take a screenshot of the full screen on your HP laptop using the default Print Screen key shortcut. Alternative Default Way for Partial Screen on HP Laptop If you want to capture a specific portion of your screen instead of the entire screen, you can use the Snip & Sketch feature on Windows 10. Pressing the Windows key, Shift, and S simultaneously will fade the screen into a white overlay and transform your cursor into a crosshair. You can then select the area you want to capture, and the snippet will be copied to the clipboard. Open an image editing program and paste the screenshot to save it. Snip & Sketch: Easy and Accurate Screenshot Selection With Snip & Sketch on Windows 10, taking a screenshot of a specific portion of your HP laptop screen has never been easier. By using this default feature, you have complete control over what you want to capture, ensuring you only include the relevant content in your screenshot. This functionality is particularly useful when you need to highlight a specific section of a webpage, an error message, or a particular area of a document. Once you press the Windows key, Shift, and S simultaneously, your screen will transform into a transparent overlay, allowing you to visually define the exact area you want to capture. The cursor turns into a crosshair, which you can use to draw a rectangle or capture a free-form snippet. After selecting the desired portion, the screenshot is automatically copied to your clipboard. From there, you can easily paste it into an image editing program, such as Microsoft Paint, and save it as a JPEG or PNG file. The Snip & Sketch feature offers a convenient and straightforward way to capture specific areas of your HP laptop screen without the need for third-party applications. It is especially valuable for tasks that require precision and focused image selection, giving you the flexibility to highlight and share only the necessary information. Snipping Tool The Snipping Tool is another built-in feature that allows you to easily capture any-sized portions of your screen on your HP laptop. With its user-friendly interface, the Snipping Tool offers various snip options to suit your needs: Rectangular snip: Select a specific rectangular area of your screen to capture. Free-form snip: Capture a customized, free-form shape on your screen. Window snip: Capture a specific window or application on your screen. Full-screen snip: Capture the entire contents of your screen. Once you’ve made a snip, the Snipping Tool provides you with convenient options for saving it as a PNG or JPEG file. You can also take advantage of the pen and highlighter tools to annotate and highlight specific areas of your screenshots, making it easy to emphasize important details. Snagit Snagit is a powerful third-party application that provides advanced screenshot capturing and editing features. With Snagit, you can easily capture screenshots, resize and edit them, and even record scrolling screens. This versatile tool offers a range of options to enhance your screenshots and improve their visual appeal. One of the key features of Snagit is the ability to select the specific portion of the screen you want to capture. This allows you to focus on the important details and crop out any unnecessary elements. After capturing the screenshot, Snagit provides a user-friendly interface where you can edit, annotate, resize, copy, and save the screenshot within the application itself. Snagit also offers a range of editing tools to enhance your screenshots. You can add text, draw shapes, arrows, and highlights to draw attention to specific areas. Furthermore, Snagit allows you to resize your screenshots to fit different dimensions without compromising the quality. If you frequently need to capture screenshots that involve scrolling, Snagit has got you covered. With its scrolling screen capture feature, you

Capture Your Screen: How to Screenshot on HP Laptop Read More »

How to Connect AirPods to Laptop: Easy Steps

how to connect airpods to laptop

Have you ever found yourself wanting to escape the tangles of headphone cords while working or enjoying your favorite content on your laptop? I certainly have. There’s nothing worse than accidentally yanking your earphones out while reaching for your coffee or struggling to unravel knotted wires. That’s why connecting your AirPods to your laptop can be a game-changer. The freedom and convenience of wireless audio make for a seamless and enjoyable experience. Whether you’re a Mac enthusiast or a Windows lover, this article will guide you through the simple steps to connect your AirPods to your laptop. Connecting AirPods to your laptop provides the convenience of wireless audio. Following the step-by-step instructions for your specific laptop’s operating system is crucial. Troubleshooting tips will help you overcome any connectivity issues that may arise. Optimizing your AirPods connection and maintaining compatibility ensures a reliable experience. You can disconnect and reconnect your AirPods easily, allowing flexibility between devices. How to Connect AirPods to a Windows Laptop Connecting your AirPods to a Windows laptop is a simple process that allows you to enjoy wireless audio while using your laptop. Follow these easy steps to pair your AirPods with your Windows laptop: Make sure your AirPods are in their charging case. Open the lid of the charging case. On your Windows laptop, click the “Start” menu and go to “Settings”. In the Settings menu, select “Devices”. Click on “Bluetooth & other devices”. Toggle on the Bluetooth option to enable it. Wait for your Windows laptop to detect your AirPods. Once your AirPods appear in the list of available devices, click on their icon to start the pairing process. Follow any on-screen prompts to complete the pairing. If you encounter any issues during the connection process, here are some troubleshooting tips: Ensure that Bluetooth is enabled on your Windows laptop. Bring your AirPods and laptop closer together to improve the Bluetooth signal. Check that your AirPods have sufficient battery charge. Restart your Windows laptop and try again. Now you can enjoy the convenience of using your AirPods with your Windows laptop for a seamless audio experience. Benefits of Connecting AirPods to Your Windows Laptop Connecting your AirPods to your Windows laptop offers several benefits: Wireless audio: Enjoy the freedom of wireless audio while using your laptop. Convenience: Avoid tangled wires and easily multitask without restrictions. Seamless switching: Switch between your AirPods and other devices effortlessly. Experience the joy of wireless audio with your AirPods and Windows laptop. AirPod Model Windows Laptop Compatibility AirPods (1st generation) and AirPods (2nd generation) Compatible with all Windows laptops with Bluetooth AirPods Pro Compatible with all Windows laptops with Bluetooth AirPods Max Compatible with all Windows laptops with Bluetooth How to Connect AirPods to Your MacBook If you own a MacBook, connecting your AirPods is a breeze. We’ll guide you through the process of pairing your AirPods with your MacBook using Apple Handoff. Additionally, we’ll provide step-by-step instructions for troubleshooting any connection issues you may encounter. Whether you have the latest AirPods or an older generation, we’ve got you covered. Let’s get started! Pairing AirPods with MacBook via Apple Handoff 1. Make sure your MacBook and AirPods are both powered on and in close proximity. 2. On your MacBook, go to “System Preferences” by clicking on the Apple menu in the top left corner. 3. Select “Bluetooth” from the preferences menu. 4. Open the lid of your AirPods’ charging case, and you should see the charging status light turn on. 5. On your MacBook’s Bluetooth settings, you should see your AirPods listed under “Devices.” Click the “Connect” button next to your AirPods. Tip: If your AirPods are not recognized by your MacBook, try resetting your AirPods by placing them in the charging case, closing the lid, and waiting 30 seconds before trying to pair them again. Connecting AirPods Not Paired with iPhone If your AirPods are not already connected to your iPhone, follow these additional steps: On your MacBook, go to “System Preferences” and click on “Apple ID.” Ensure that you are signed in with the same Apple ID used on your iPhone. Under the “Apps on this Mac using iCloud” section, check the box next to “Handoff.” This will enable the seamless connection between your iPhone and MacBook. Different Generations of AirPods and Mac Operating System Requirements AirPods Model Required Mac Operating System AirPods (1st & 2nd Generation) macOS Sierra (10.12) or later AirPods Pro macOS Catalina (10.15.1) or later AirPods Max macOS Big Sur (11.1) or later Make sure your MacBook is running the minimum required operating system for your AirPods model to ensure a smooth connection. Connecting your AirPods to your MacBook is simple and convenient. Whether you’re using Apple Handoff or troubleshooting connection issues, you can enjoy a wireless audio experience seamlessly. Now, you’re ready to enjoy your favorite music, podcasts, and more with your AirPods and MacBook! Troubleshooting AirPods Connection Issues If you’re experiencing difficulties connecting your AirPods to your laptop, don’t worry. We’re here to help you troubleshoot the problem and get your AirPods connected in no time. Follow these tips to resolve any connectivity issues: Check the battery levels: Ensure that your AirPods have sufficient battery charge. Low battery levels can affect the connection between your AirPods and laptop. Perform a reset: Try resetting your AirPods by placing them in the charging case, closing the lid, and waiting for a few seconds. Then, open the lid and press and hold the setup button on the back of the case until the LED indicator starts flashing white. This will reset the AirPods and can often fix connection problems. Verify Bluetooth settings: Make sure that Bluetooth is enabled on your laptop. Check the Bluetooth settings and ensure that your AirPods are discoverable. You may need to turn off and on Bluetooth or restart your laptop to establish a fresh connection. By following these troubleshooting steps, you can overcome any connectivity issues and enjoy a seamless connection between your AirPods and laptop. Remember, a little troubleshooting

How to Connect AirPods to Laptop: Easy Steps Read More »

Force Restart iPhone Guide – Quick & Easy Steps

how to force restart iphone

Have you ever experienced the frustration of your iPhone freezing or becoming unresponsive? It’s a common occurrence that can leave you feeling helpless and disconnected from the world. Whether you rely on your iPhone for work, communication, or entertainment, a malfunctioning device can disrupt your daily life. But don’t worry, there’s a simple solution to get your iPhone back up and running again – a force restart. When your iPhone is stuck or not responding, performing a force restart can often resolve the issue and restore your device to normal functionality. In this guide, we’ll walk you through the step-by-step process of force restarting different iPhone models, ensuring that you have the knowledge and confidence to tackle any unresponsive situation. Key Takeaways: Force restarting your iPhone can help resolve common issues like freezing or unresponsiveness. The method to force restart your iPhone depends on the model you have. If force restarting doesn’t work, there are further troubleshooting options like charging your device or entering recovery mode. Always seek professional assistance from Apple Support if you’re unable to resolve the issue on your own. Remember to back up your data regularly to avoid potential data loss during troubleshooting processes. How to Force Restart iPhone X, 11, 12, 13, or Later If you own an iPhone X, 11, 12, 13, or any of the later models, you may encounter situations where your device becomes unresponsive or frozen. In such cases, a force restart can often resolve the issue and get your iPhone back up and running. Here’s how you can force restart your iPhone X, 11, 12, 13, or any later models: Press and hold either volume button and the side button simultaneously. Continue holding both buttons until the power-off slider appears on the screen. Drag the slider to turn off your iPhone. Once the device is turned off, wait for 30 seconds before proceeding to the next step. Press and hold the side button until the Apple logo appears on the screen. This force restart method can effectively help you overcome unresponsiveness or freezing issues on your iPhone X, 11, 12, 13, or any later models. It provides a quick and easy solution to get your device back to normal functioning. Model Force Restart Steps iPhone X Press and hold either volume button and the side button until the power-off slider appears. Drag the slider to turn off the device. Wait for 30 seconds, then press and hold the side button until the Apple logo appears. iPhone 11 Press and hold either volume button and the side button until the power-off slider appears. Drag the slider to turn off the device. Wait for 30 seconds, then press and hold the side button until the Apple logo appears. iPhone 12 Press and hold either volume button and the side button until the power-off slider appears. Drag the slider to turn off the device. Wait for 30 seconds, then press and hold the side button until the Apple logo appears. iPhone 13 Press and hold either volume button and the side button until the power-off slider appears. Drag the slider to turn off the device. Wait for 30 seconds, then press and hold the side button until the Apple logo appears. Note: It’s important to give your iPhone enough time to power off before attempting to turn it back on. Waiting for 30 seconds ensures a complete shutdown and helps in resolving unresponsiveness issues effectively. If you encounter any further problems or if the force restart doesn’t resolve the issue, you may consider reaching out to Apple Support for further assistance. How to Force Restart iPhone 6, 7, 8, or SE (2nd or 3rd Generation) If you own an iPhone 6, 7, 8, or SE (2nd or 3rd generation) and encounter a frozen or unresponsive device, do not worry. You can easily force restart your iPhone using a simple method. To begin, locate the side button on your iPhone. Press and hold this button until the power-off slider appears on the screen. Wait patiently for approximately 30 seconds before moving to the next step. This will ensure that your device has ample time to power down completely. After the waiting period, press and hold the side button once again. Keep holding the button until you see the iconic Apple logo on the screen. At this point, your iPhone will start up and return to its normal functioning state. The force restart process is now complete, and you can resume using your device as usual. This method is particularly useful when your iPhone becomes unresponsive or freezes. By force restarting your device, you can resolve these issues and regain full control over your iPhone. So, if you ever encounter a frozen or unresponsive iPhone 6, 7, 8, or SE (2nd or 3rd generation), remember this simple force restart technique. How to Force Restart iPhone SE (1st Generation), 5, or Earlier If you’re facing the frustrating situation where your iPhone SE (1st generation), iPhone 5, or any earlier models won’t turn on or needs a hard reset, don’t worry! There’s a slightly different process to force restart these devices. Follow these simple steps to get your iPhone back up and running: Press and hold the top button until the power-off slider appears. Drag the slider to turn off your iPhone. Patiently wait for 30 seconds. Press and hold the top button again until you see the Apple logo. By performing this force restart, you can resolve issues where your iPhone fails to turn on or is in need of a hard reset. Remember to give your device ample time to respond during the process. Now you can regain control of your iPhone SE (1st generation), iPhone 5, or earlier models effortlessly! Model Force Restart Process iPhone SE (1st generation) Press and hold the top button until the power-off slider appears. Drag the slider to turn off the device. After waiting for 30 seconds, press and hold the top button until the Apple logo appears

Force Restart iPhone Guide – Quick & Easy Steps Read More »

Renaming Your iPhone Made Easy: Quick Guide

how to change iphone name

Have you ever scrolled through a crowded room, desperately searching for your iPhone among a sea of identical devices? I’ve been there too. It’s frustrating and time-consuming. That’s why I discovered the power of giving my iPhone a unique name. It may seem like a small detail, but it has made a world of difference. A unique name for your iPhone not only reflects your individuality but also helps your device stand out and be easily recognizable. Plus, it simplifies tasks like syncing with iTunes and using features like AirDrop. Trust me, once you give your iPhone an identity that resonates with you, you’ll wonder why you didn’t do it sooner. In this quick guide, I’ll walk you through the simple steps to change the name of your iPhone. Whether you’re a tech-savvy enthusiast or a casual user, this article has got you covered. Let’s dive in and make your iPhone truly yours! Key Takeaways: Choosing a unique name for your iPhone reflects your individuality and helps it stand out among other devices. A thoughtfully chosen iPhone name simplifies tasks like syncing with iTunes and using features like AirDrop. You can easily change the name of your iPhone during the setup process or through the Settings app. Consider privacy and security when naming your iPhone, avoiding personal details that could compromise your safety. Customizing your iPhone’s name can improve organization and productivity, especially for work and personal projects. The Importance of a Unique iPhone Name A unique name for your iPhone has several benefits. It ensures that your device stands out in a crowded environment and helps you quickly identify your own phone when syncing with iTunes or using features like AirDrop. Your iPhone’s name also plays a crucial role in settings where it is visible to others, such as when connecting to Bluetooth devices, Wi-Fi networks, or when sharing content. Choosing a unique name for your iPhone reflects your individuality and makes it easier to keep your device organized and personalized. When your iPhone has a unique name, it is easily distinguishable from other devices, making it simpler to locate and connect to it in various settings. For example, when connecting to Bluetooth devices, a unique iPhone name makes it easier to identify and select your device from a list of available connections. Similarly, when sharing files through AirDrop, having a unique name ensures that you can easily spot your own iPhone on the recipient’s device. The benefits of a unique iPhone name go beyond just convenience. It also adds a personal touch to your device. By choosing a name that reflects your individuality, you can make your iPhone feel more like an extension of yourself. It becomes a reflection of your personality and style, allowing you to showcase your uniqueness in a simple and subtle way. With a unique iPhone name, you can also enhance the organization and personalization of your device. When your iPhone is easily identifiable by its name, you can quickly locate it in iTunes or other applications that sync with your device. In addition, a unique iPhone name can help you differentiate between multiple iPhones if you own more than one, making it easier to manage and navigate through your devices. By understanding the importance of a unique iPhone name, you can take advantage of the benefits it offers. From expressing your individuality to simplifying device management, a unique iPhone name is a small but significant detail that can enhance your overall iPhone experience. Setting Up Your iPhone’s Name During Installation During the setup process of your new iPhone, you have the opportunity to choose a name for your device. This name is used to identify your iPhone on networks and to other devices. To set up your iPhone’s name during installation, simply follow these steps: Step 1: Follow the on-screen instructions until you reach the ‘Set Up iPhone’ screen. Step 2: From there, select either ‘Set Up as New iPhone’ or ‘Restore from Backup’ depending on your preference. Step 3: Continue with the setup process until you reach the ‘About’ section. Step 4: Tap on ‘Name’ and enter the desired name for your iPhone. It’s important to note that the name you choose can be changed at any time through the Settings app. Once you’ve completed the setup process, your iPhone will be identified by the new name you’ve chosen, making it easier for you to connect with other devices and personalize your iPhone experience. Choosing the right name for your iPhone not only adds a personal touch to your device but also makes it easier to identify and connect with other devices. Now that you know how to set up your iPhone’s name during installation, you can customize your device to reflect your individuality and make it truly yours. Renaming Your iPhone Using the Settings App If you want to give your iPhone a new name, it’s a quick and simple process that can easily be done using the Settings app. Whether you have the latest iOS 17 or a previous version, follow these steps to change the name of your iPhone: Open the Settings app on your iPhone. Scroll down and tap on General. Select About. Tap on the first line that displays the current name of your iPhone. Enter your desired new name and press Done. Once you’ve completed these steps, your iPhone will now be recognized by its new name across various services, including iCloud, AirDrop, and Personal Hotspot. Renaming Your iPhone in iOS 17 Using the Settings App – Step by Step: Steps Screenshots 1. Open Settings app 2. Scroll down and tap on General 3. Select About 4. Tap on the first line that displays the current name of your iPhone 5. Enter your desired new name and press Done – That’s it! You’ve successfully renamed your iPhone using the Settings app. Now your iPhone will have a brand new name that reflects your individuality and personal style. How Your iPhone’s Name Links to Other Features

Renaming Your iPhone Made Easy: Quick Guide Read More »

Welcome to [Lacagsame], your ultimate destination for insightful articles spanning the realms of finance, nature, technology, sports, and digital marketing.

Important Links

Home

Company

Privacy Policy

Terms and conditions

Disclaimer

Contact

Fell free to contact us anytime

© 2023 Created with lacagsame.com

Scroll to Top