Have you ever experienced that sinking feeling when you flush the toilet and the water starts rising instead of draining? It’s a frustrating situation that can quickly turn into a messy disaster. But don’t panic! With a little know-how and the right tools, you can easily unclog your toilet and restore its proper function. In this guide, we’ll walk you through the step-by-step process of snaking a toilet to remove stubborn blockages. So, roll up your sleeves and let’s get started on how to snake a toilet and say goodbye to clogs once and for all!
Key Takeaways:
- Snaking a toilet is a simple and effective method for unclogging stubborn blockages.
- Make sure to cover the floor with towels and wear rubber gloves to protect yourself.
- Insert the end of the snake into the toilet and push down while rotating the handle.
- Fully extend the snake past the obstruction and twist the handle to break up the clog.
- Retract the snake and repeat if necessary until the clog is cleared.
Step 1: Prepare the Area and Gather Materials
Before snaking a toilet, it’s important to take a few necessary steps to ensure a smooth process. By preparing the area and gathering the required materials, you can minimize any potential mess and make the unclogging process more efficient.
Rationale behind Preparation
Preparing the area is essential to protect your bathroom floor from any potential water or debris. Additionally, wearing rubber gloves during this process will provide you with proper protection against any bacteria or germs present.
Gather the Necessary materials
Here’s a list of materials you’ll need for snaking a toilet:
- Towels: Place towels on the floor around the toilet to catch any water or debris that may spill during the unclogging process.
- Rubber gloves: Ensure you have a pair of rubber gloves to protect your hands from any harmful substances.
- Bucket or trash bag: Keep a bucket or a trash bag nearby to collect any debris that the snake retrieves.
Additional Considerations
In some cases, you may need to turn off the water to the toilet or close the flapper inside the tank to prevent overflow. This step is especially important if the toilet is already prone to overflowing or if you suspect a severe clog. By taking these precautionary measures, you’ll minimize any potential mess and ensure a more manageable situation.
Now that you understand the importance of preparing the area and gathering the necessary materials, you’re ready to move on to the next step â inserting the snake into the toilet.
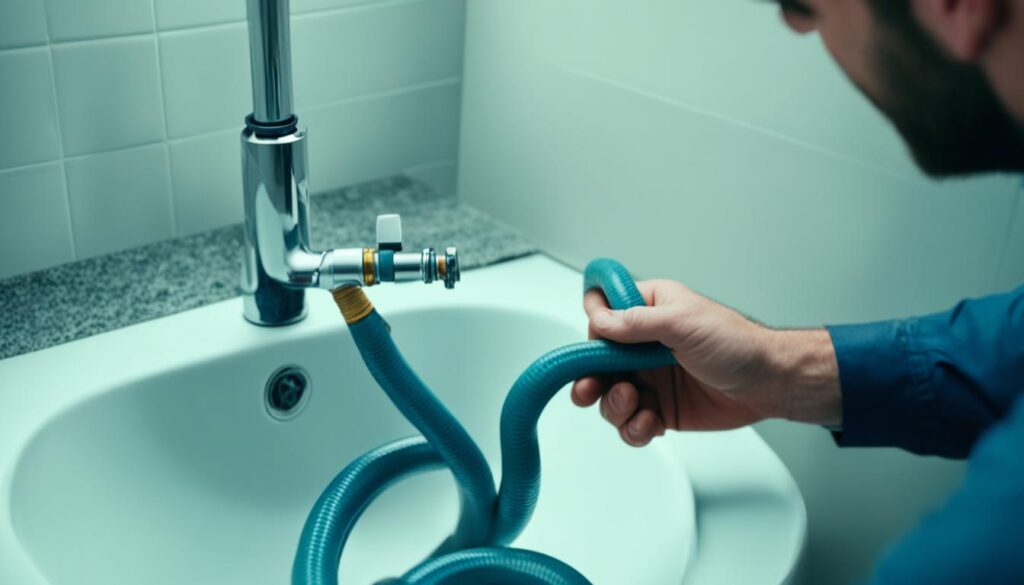
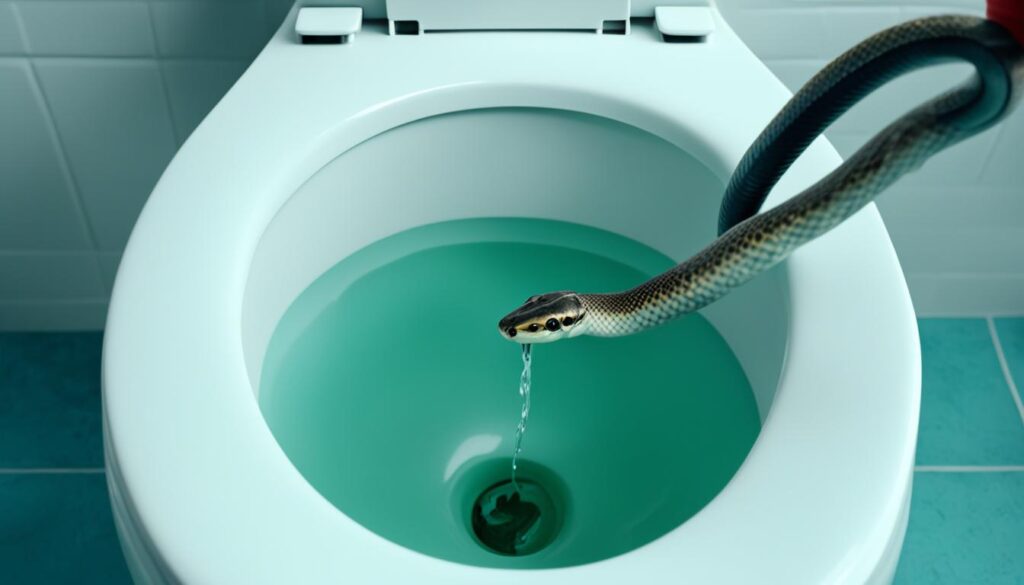
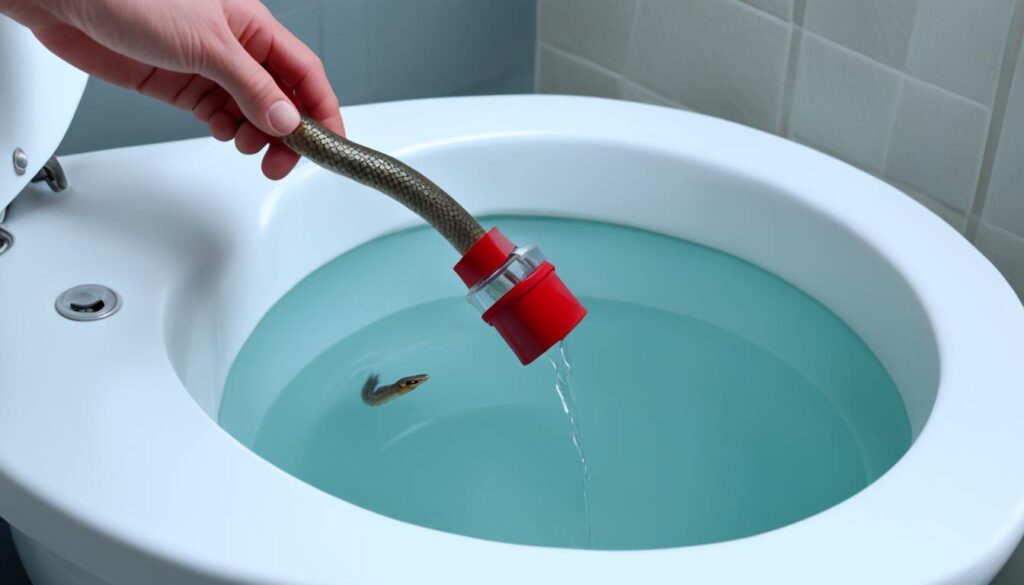
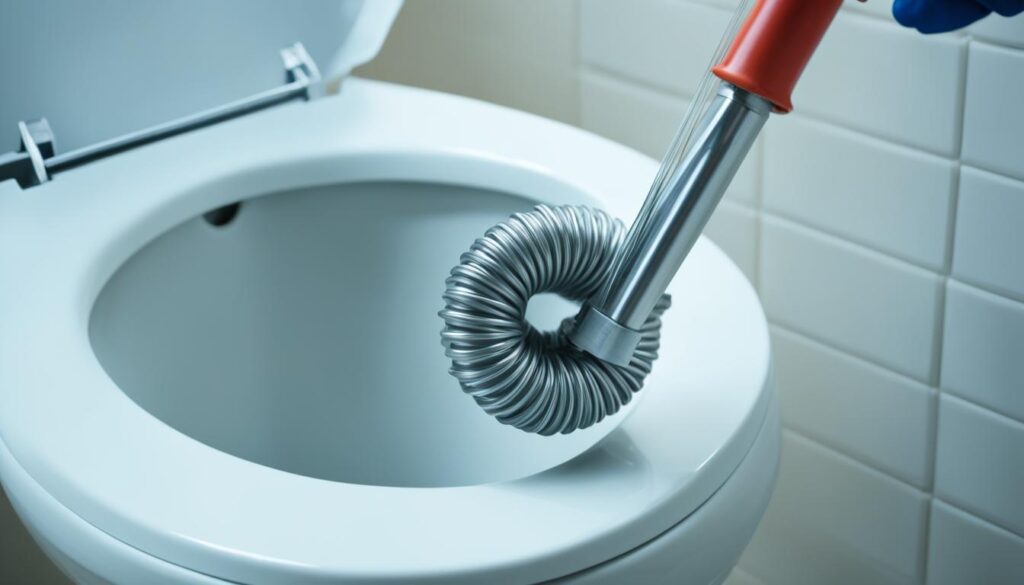
Step 2: Insert the Snake into the Toilet
To begin snaking the toilet, insert the end of the snake into the toilet bowl, making sure the curved section rests at the bottom of the bowl where it narrows into a pipe. The plastic or metal rod around the snake prevents it from scratching the porcelain. Push the handle downward and rotate it clockwise to help the snake navigate through the plumbing.
Your goal is to guide the toilet drain snake through the pipes, reaching the point where the clog is located. By inserting the snake properly, with the curved section at the base of the bowl, you ensure that it follows the correct path and helps dislodge the obstruction.
Be cautious not to force the snake too vigorously, as excessive force may cause damage to the toilet or the plumbing. Instead, gently and steadily push the snake into the drain, allowing it to navigate its way through the pipes.
Remember, the snake is designed to push through and break apart the clog, so don’t be alarmed if you feel some resistance. With steady pressure and rotation, the snake will make its way through the blockage, clearing the path for proper water flow.
Inserting the Snake: Step-by-Step
- Put on rubber gloves for protection.
- Position the end of the snake into the toilet bowl, with the curved section resting at the base.
- Ensure the plastic or metal rod surrounds the snake to prevent scratching the porcelain.
- Push the handle downward, applying gentle pressure to insert the snake into the drain.
- Rotate the handle clockwise while maintaining a steady downward push to help the snake navigate the plumbing.
Remember, proper insertion of the snake is crucial to effectively clear the clog and restore proper toilet function. Take your time, follow the steps, and be patient as you guide the snake into the toilet drain.
Step 3: Extend and Rotate the Snake
To fully extend the snake into the plumbing, you need to push down on the handle while rotating it clockwise. This dual action helps the snake navigate through the curved nature of the plumbing system, reaching deeper into the pipes. Keep in mind that depending on the obstruction, it may take some effort to feed the snake all the way in.
If you encounter an obstruction during the snaking process, don’t worry! You can overcome it by rotating the handle counterclockwise a few times. During this motion, try gently jostling the shaft to help the snake move past the blockage. This combined movement will help effectively extend the snake and tackle the clog.
Using the snake, rotate the handle clockwise to extend it into the plumbing.
Step 4: Retract and Remove the Snake
Now that you have fully extended the snake into the plumbing, it’s time to retract it and remove the clog. Follow these steps:
- Loosen the obstruction: Turn the handle clockwise 5-10 times to loosen the clog. This motion helps break up the blockage, making it easier to remove.
- Retrieve the snake: To retract the snake, pull it back towards you while twisting the handle counterclockwise. This action ensures that the snake detaches from any residue or debris as it is removed from the plumbing.
- Check for cleared clog: If the snake successfully cleared the clog, you should notice the water in the toilet bowl draining. This indicates that the obstruction has been removed.
- Repeat if necessary: In some cases, the clog may not clear completely with the first attempt. If the water does not drain or if the toilet continues to show signs of a blockage, repeat the process of extending, rotating, retracting, and removing the snake until the clog is fully cleared.
Removing the snake from the plumbing helps ensure that the clog is fully cleared. Remember to exercise caution while handling the snake to avoid any splashes or contact with debris. Once the snake has been retrieved, it’s time to move on to the next step in restoring proper flushing and function to your toilet.
Step 5: Plunge and Flush the Pipes
After retracting the snake, it’s time to give your toilet an extra push to ensure proper drainage. A trusty plunger is the perfect tool for this task. Here’s how to effectively plunge the toilet and flush away any remnants of the clog:
- Place the plunger into the toilet bowl, ensuring a tight seal around the drain.
- Pump the plunger up and down vigorously several times.
- Continue plunging until you feel the water start to flow freely down the drain.
- If necessary, repeat the plunging process to completely clear the pipes.
If you prefer using a toilet cleaner to further tackle the clog and keep your toilet fresh and clean, here’s what you can do:
Pour toilet bowl cleaner into the toilet, making sure to coat the entire bowl and the drain.
Let the cleaner sit for about 30 minutes to effectively break down any remaining residue.
After the allotted time, flush the toilet to flush away the cleaner and any loosened debris.
Alternatively, you can create a natural cleaning solution using baking soda and white vinegar:
- Pour about half a cup of baking soda into the toilet bowl.
- Add one cup of white vinegar to the bowl, causing a fizzy reaction.
- Let the mixture sit for around 30 minutes.
- Flush the toilet to remove the solution and any remaining debris.
By plunging and utilizing an effective toilet cleaner, you’ll ensure that your toilet is clean, fresh, and free from clogs.
Tips to Avoid Toilet Clogs
Preventing toilet clogs is key to maintaining a smoothly functioning bathroom. By following these essential tips, you can minimize the risk of clogs and keep your toilet in excellent condition.
- Only flush water-soluble items: To prevent clogs, make sure to flush only water-soluble items like toilet paper. Avoid flushing paper towels, tissues, sanitary napkins, or any other non-dissolvable materials. These can easily obstruct the plumbing and lead to clogs.
- Reduce toilet paper usage: Excessive amounts of toilet paper can contribute to clogs. Consider using single-ply toilet paper, which dissolves more easily and reduces the chances of clogging.
- Act quickly when signs of a clog appear: If you notice a low water level or slow flushing, it may be a sign of an impending clog. Act promptly by unclogging the toilet or contacting a professional plumber.
- Maintain cleanliness: Regularly clean your toilet to prevent the buildup of bacteria, grime, and other substances that can contribute to clogs. Use toilet cleaners specifically formulated for toilets and follow the instructions for safe and effective use.
Did You Know? A blocked toilet can cause inconvenience and potential damage if not addressed promptly. By implementing these preventive measures, you can save yourself from the hassle and expense of dealing with a clogged toilet.
By following these simple yet effective tips, you can significantly reduce the occurrence of toilet clogs and maintain a smoothly functioning bathroom. Remember, prevention is always better than dealing with a clog after it happens.
Now that you know how to prevent toilet clogs, let’s explore what to do when you encounter a clogged toilet in the next section.
What to Do When a Toilet is Clogged
Dealing with a clogged toilet can be a stressful situation, especially when it’s at risk of overflowing. Taking immediate action is crucial to prevent any further damage. Follow these steps to address a clogged toilet:
- Close the flapper or turn off the water supply: To prevent the toilet from overflowing, quickly identify the flapper inside the tank and close it. If you’re unable to locate the flapper, turn off the water supply to the toilet by shutting off the valve located behind the toilet.
- Protect the floor: Place towels or newspapers around the base of the toilet to shield the floor from any potential water or debris.
- Remove the obstruction: If the clog is within your reach and you have rubber gloves on hand, try to manually remove the obstruction. Gently break up the clog or pull it out using your gloved hand. Remember to dispose of the waste properly.
- Address gas smell promptly: If there is a strong smell of gas coming from the toilet, it’s crucial to contact a plumber immediately. Gas leaks can be hazardous and require professional attention.
In the case of a clogged toilet, taking swift action is key to preventing further complications. By following these steps, you can mitigate the risk of an overflowing toilet and tackle the clog effectively. Remember, safety should always be a priority, and if you’re unsure or encounter any difficulties, don’t hesitate to seek professional assistance.
How to Fix a Clogged Toilet With a Plunger
If you’re dealing with a clogged toilet, a plunger can be your best friend. This versatile tool can effectively unclog the toilet and restore proper flushing. Follow these simple steps to get your toilet back in working order.
Step 1: Choose the Right Plunger
When it comes to plungers, not all are created equal. Look for a heavy-duty plunger with a ball-shaped head or rubber flanges. These features help create an airtight seal and increase plunging effectiveness.
Step 2: Ensure Proper Water Levels
Before plunging, make sure there is enough water in the toilet bowl to cover the plunger head. This water creates the necessary hydraulic pressure for effective plunging. If the water level is low, add some water using a bucket or pitcher.
Step 3: Create an Airtight Seal
Place the plunger over the drain opening in the toilet bowl, ensuring a tight seal. Press it down firmly to expel any trapped air. The seal is crucial for generating the necessary suction to dislodge the clog.
Step 4: Plunge Vigorously
Once the plunger is sealed, vigorously plunge up and down using firm, controlled movements. The goal is to create pressure that will dislodge the clog and allow water to flow freely. Maintain a consistent plunging rhythm for maximum effectiveness.
Step 5: Repeat if Necessary
If the water begins to drain after plunging, congratulations! You’ve successfully unclogged the toilet. However, if the clog persists, repeat the plunging process a few more times. Sometimes stubborn clogs require multiple attempts to clear.
Step 6: Clean and Store the Plunger
After unclogging the toilet, it’s important to clean the plunger before storing it. Rinse it thoroughly with warm water and disinfect it using a mild household cleaner or bleach solution. Allow it to air dry before placing it in a clean, dry storage area.
| Benefits of Using a Plunger | Tips for Effective Plunging |
|---|---|
|
|
How to Fix a Clogged Toilet With a Snake
If plunging doesn’t work, a toilet auger or plumbing snake can be used to clear the clog effectively. A toilet auger, also known as a plumbing snake, is a long, flexible tool specifically designed to break up obstructions in your toilet’s plumbing system.
To fix a clogged toilet with a snake, follow these steps:
- Step 1: Insert the Snake into the Toilet
- Step 2: Crank the Handle to Extend the Snake
- Step 3: Rotate the Handle to Break up the Obstruction
- Step 4: Fully Extend, Retract, and Remove the Snake
- Step 5: Repeat if Necessary
Insert the end of the snake into the toilet bowl, ensuring the snake’s curved section rests at the bottom, where the bowl narrows into a pipe. The plastic or metal rod around the snake protects the porcelain from scratches.
Hold onto the handle of the snake and crank it clockwise. This action will extend the snake and guide it into the plumbing system. The snake may require some effort to feed it all the way in due to the curved nature of the plumbing.
Once the snake is fully extended, rotate the handle counterclockwise a few times while jostling the shaft. This motion helps break up the obstruction and clear the clog.
Continue cranking the handle clockwise to fully extend the snake into the plumbing. Then, retract and remove the snake by pulling and twisting the handle counterclockwise. Be cautious not to scratch the porcelain as you remove the snake from the toilet.
If the clog isn’t fully cleared after the first attempt, repeat the process by inserting the snake back into the toilet and following steps 2 to 4 until the clog is completely cleared.
Remember to take precautions, such as wearing rubber gloves and protecting the floor, when using a snake to fix a clogged toilet. If you’re unsure about using a plumbing snake or the clog remains persistent, it may be best to consult a professional plumber for assistance.
Conclusion
Snaking a toilet can be a highly efficient method to unclog stubborn blockages. By following the step-by-step process and using the appropriate tools, you can effortlessly clear a clog and restore proper flushing functionality to your toilet.
Remember to take necessary precautions, such as wearing rubber gloves and protecting the floor with towels, to ensure a clean and safe snaking experience. Taking the time to regularly maintain your toilet can also aid in preventing future clogs and issues with drainage.
With this guide, you now have the knowledge and confidence to tackle toilet clogs on your own. So, the next time you face a clogged toilet, remember to grab your trusty snake and resolve the issue with ease. Say goodbye to the frustrating and unpleasant experience of a clogged toilet and hello to a smoothly functioning plumbing system.
FAQ
How do I snake a toilet?
To snake a toilet, follow these steps: 1) Cover the floor with towels, 2) Place the end of the snake into the toilet, 3) Push down and rotate the handle to extend the snake, 4) Fully extend the snake past the obstruction and turn the handle, 5) Pull and twist the handle to retract the snake.
What precautions should I take before snaking a toilet?
Before snaking a toilet, it’s important to cover the floor with towels and wear rubber gloves for protection. Additionally, have a bucket or trash bag handy to collect any debris the snake retrieves. It may also be necessary to turn off the water to the toilet or close the flapper inside the tank to prevent overflow.
How do I insert the snake into the toilet?
To begin snaking the toilet, insert the end of the snake into the toilet bowl, making sure the curved section rests at the bottom of the bowl where it narrows into a pipe. The plastic or metal rod around the snake prevents it from scratching the porcelain. Push the handle downward and rotate it clockwise to help the snake navigate through the plumbing.
How do I extend and rotate the snake?
Push down on the handle of the snake while rotating it clockwise to fully extend the snake into the plumbing. The snake may require some effort to feed it all the way in due to the curved nature of the plumbing. If the snake encounters an obstruction, rotate the handle counterclockwise a few times while jostling the shaft to help it move past the blockage.
How do I retract and remove the snake?
Once the snake has been fully extended, turn the handle clockwise 5-10 times to loosen the obstruction. Then, pull and twist the handle counterclockwise to retract the snake from the plumbing. If the snake clears the clog, the water in the bowl should drain. If not, repeat the process until the clog is cleared.
How do I plunge and flush the pipes?
After retracting the snake, use a plunger to further remove any remnants of the clog. Plunge the toilet a few times to ensure proper drainage. You can also pour toilet bowl cleaner into the toilet and let it sit for 30 minutes before flushing. Alternatively, you can use a mixture of baking soda and white vinegar followed by a flush.
What are some tips to avoid toilet clogs?
To minimize toilet clogs, only flush water-soluble items like toilet paper. Avoid flushing paper towels, tissues, and other non-dissolvable materials. Reduce the amount of toilet paper used and consider using single-ply toilet paper. Act quickly when you notice signs of a clog, such as low water level or slow flushing. Keep the toilet and pipes clean by regularly cleaning the toilet and using toilet cleaners specifically formulated for toilets.
What should I do when a toilet is clogged?
When dealing with a clogged toilet, take immediate steps to prevent overflow. Close the flapper or turn off the water supply to the toilet. Place towels or newspapers around the toilet to protect the floor. If the obstruction is within reach, try to remove it by hand with rubber gloves. If there is a strong smell of gas, contact a plumber immediately.
How do I fix a clogged toilet with a plunger?
A plunger can be an effective tool for unclogging a toilet. Use a heavy-duty plunger with a ball-shaped head or rubber flanges. Ensure the toilet bowl has enough water to cover the plunger. Maintain a seal and vigorously plunge up and down until the water begins to drain. Repeat if necessary. Clean the plunger before storing.
How do I fix a clogged toilet with a snake?
If plunging doesn’t work, a toilet auger or plumbing snake can be used. Insert the snake into the toilet and crank the handle to extend it into the plumbing. Rotate the handle to break up the obstruction. Fully extend the snake, then retract and remove it. If necessary, snake the toilet again until the clog is cleared.
What are some concluding thoughts on snaking a toilet?
Snaking a toilet can be an effective method for unclogging stubborn blockages. By following the step-by-step process and using the right tools, you can easily clear a clog and restore proper flushing. Remember to take precautions, such as wearing gloves and protecting the floor, and regularly maintain your toilet to prevent future clogs.