Remember that feeling of excitement when you got your hands on your new iPhone? The anticipation of exploring its sleek design, the promise of advanced features, and the potential for endless possibilities. But along with that excitement comes the daunting task of transferring all your precious data from your old iPhone to the new one.
As much as we love the idea of a fresh start, the thought of losing photos, contacts, messages, and other important data can be overwhelming. We’ve all been there, desperately searching for a solution to ensure a smooth transition without losing any memories.
Well, fret not! We’ve got you covered with this comprehensive guide on how to transfer your data seamlessly from your old iPhone to your new one. Whether you’re upgrading to the latest model or switching to a new device for a change, we’ll walk you through the step-by-step process, ensuring that no memory is left behind.
Using Quick Start for iPhone to iPhone Transfer
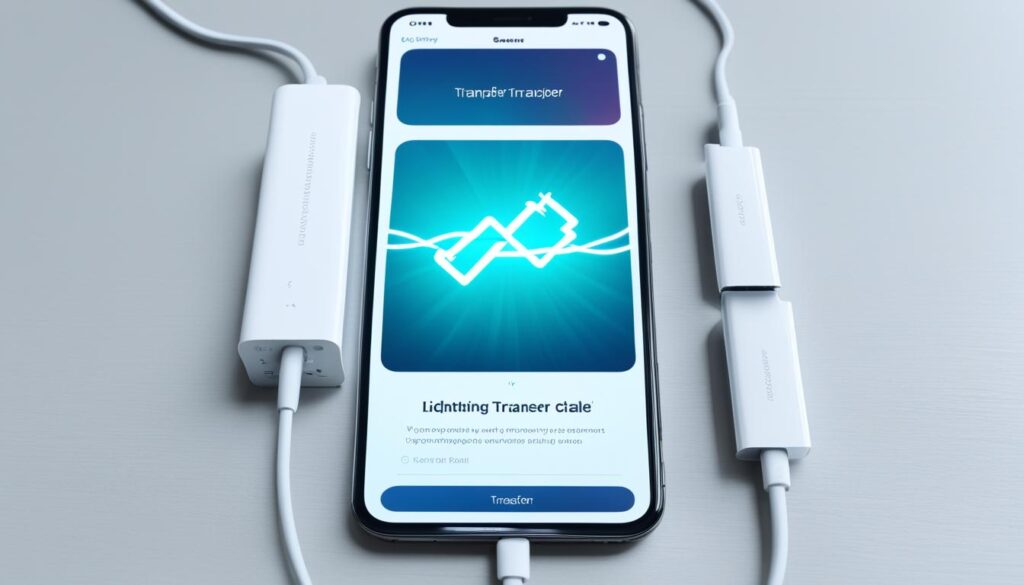
One of the easiest ways to transfer data from your old iPhone to your new iPhone is by using the Quick Start feature. Simply ensure that both devices are connected to Wi-Fi, turn on your new iPhone, and follow the onscreen instructions to get started. This method allows for a quick and seamless transfer of your apps and data between the two devices, making it an ideal option for those looking for a hassle-free experience.
With Quick Start, you don’t need to worry about manually transferring each app or piece of data. The feature makes use of the proximity of the two iPhones and transfers all compatible data automatically. This includes your apps, settings, messages, photos, and more. It even takes care of the initial setup process, saving you time and effort.
Follow these steps to transfer your data using Quick Start:
- Make sure both iPhones are connected to Wi-Fi.
- Power on your new iPhone by pressing and holding the side or top button.
- Place your old iPhone near your new iPhone.
- A popup message will appear on your new iPhone asking if you want to use Quick Start. Tap “Continue” to proceed.
- Use your old iPhone to scan the animation that appears on your new iPhone.
- Enter your old iPhone’s passcode on your new iPhone.
- Follow the onscreen instructions to complete the transfer process.
During the transfer, your new iPhone will display the estimated time remaining for the process to complete. The duration may vary depending on the amount of data being transferred. It’s important to keep both iPhones near each other and on Wi-Fi until the transfer is finished.
Once the transfer is complete, you can disconnect your old iPhone and start using your new iPhone. All your apps will be installed, and your data will be ready for you to access.
| Pros | Cons |
|---|---|
| Quick and effortless transfer | Requires both iPhones to be in close proximity |
| Transfers all compatible data automatically | Relies on Wi-Fi connection |
| Saves time and effort | May take longer for larger amounts of data |
Overall, Quick Start offers a simple and efficient way to transfer data from your old iPhone to your new iPhone. Whether you’re upgrading to a new device or setting up a second iPhone, this feature ensures a smooth transition with minimal effort.
Transferring Data via iCloud Backup
When it comes to transferring data to your new iPhone, one reliable option is using iCloud backup. To ensure a seamless transfer, it’s important to create a recent backup of your old iPhone using iCloud before setting up your new device.
During the setup process of your new iPhone, you’ll have the option to restore from an iCloud backup. Simply sign in to your iCloud account and select the backup you want to restore. This method allows for a comprehensive transfer of your apps, settings, and data from your old iPhone to your new one.
Restoring from an iCloud backup ensures that your new iPhone will have the same apps, configurations, and data as your old device. Whether it’s your contacts, photos, calendar events, or even app preferences, you can have them all transferred seamlessly.
How to Transfer Data via iCloud Backup:
- Create a recent backup of your old iPhone using iCloud.
- Power on your new iPhone and begin the setup process.
- Choose the option to restore from an iCloud backup.
- Sign in to your iCloud account.
- Select the backup you want to restore.
- Wait for the restoration process to complete.
- Once done, your new iPhone will have all the apps, settings, and data from your old device.
It’s important to note that a stable and reliable internet connection is necessary for a successful transfer via iCloud backup. Additionally, make sure to keep your devices connected to power during the restoration process to avoid any interruptions.
| Data Transferred via iCloud Backup | Notable Features |
|---|---|
| Apps | Restores all the apps installed on your old iPhone. |
| Settings | Includes system settings, app preferences, and customizations. |
| Photos | Transfers your entire photo library, including albums and organization. |
| Contacts | Migrates all your contacts, ensuring seamless communication. |
| Calendar Events | Transfers all your upcoming events and appointments. |
| Messages | Restores your messages, allowing you to continue conversations seamlessly. |
| Notes | Transfers your notes, ensuring you don’t lose any important information. |
| Safari Bookmarks | Migrates all your saved bookmarks for easy web browsing. |
By utilizing iCloud backup, you can easily transfer all your important data to your new iPhone without the need for cables or additional software. This method is particularly useful if you want a hassle-free transfer experience that ensures your new device is set up just the way you like it.
Transferring Data via iTunes Backup
If you prefer to use iTunes for transferring data between your iPhones, you can create a backup of your old iPhone using iTunes and then restore that backup to your new iPhone. Follow these steps to transfer your apps, data, and settings:
- Connect your old iPhone to your computer using the USB cable.
- Open iTunes on your computer. If it doesn’t open automatically, you can manually open it.
- Click on the device icon, which appears in the upper-left corner of the iTunes window. It resembles an iPhone.
- In the “Backups” section, click on the “Back Up Now” button to create a backup of your old iPhone. Wait for the backup process to complete.
- Once the backup is finished, disconnect your old iPhone from the computer.
- Turn on your new iPhone and complete the setup process until you reach the “Apps & Data” screen.
- Select the “Restore from iTunes Backup” option.
- Connect your new iPhone to the computer using the USB cable.
- In iTunes, select your new iPhone from the device list.
- Under the “Backups” section, choose the backup you created earlier.
- Click on the “Restore Backup” button to start the transfer process.
- Wait for the transfer to complete. Your new iPhone will restart and then sync with the transferred data.
This method allows for a direct and efficient transfer of your apps, data, and settings from your old iPhone to your new one. By following these steps, you can seamlessly migrate your data without any hassle.
Transferring Data via AirDrop
For those who prefer a wireless method of transferring data between iPhones, AirDrop can be a convenient option. With AirDrop, you can easily transfer files like photos, videos, and more between two Apple devices.
Simply ensure that Bluetooth and Wi-Fi are turned on, select the files you want to transfer, and choose the target iPhone from the AirDrop options.
This method allows for a quick and wireless transfer of specific files between iPhones.
AirDrop offers a seamless way to share files directly between Apple devices. Whether you need to quickly send vacation photos to a friend or share a presentation with a colleague, AirDrop simplifies the process.
Using iOS Data Transfer Software
If you want more control over the data transfer process, you can use professional iOS data transfer software like EaseUS MobiMover. This software allows you to transfer various types of data, including photos, videos, contacts, messages, and more, from one iPhone to another.
Simply connect both devices to your computer, select the files you want to transfer, and follow the instructions provided by the software. This method offers a comprehensive and customizable transfer of data between iPhones.
Key Features of EaseUS MobiMover:
- Easy-to-use interface: The software provides a user-friendly interface that makes the data transfer process intuitive and hassle-free.
- Wide range of supported data types: You can transfer photos, videos, contacts, messages, music, notes, and more using this powerful tool.
- Selective transfer: With EaseUS MobiMover, you have the flexibility to choose specific files or categories to transfer, giving you full control over your data.
- No data loss: The software ensures that your data remains intact during the transfer process, so you don’t have to worry about losing any valuable information.
- High-speed transfer: EaseUS MobiMover utilizes advanced technology to transfer data quickly and efficiently, saving you time and effort.
Whether you’re upgrading to a new iPhone or simply need to transfer data between devices, iOS data transfer software like EaseUS MobiMover can make the process seamless and stress-free. Take advantage of its powerful features to ensure a smooth transition to your new device.
Transfer Data using iCloud Syncing Photos
If you mainly want to transfer photos from your old iPhone to your new iPhone, you can utilize iCloud syncing photos. By enabling iCloud Photo Library on both devices, your photos will be automatically synced, allowing you to access them on your new iPhone. This method is perfect for individuals who primarily want to transfer photos without the need for transferring all data and settings.
Syncing Photos with iCloud
To transfer your photos using iCloud syncing, follow these simple steps:
- Ensure both your old and new iPhone are connected to a stable Wi-Fi network.
- On your old iPhone, go to “Settings” and tap on your name at the top of the screen to access your Apple ID settings.
- Select “iCloud” and then “Photos.”
- Toggle on the “iCloud Photo Library” option.
- Wait for your photos to upload to iCloud.
- Once the upload is complete, take your new iPhone and follow the onscreen setup instructions.
- During setup, sign in to your Apple ID and ensure the same iCloud account is used.
- Enable the “iCloud Photo Library” option on your new iPhone.
- Your photos will now be synced automatically, and you can access them in the Photos app on your new iPhone.
With iCloud syncing photos, you can conveniently transfer your cherished memories from your old iPhone to your new one without the need for manual transfers or the usage of external tools.
Note: It may take some time for all your photos to sync depending on the size of your photo library and internet speed.
Considerations for Choosing a Data Transfer Method
When it comes to transferring data from your old iPhone to your new iPhone, there are several important considerations to keep in mind. By weighing these factors, you can select the right method that best suits your needs and preferences.
Amount of Data
The first consideration is the amount of data you need to transfer. Are you looking to transfer just a few photos and contacts, or do you want to transfer all of your apps, settings, and files? Understanding the size of your data will help you evaluate the most suitable method for your transfer.
Control Over the Transfer
Another factor to consider is the level of control you want over the transfer process. Some methods, like Quick Start and iCloud backup, offer a seamless and automated transfer, while others, like iTunes backup and iOS data transfer software, provide more control and customization options. Evaluate your preferences to find the method that aligns with your desired level of involvement.
Speed and Convenience
The speed and convenience of the transfer method are also important considerations. Some methods, such as AirDrop, offer quick and wireless transfers for specific files, while others, like iCloud and iTunes backup, involve longer transfer times but are more comprehensive. Consider your time constraints and the urgency of your data transfer to determine which method suits you best.
Specific Requirements and Limitations
Lastly, it’s crucial to be aware of any specific requirements or limitations of the transfer method. For example, iCloud backup requires a stable internet connection, while iTunes backup necessitates a computer with iTunes installed. Take note of these requirements to ensure that your chosen method is compatible with your devices and circumstances.
By considering the amount of data, level of control, speed and convenience, and specific requirements, you can make an informed decision when choosing the right data transfer method for your iPhone to iPhone transfer.
Other Tips for a Smooth Data Transfer Experience
In addition to choosing the right transfer method, there are a few tips that can help ensure a seamless data transfer experience for your iPhone to iPhone transfer:
- Ensure both devices are fully charged or connected to a power source during the transfer: A stable power source guarantees that the transfer process will not be interrupted due to low battery life.
- Keep both devices close together: Maintaining physical proximity between the old and new iPhones ensures a strong and stable connection for a smooth and uninterrupted transfer.
- Check for specific requirements or limitations: Different transfer methods may have specific requirements or limitations. It is important to review the guidelines or documentation provided by the chosen transfer method to ensure a seamless transfer.
| Tips for a Smooth Data Transfer Experience |
|---|
| Ensure both devices are fully charged or connected to a power source during the transfer |
| Keep both devices close together |
| Check for specific requirements or limitations |
By following these tips, you can minimize any potential disruptions or issues during the data transfer process and ensure a seamless transfer experience.
Troubleshooting and Support
If you encounter any difficulties or issues during the data transfer process, don’t panic. Apple provides comprehensive support resources to assist you. Whether you need help troubleshooting a specific problem or have general questions about transferring data to a new iPhone, Apple Support is here to guide you through the process.
Here are some ways you can get the support you need:
- Online Guides and Tutorials: Apple offers a wide range of online resources, including step-by-step guides and tutorials, to help you troubleshoot common data transfer issues. These guides provide detailed instructions and troubleshooting tips to resolve any challenges you may face.
- Apple Support Website: Visit the Apple Support website to access a wealth of information and resources. You can search for specific topics or browse through support articles to find solutions to your data transfer queries.
- Contact Apple Support: If you need personalized assistance, you can contact Apple Support directly. Apple experts are available via phone, chat, or email to provide guidance and support tailored to your specific data transfer needs.
Remember, Apple Support is there to help you overcome any obstacles you may encounter when transferring data to your new iPhone. Don’t hesitate to reach out for assistance to ensure a successful and smooth transfer process.
Troubleshooting Tips
While Apple Support is always available to assist you, here are some general troubleshooting tips that can help resolve common data transfer issues:
- Ensure both devices are connected to a stable Wi-Fi network during the transfer process.
- Make sure both devices have sufficient battery life or are connected to a power source to prevent interruptions during the transfer.
- Restart both devices if you encounter any connectivity or compatibility issues.
- Double-check that you are using the correct transfer method that aligns with your specific data transfer requirements.
- Review the support documentation provided by Apple for the specific transfer method you are using to troubleshoot any known issues.
By following these troubleshooting tips and utilizing the support resources available, you can overcome any difficulties and ensure a successful transfer of your data to your new iPhone.
Conclusion
Transferring data from your old iPhone to your new iPhone can be a seamless and hassle-free process. By following the step-by-step instructions and utilizing the right tools and methods, you can easily transfer your apps, data, and settings to your new device. Whether you choose to use Quick Start, iCloud, iTunes, or other transfer methods, you have the flexibility to decide what works best for you.
During the iPhone upgrade process, it’s important to consider factors such as the amount of data you need to transfer, the level of control you want over the transfer process, and the speed and convenience of the method. This ensures that you select the most suitable method that aligns with your needs and preferences.
With the variety of options available, whether it’s using Apple’s built-in features like Quick Start or iCloud, or utilizing third-party tools like iOS data transfer software, you have the freedom to choose the method that suits you best. Upgrade your iPhone with confidence, knowing that your valuable data will be safely transferred to your new device, allowing you to seamlessly continue your digital journey.
FAQ
How can I transfer data from my old iPhone to my new iPhone?
There are several methods to transfer data from your old iPhone to your new iPhone. You can use Quick Start, iCloud backup, iTunes backup, AirDrop, iOS data transfer software, or iCloud syncing photos depending on your specific needs and preferences.
How does Quick Start work for iPhone to iPhone transfer?
Quick Start allows for a quick and seamless transfer of apps and data between two iPhones. Simply ensure both devices are connected to Wi-Fi, turn on your new iPhone, and follow the onscreen instructions to get started.
How can I transfer data via iCloud backup?
Before setting up your new iPhone, make sure you have created a recent backup of your old iPhone using iCloud. During the setup process of your new iPhone, choose to restore from an iCloud backup, sign in to your iCloud account, and select the backup you want to restore.
How do I transfer data via iTunes backup?
Connect your old iPhone to your computer, open iTunes, and click on the device icon. From there, choose to back up your device and then select the backup to restore during the setup process of your new iPhone.
How can I transfer data between iPhones using AirDrop?
Enable Bluetooth and Wi-Fi on both devices, select the files you want to transfer, and choose the target iPhone from the AirDrop options. This method allows for a quick and wireless transfer of specific files between iPhones.
What is iOS data transfer software, and how can I use it?
iOS data transfer software like EaseUS MobiMover allows you to transfer various types of data from one iPhone to another. Simply connect both devices to your computer, select the files you want to transfer, and follow the software’s instructions.
How can I transfer data using iCloud syncing photos?
By enabling iCloud Photo Library on both devices, your photos will be automatically synced, allowing you to access them on your new iPhone. This method is ideal for transferring photos without the need for a complete transfer of all data and settings.
What factors should I consider when choosing a data transfer method for my iPhone to iPhone transfer?
Some factors to consider include the amount of data you need to transfer, the level of control you want over the transfer process, the speed and convenience of the method, and any specific requirements or limitations of the method.
Are there any tips for a smooth data transfer experience?
Yes, some tips include ensuring both devices are fully charged or connected to a power source, keeping them close together to maintain a stable connection, and checking for any specific requirements or limitations of the transfer method you are using.
What should I do if I encounter difficulties or issues during the data transfer process?
If you encounter any difficulties or issues, Apple provides comprehensive support resources, including online guides and tutorials. You can also contact Apple Support for assistance with troubleshooting specific problems or general questions about the data transfer process.
Is transferring data from my old iPhone to my new iPhone a complicated process?
No, with the right tools and methods, transferring data from your old iPhone to your new iPhone can be a seamless process. Whether you choose to use Quick Start, iCloud, iTunes, or other transfer methods, following the step-by-step instructions and considering the factors discussed in this guide will help ensure a smooth and successful data transfer experience.

