Have you ever found yourself buried under stacks of papers, desperately searching for that one important document? Or maybe you’ve needed to sign a contract urgently, but didn’t have access to a printer or scanner. We’ve all been there, and it can be incredibly frustrating.
But what if I told you that you can easily scan and digitize documents right from your iPhone? That’s right, with just a few taps, you can transform physical paperwork into digital files, allowing you to organize, save, and access them with ease.
Whether you’re a student, a professional, or simply someone who values efficiency and organization, the scanning capabilities of your iPhone can revolutionize the way you handle documents. No more cluttered desk, no more searching through countless folders – just a simple, streamlined process that puts everything at your fingertips.
Curious to know more? In this article, we will guide you through the steps of scanning documents on your iPhone, using both the built-in apps and third-party alternatives. We’ll also explore additional tips and tricks to optimize your scanning experience. So grab your phone, and let’s dive in!
Key Takeaways:
- Scanning documents on your iPhone is a convenient way to digitize and organize paperwork.
- With the built-in Notes and Files apps, you can easily capture and save scanned documents on your iPhone.
- Continuity Camera allows for seamless integration between iPhone and Mac, extending your scanning capabilities.
- There are also third-party scanner apps available that offer additional features like OCR and advanced editing options.
- Optimize your scanning experience by following tips like ensuring proper lighting and using stable surfaces for clear scans.
How to Scan a Document in Notes
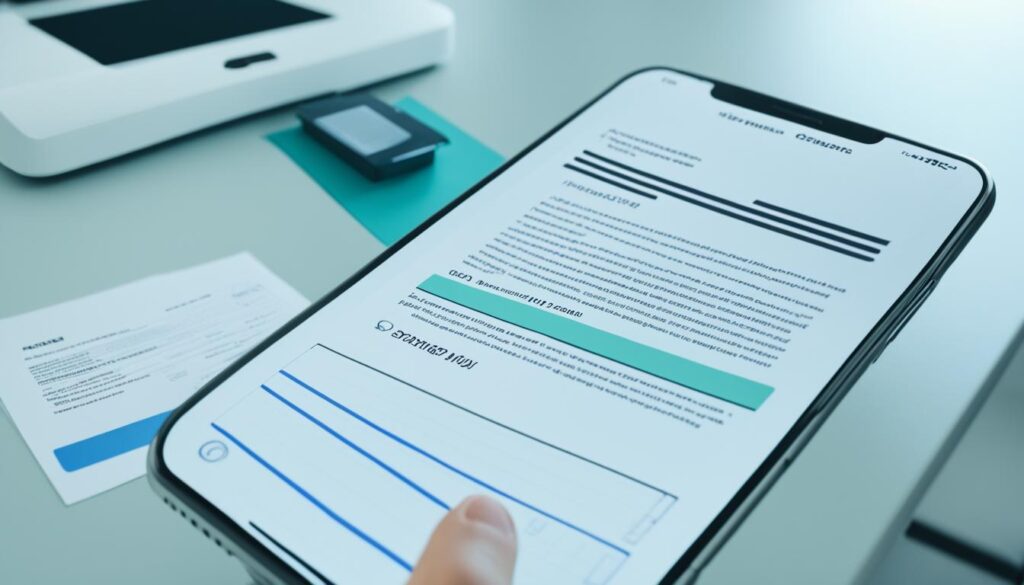
To scan a document using your iPhone, open the Notes app and select a note or create a new one. Tap on the Camera button, then choose the option to Scan Documents. Position your document within the camera’s view, and it will automatically scan. If needed, you can manually capture a scan by tapping the Shutter button. Adjust the corners to fit the page and tap Keep Scan to save it. You can then save the scanned document or add additional scans to the same note.
Scanning documents with your iPhone is a simple process that can be done using the built-in Notes app. By following these steps, you can quickly digitize your physical documents and easily store them on your device. The Notes app provides a convenient tool for iPhone scanning, allowing you to create a digital archive of important paperwork or quickly capture new documents on the go.
Signing a Document in Notes
If you need to sign a document on your iPhone, the Notes app provides a convenient method to add your digital signature. Follow these simple steps:
- Open the Notes app on your iPhone.
- Locate the document you want to sign.
- Tap on the document to open it.
- Tap the Share button, typically represented by a square with an upward arrow.
- From the Share menu, select Markup.
- In the Markup view, you can choose to add a saved signature or create a new one by tapping the (+) button.
- Adjust the size and position of the signature box to fit your document.
- Once you’re satisfied with the signature placement, tap Done to complete the process.
Alternatively, if you prefer a more personal touch, you can sign a document using your finger or an Apple Pencil. Simply follow the same steps, but instead of selecting a saved signature or creating a new one, use your finger or Apple Pencil to sign directly on the document in the Markup view.
Adding your digital signature using the Notes app gives your document the professional touch and security it needs.
Secure and Legally Binding
In today’s digital world, signing documents electronically has become increasingly common. With the ability to sign documents on your iPhone, you can handle important paperwork efficiently and securely. The built-in digital signature feature in the Notes app ensures that your signature is legally binding and provides the necessary level of authenticity.
Capture seamless signatures with your favorite pen and paper
If you prefer using a pen and paper for your signature, you can easily digitize it and use it across multiple documents on your iPhone. Simply take a photo of your signature using your iPhone’s camera and save it to your device. Then, add it as a saved signature in the Markup view of the Notes app. This way, you can have the best of both worlds – the authenticity of your handwritten signature combined with the convenience of digital documentation.
| Benefits of Signing Documents in Notes: |
|---|
| 1. Convenience – Sign documents directly on your iPhone. |
| 2. Security – Ensure the integrity and authenticity of your signature. |
| 3. Legally Binding – Digital signatures hold legal validity. |
| 4. Personalization – Choose between a saved signature or sign with your finger or Apple Pencil. |
| 5. Seamless Integration – Your signed documents can be easily stored and shared within the Notes app. |
Signing documents on your iPhone with the Notes app offers a streamlined process that saves you time, eliminates the need for physical paperwork, and allows you to keep your important documents organized in one place. Whether you’re signing contracts, agreements, or any other legal documents, the Notes app provides a reliable and user-friendly solution.
Scanning a Document in Files
In addition to the Notes app, you can also scan documents directly into the Files app on your iPhone.
- Open the Files app and choose a location to save your scan.
- Tap the More button (represented by three dots) in the upper right corner.
- Select Scan Documents.
- Position your document within the camera’s view.
- Either tap the Shutter button or wait for the scan to capture automatically.
- Adjust the corners if needed.
- Tap Keep Scan to save it.
- You can add more scans or tap Save to finalize the process.
Comparison of Scanning Methods
| Scanning Method | App/Service | File Format | Ability to Add Multiple Scans |
|---|---|---|---|
| Notes app | Notes | Yes | |
| Files app | Files | Yes | |
| Third-party scanner apps | Adobe Scan, CamScanner, Scanner Pro, Microsoft Office Lens | PDF, JPEG | Yes |
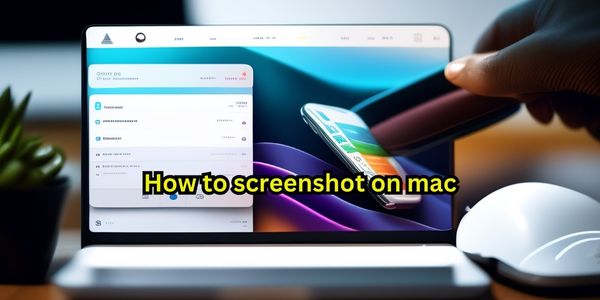
Using Continuity Camera to Scan or Take Photos
Continuity Camera is a powerful feature that allows you to harness the scanning and photography capabilities of your iPhone directly on your Mac. With Continuity Camera, you can seamlessly capture high-quality scans and photos using your iPhone and instantly have them available on your Mac for further use.
This feature is supported by various apps such as Finder, Keynote, Mail, Messages, Notes, Numbers, Pages, and TextEdit. Whether you need to scan a document or capture a visual moment, Continuity Camera provides a convenient solution.
To use Continuity Camera, simply open one of the supported apps on your Mac and follow these steps:
- If you want to insert a scanned document or photo in a specific location, control-click in that location. Alternatively, you can choose the respective option from the File menu if available in the app.
- Next, select the “Scan Document” or “Take Photo” option.
- On your iPhone, the Camera app will automatically open.
- Capture the desired photo or scan using your iPhone’s camera.
- Once captured, the image will appear on your Mac, ready for immediate use.
With Continuity Camera, you have the flexibility to utilize your iPhone’s advanced camera technology while seamlessly incorporating the captured content into your Mac workflow. Whether you’re scanning important documents, capturing visual inspiration, or simply preserving memories, Continuity Camera simplifies the process and enhances your productivity.
By leveraging the power of Continuity Camera, you can streamline your workflow, save time, and ensure that your documents and visual content are readily available across your devices.
Continuity Camera empowers you to harness the full potential of your iPhone’s camera capabilities seamlessly. Capture documents, photos, and visual inspiration with ease and have them instantly available on your Mac, eliminating the need for manual transfers or additional steps. Take advantage of this innovative feature and elevate your productivity today.
Mac Requirements for Continuity Camera
To use Continuity Camera with your iPhone and Mac, ensure that your devices meet the compatibility requirements. Continuity Camera is compatible with a range of Apple devices, including:
- MacBook models introduced in 2015 or later
- MacBook Pro models from 2012 or later
- MacBook Air models from 2012 or later
- Mac mini models from 2012 or later
- iMac models from 2012 or later
- iMac Pro
- Mac Pro models from 2013 or later
- Mac Studio models from 2022 or later
- iPhone models
- iPad models
- iPod touch models
By ensuring that your devices meet these compatibility requirements, you can take advantage of the seamless integration between your iPhone and Mac enabled by Continuity Camera.
Scanning Documents with an iPhone without Third-Party Apps
If you own an iPhone, you can take advantage of Apple’s built-in document scanner feature, eliminating the need for third-party apps. With this feature, you can easily scan documents using your iPhone’s camera and save them as PDFs. Whether you’re looking to digitize important paperwork or simply want to store receipts for easy access, the built-in scanner is a convenient tool at your fingertips.
This functionality is available in apps like Notes and Files, allowing you to scan documents directly into these applications without downloading any additional software. With just a few simple steps, you can turn your iPhone into a powerful document scanner.
To scan a document using the built-in scanner on your iPhone:
- Open the Notes or Files app on your iPhone.
- Create a new note or select an existing one.
- Tap on the camera button within the app.
- Choose the option to “Scan Documents”.
- Position your document within the camera’s view, ensuring that it is well-lit and clearly visible.
- Wait for the scan to automatically capture, or manually capture the scan by tapping the shutter button.
- Adjust the corners of the document if needed.
- Tap “Keep Scan” to save the scanned document.
Once you’ve saved the scanned document, you can easily access it within the Notes or Files app. You can also organize and store your scanned documents by creating folders or adding tags for efficient retrieval.
This built-in scanner on the iPhone provides a seamless and convenient way to digitize your physical documents without the need for third-party apps. Whether you’re a student, professional, or simply someone who wants to reduce clutter, take advantage of this feature to simplify your document management process.
| Pros | Cons |
|---|---|
| Eliminates the need for additional app downloads. | May not offer the same advanced features as third-party scanner apps. |
| Integrated with native iOS apps like Notes and Files. | Limited options for editing and enhancing scanned documents. |
| Saves scanned documents as PDFs for easy sharing and archiving. | May not be suitable for specialized scanning needs. |
| Convenient and user-friendly interface. | Dependent on the quality of the iPhone’s camera. |
| Saves storage space by eliminating the need for physical copies. | May not be suitable for high-volume scanning. |
Overall, the built-in document scanner on the iPhone offers a practical solution for scanning documents on the go. Whether you’re scanning receipts, contracts, or important paperwork, this feature simplifies the process and allows you to easily manage your digital files. Give it a try and experience the convenience of scanning documents with your iPhone.
Benefits of Scanning Documents on Your iPhone
Scanning documents on your iPhone offers several benefits. Firstly, it allows for quick and convenient digitization of physical documents, eliminating the need for traditional scanning equipment. With just a few taps, you can capture important papers and convert them into digital files that are easily accessible.
One of the key advantages of iPhone document scanning is the ability to easily organize and store scanned documents electronically. By saving documents in digital format, you can reduce paper clutter and create a more organized and efficient filing system. With the built-in scanning capabilities of your iPhone, you can quickly categorize and search for specific documents, making it easy to find what you need when you need it.
Furthermore, scanning documents on your iPhone often produces high-quality results. The camera technology on iPhones is advanced and offers features such as automatic scanning, which ensures that your scans are clear and crisp. You also have the ability to adjust corners and optimize document visibility, enhancing the overall quality of the scanned document.
Overall, utilizing the built-in scanning capabilities of your iPhone provides a seamless and efficient method for handling documents. Whether you’re a student, a professional, or just someone who wants to go paperless, scanning documents on your iPhone offers convenience, organization, and high-quality results.

Comparison of Scanning Methods
| Method | Advantages | Disadvantages |
|---|---|---|
| Traditional Scanners |
|
|
| Third-Party Scanning Apps |
|
|
| iPhone Document Scanning |
|
|
Best Scanner Apps for iPhone
While the built-in scanner on your iPhone is effective, there are also third-party scanner apps available that offer enhanced scanning features. These scanner apps provide users with advanced functionalities, turning their iPhones into powerful scanning tools for various document management needs. Here are some of the top scanner apps for iPhone:
1. Adobe Scan
Adobe Scan is a highly recommended scanner app for iPhone, offering exceptional scanning capabilities. With its built-in OCR technology, it can convert scanned documents into searchable and editable files. The app also integrates seamlessly with Adobe Cloud, allowing easy access and storage of scanned documents across devices.
2. CamScanner
CamScanner is another popular scanner app preferred by many iPhone users. It features an intuitive interface and offers various scanning modes for different document types. Additionally, CamScanner provides smart cropping and image enhancement, ensuring high-quality scans every time.
3. Scanner Pro
Scanner Pro is a user-friendly scanner app that allows you to scan documents quickly and effortlessly. It provides automatic edge detection, perspective correction, and document enhancement features to ensure optimal scan quality. Furthermore, Scanner Pro supports various cloud storage integrations, making it easy to save and share scanned documents.
4. Microsoft Office Lens
Microsoft Office Lens is a versatile scanner app that integrates seamlessly with the entire Microsoft Office suite. It is capable of capturing different document types and optimizing them for easy reading and editing. Office Lens also offers reliable OCR functionality, allowing you to extract text from scanned documents accurately.
These scanner apps provide a range of convenient features such as OCR, cloud storage integration, and advanced editing options. Users can explore these apps to find the one that best suits their scanning needs and preferences. Whether you need to scan receipts, contracts, or important documents, these scanner apps for iPhone are sure to enhance your document scanning experience.
In Summary
Third-party scanner apps for iPhone offer enhanced features such as OCR, cloud storage integration, and advanced editing options. Some of the top scanner apps include Adobe Scan, CamScanner, Scanner Pro, and Microsoft Office Lens. These apps provide users with powerful scanning capabilities, making it easy to digitize and manage documents on their iPhones.
Tips for Optimizing iPhone Document Scanning
Scanning documents on your iPhone is a convenient way to digitize your paperwork. By following these tips, you can enhance your iPhone document scanning experience and ensure high-quality scans.
1. Ensure Proper Lighting
To capture clear and legible scans, it’s essential to have adequate lighting. Scan your documents in a well-lit environment or use the device’s flash to achieve optimal results.
2. Place Documents on a Stable Surface
When scanning, place your document on a flat and stable surface to prevent blurriness or distortion. This ensures that the entire document is captured accurately.
3. Keep Document Within the Frame
Position the document within the camera’s frame to avoid cropping important information. Adjust the corners if needed to include the entire document in the scan.
4. Utilize Editing Options
Most scanning apps offer editing options to improve the scan quality. Adjust the brightness and contrast settings to enhance the legibility and visibility of the scanned document.
5. Regularly Update Scanning App
Stay up to date with the latest features and improvements by regularly updating your scanning app. This ensures you have access to the most advanced scanning capabilities.
By following these iPhone scanning tips, you can optimize the document scanning process and improve the overall scan quality. Enjoy the convenience of having digital copies of your important documents at your fingertips.
| Tip | Description |
|---|---|
| Ensure Proper Lighting | Scan in a well-lit environment or use the device’s flash. |
| Place Documents on a Stable Surface | Prevent blurriness by scanning on a flat and stable surface. |
| Keep Document Within the Frame | Position the document to include all information in the scan. |
| Utilize Editing Options | Adjust brightness and contrast settings to enhance scan quality. |
| Regularly Update Scanning App | Stay up to date with the latest features and improvements. |
Conclusion
Scanning documents on your iPhone is a simple and efficient process that can be accomplished using the built-in Notes and Files apps. With just a few taps, you can easily capture, save, and organize your documents digitally, eliminating the need for traditional scanning equipment.
Furthermore, the Continuity Camera feature allows for seamless integration between your iPhone and Mac, expanding the scanning capabilities across devices. This means you can effortlessly scan and transfer documents from your iPhone to your Mac, making it even more convenient to manage your files.
Whether you prefer to use the native scanner in the Notes and Files apps or explore third-party options, your iPhone provides a versatile and user-friendly solution for digitizing your documents. With the ability to adjust corners, optimize visibility, and save scans as PDFs, you can ensure high-quality results and easily access your documents whenever you need them.
So, start taking advantage of your iPhone’s powerful scanning capabilities and enjoy the simplicity of managing your files on the go. Say goodbye to paper clutter and embrace the digital age with the ease and convenience of scanning with your iPhone.
FAQ
How do I scan a document on my iPhone?
To scan a document using your iPhone, open the Notes app and select a note or create a new one. Tap on the Camera button, then choose the option to Scan Documents. Position your document within the camera’s view, and it will automatically scan. If needed, you can manually capture a scan by tapping the Shutter button. Adjust the corners to fit the page and tap Keep Scan to save it. You can then save the scanned document or add additional scans to the same note.
How can I sign a document on my iPhone?
To sign a document on your iPhone, open the Notes app and locate the document. Tap on the document, then tap the Share button and select Markup. From there, you can add a saved signature or create a new one. Adjust the size and position of the signature box as needed. Once you’re done, tap Done to complete the process. Alternatively, you can sign a document by following similar steps and signing with your finger or an Apple Pencil.
Can I scan documents directly into the Files app on my iPhone?
Yes, you can scan documents directly into the Files app on your iPhone. Open the Files app and choose a location to save your scan. Tap the More button (represented by three dots) in the upper right corner, then select Scan Documents. Position your document within the camera’s view and either tap the Shutter button or wait for the scan to capture automatically. Adjust the corners if needed and tap Keep Scan to save it. You can add more scans or tap Save to finalize the process. The scanned document will be saved as a PDF in the chosen location.
How can I use Continuity Camera to scan or take photos with my iPhone and Mac?
Continuity Camera allows you to use your iPhone as a tool for scanning documents or taking photos on your Mac. Open a supported app on your Mac and either control-click where you want the photo or scan to be inserted or choose the respective option from the File menu. The Camera app on your iPhone will open, allowing you to capture a photo or scan. Once captured, the image will appear on your Mac for further use.
What are the requirements for using Continuity Camera between my iPhone and Mac?
Continuity Camera works with MacBook models introduced in 2015 or later, MacBook Pro models from 2012 or later, MacBook Air models from 2012 or later, Mac mini models from 2012 or later, iMac models from 2012 or later, iMac Pro, Mac Pro models from 2013 or later, Mac Studio models from 2022 or later, iPhone models, iPad models, and iPod touch models.
Are there built-in scanning options on the iPhone?
Yes, Apple offers a built-in document scanner feature on iOS devices. With this feature, you can easily scan documents using the camera on your iPhone and save them as PDFs. This functionality is available in apps like Notes and Files, allowing you to scan documents directly into these applications without downloading additional software.
What are the benefits of scanning documents on my iPhone?
Scanning documents on your iPhone offers several benefits. Firstly, it allows for quick and convenient digitization of physical documents, eliminating the need for traditional scanning equipment. Additionally, scanned documents can be easily organized and stored electronically, reducing paper clutter and enabling easy access. Moreover, scanning on your iPhone often produces high-quality results, with the ability to adjust corners and optimize document visibility. Overall, utilizing the built-in scanning capabilities of your iPhone provides a seamless and efficient method for handling documents.
Are there any recommended scanner apps for iPhone?
Some popular scanner apps for iPhone include Adobe Scan, CamScanner, Scanner Pro, and Microsoft Office Lens. These apps offer advanced features like OCR (Optical Character Recognition), cloud storage integration, and advanced editing options. Users can explore these apps to find the one that best suits their scanning needs and preferences.
How can I optimize the scanning process on my iPhone?
To achieve optimal results when scanning documents on your iPhone, consider the following tips: Ensure proper lighting by scanning in a well-lit environment or using the device’s flash. Place the document flat on a stable surface to capture a clear image. Keep the document within the camera’s frame and adjust corners if needed. Utilize editing options within the scanning app to enhance scan quality, such as adjusting brightness and contrast. Regularly update the scanning app to access the latest features and improvements. By following these tips, you can enhance your iPhone document scanning experience.
Is scanning documents on an iPhone a straightforward process?
Yes, scanning documents on your iPhone is a straightforward process that can be done within the built-in Notes and Files apps. With a few taps, you can easily capture, save, and organize your documents digitally. Additionally, the Continuity Camera feature allows for seamless integration between iPhone and Mac, extending the scanning capabilities across devices. Whether you choose to use the native scanner or explore third-party apps, the iPhone provides a convenient and efficient solution for digitizing your documents. Start utilizing your iPhone as a portable scanner and enjoy the simplicity of managing your files on the go.