Do you ever find yourself wanting to capture a special moment on your screen? Maybe it’s a funny meme, an important message, or a beautiful image that you want to save and share. I know the feeling. There have been countless times when I’ve come across something that I just had to capture and keep.
That’s why I’m excited to share with you the simple and intuitive way to screenshot on your Dell laptop. Whether you’re using Windows 11, Windows 10, Windows 8.1, or Windows 8, Dell laptops offer convenient methods for capturing screenshots that will help you preserve those memorable moments forever.
With just a few keystrokes, you can capture anything on your screen and save it as an image file. The possibilities are endless – from capturing important information for work or school, to capturing cherished memories with family and friends.
In this article, we’ll explore different methods for screenshotting on Dell laptops, including using the Print Screen key, the Snipping Tool, and even third-party screenshot software. You’ll learn the keyboard shortcuts, how to customize your screenshots, and troubleshoot any issues you may encounter along the way.
So get ready to unlock the power of screen capture on your Dell laptop. Let’s dive in and start capturing those special moments!
Key Takeaways:
- Learn how to screenshot on your Dell laptop using the Print Screen key.
- Discover alternative methods for capturing screenshots, such as using the Snipping Tool.
- Explore third-party screenshot software for advanced features and customization options.
- Master troubleshooting techniques for resolving screenshot issues on your Dell laptop.
- Follow best practices for organizing, editing, and sharing your screenshots.
Using the Print Screen Key in Windows 11, Windows 10, Windows 8.1, and Windows 8
In Windows 11, Windows 10, Windows 8.1, and Windows 8, capturing screenshots is made easy using the Print Screen key in combination with other keys. Whether you want to capture the entire screen, all active windows, or a single active window, there are simple keyboard shortcuts you can use.
Keyboard Shortcuts for Windows 11 and Windows 10
To capture the entire screen in Windows 11 and Windows 10, simply press the Windows logo key + PrntScrn key together. You’ll notice a brief screen dimming effect, indicating that the screenshot has been taken. The captured screenshot is automatically saved to your Screenshots folder in the Pictures directory.
If you’re using a tablet, press the Windows logo button + volume down button together to capture the entire screen.
To capture all active windows instead of the entire screen, press the PrntScrn key.
If you only want to capture a single active window, tap or click on the window you wish to screenshot and then press the Alt + PrntScrn keys together. This will capture the active window and save it to your clipboard.
Keyboard Shortcut for Windows 8.1 and Windows 8
In Windows 8.1 and Windows 8, the process is similar to Windows 11 and Windows 10. Use the Windows logo key + PrntScrn key combination to capture the entire screen. Again, the captured screenshot will be saved to the Screenshots folder in the Pictures directory.
To capture all active windows, press the PrntScrn key.
If you want to capture a single active window, tap or click on the window and press the Alt + PrntScrn keys simultaneously to capture and save it to your clipboard.
Once you have captured a screenshot, you can open an image editor or a document and paste the screenshot. From there, you can edit, crop, annotate, or save the screenshot as desired.
Using the Print Screen key and its combinations in Windows makes it quick and convenient to capture screenshots on your Dell laptop running Windows 11, Windows 10, Windows 8.1, or Windows 8.
| Windows Version | Capture Entire Screen | Capture All Active Windows | Capture Single Active Window |
|---|---|---|---|
| Windows 11 and Windows 10 | Windows logo key + PrntScrn | PrntScrn | Alt + PrntScrn |
| Windows 8.1 and Windows 8 | Windows logo key + PrntScrn | PrntScrn | Alt + PrntScrn |
By utilizing the Print Screen key and its combinations, you can easily capture valuable moments on your Dell laptop’s screen, whether you’re running Windows 11, Windows 10, Windows 8.1, or Windows 8. Try it out and start capturing screenshots effortlessly.
Taking Screenshots on Dell Laptops with Print Screen Key
On most Dell laptops, the Print Screen key is located at the top of the keyboard on the right side. It may also be one of the Function keys, such as F10. To capture a screenshot, simply press the Print Screen key. If the Print Screen key is combined with F10, you may need to hold down the Fn key while pressing the Print Screen key. The captured screenshot will be saved to the clipboard, and you can paste it into an image editor or document.
If you prefer using a keyboard shortcut to quickly capture screenshots on your Dell laptop, the Print Screen key is your best friend. Just press the key, and your screenshot data will be saved to the clipboard, ready to be shared or edited. It’s a straightforward and efficient way to document your screen moments with ease.
Visual learners might appreciate the simplicity of how screenshots can be taken on Dell laptops using the Print Screen key. With just one press, the entire screen is captured and ready for further use. Whether you’re saving a memorable online conversation, capturing an important article, or creating a step-by-step tutorial, the Print Screen key makes it effortless to preserve moments that matter to you on your Dell laptop.
If you encounter difficulty locating the Print Screen key on your Dell laptop keyboard, consult your device’s user manual or the Dell support website for detailed instructions specific to your model. Once you become familiar with the location and functionality of the Print Screen key, capturing screenshots on your Dell laptop becomes second nature.
Now that you know how to take screenshots on your Dell laptop using the Print Screen key, let’s explore alternative methods in the following sections. They might have additional features and flexibility that suit your specific needs or preferences.
| Pros | Cons |
|---|---|
| Simple and quick | No advanced editing options |
| Effortlessly saves to clipboard | No automatic file-saving |
| Works on most Dell laptops | May require function key combination on some models |
Alternative Ways to Take Screenshots on Dell Laptops
In addition to using the Print Screen key, Dell laptops offer alternative methods for capturing screenshots. One popular option is the Snipping Tool, a built-in Windows utility that allows you to capture selected portions of the screen and save them as image files.
Using the Snipping Tool
The Snipping Tool provides a user-friendly interface for capturing screenshots on your Dell laptop. To access the Snipping Tool:
- Click on the Start menu.
- Type “snipping tool” in the search box.
- Select the Snipping Tool from the search results.
Once you open the Snipping Tool, you can choose from different types of snips, such as free-form, rectangular, window, or full-screen, depending on your specific needs. After capturing the desired portion of the screen, you can save the screenshot as an image file and use it as needed.
Using the Snipping Tool on Dell Laptops
The Snipping Tool is a versatile tool that allows you to capture screenshots on your Dell laptop with ease. This built-in Windows utility provides various snip options, enabling you to capture specific areas, windows, or the entire screen. Let’s explore how you can make the most of the Snipping Tool on your Dell laptop.
To open the Snipping Tool, simply click on the Start menu and search for “snipping tool.” Once opened, you will see a small toolbar with snip options at the top of the screen. These options include:
- Free-form Snip: Allows you to draw any shape around the area you want to capture.
- Rectangular Snip: Lets you capture a rectangular portion of the screen.
- Window Snip: Captures a specific window or dialog box.
- Full-screen Snip: Captures the entire screen.
Choose the snip option that best suits your needs by clicking on it. Once you have selected the snip type, your screen will fade, indicating that it is ready for capturing. Simply use your mouse or touchpad to draw or select the desired area of the screen. The captured snip will then appear in the Snipping Tool window.
- Save the snip as an image file: Click on the “Save” icon in the Snipping Tool toolbar, choose a location on your Dell laptop, and give the file a name.
- Copy the snip to the clipboard: Click on the “Copy” icon in the Snipping Tool toolbar to copy the snip to your clipboard. You can then paste it into an image editor or document.
- Use the Snipping Tool’s editing features: The Snipping Tool also offers basic editing options to enhance your captured snip. These include highlighting, cropping, and adding annotations. Simply click on the respective icons in the Snipping Tool toolbar to access these editing functions.
The Snipping Tool is a convenient and user-friendly tool that allows you to capture and customize screenshots on your Dell laptop. Whether you need to capture a specific area, a window, or the entire screen, the Snipping Tool provides a straightforward solution. Experiment with the different snip types and editing features to create professional-looking screenshots for various purposes.
Screenshot Tips and Tricks for Dell Laptops
Here are some tips and tricks for capturing screenshots on Dell laptops. These helpful techniques will allow you to capture your screen effortlessly and make the most out of your Dell laptop’s screenshot capabilities.
- To capture a specific window, simply use the Alt + Print Screen key combination. This will capture the active window and save it to your clipboard.
- If you want to capture the entire screen and save it as a file, use the Windows logo key + PrntScrn key combination. This quick shortcut will instantly capture the entire screen and save it as an image file.
- For capturing a selected portion of the screen, you can make use of the Snipping Tool or third-party screenshot software. These tools allow you to select a specific area of the screen and capture it with precision.
Remember to save your screenshots in a designated folder for easy access. This will help you stay organized and quickly find the screenshots you need when you want to refer back to them.
Take advantage of these screenshot tips and tricks to enhance your productivity on your Dell laptop. Whether you need to capture a specific window, the entire screen, or a selected area, these techniques will make the process quick and seamless.
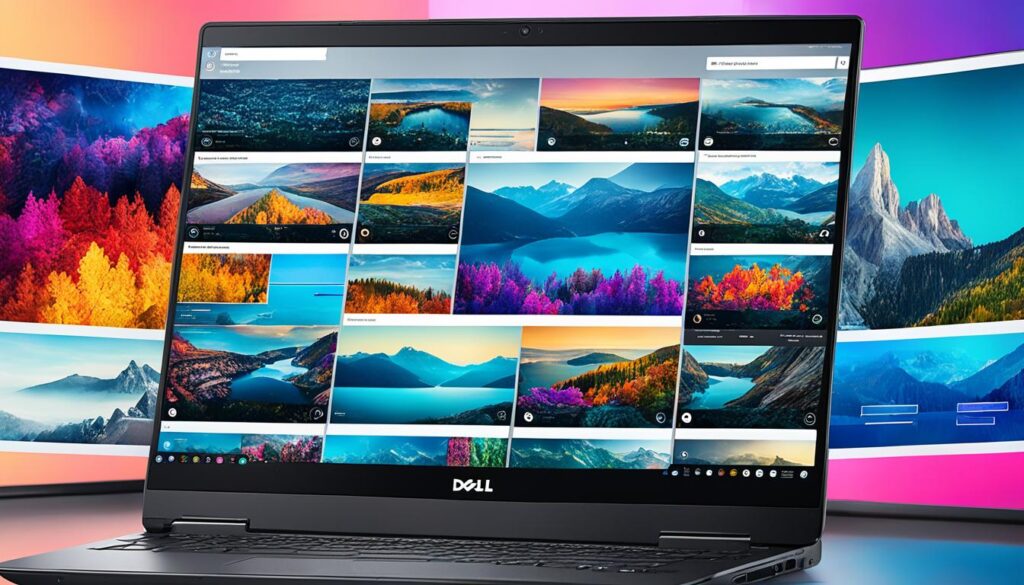
Use the image above as a visual reference to better understand the tips and tricks discussed in this section. It showcases the various screenshot techniques explained and visually highlights how they can be applied on your Dell laptop.
Troubleshooting Screenshot Issues on Dell Laptops
If you’re facing problems with capturing screenshots on your Dell laptop, there are several troubleshooting steps you can take to resolve the issue. Follow the guide below to troubleshoot and fix any screenshot-related problems you may encounter.
1. Check Print Screen Key Functionality
Start by testing the functionality of the Print Screen key in various applications. Press the Print Screen key on your Dell laptop and verify if it captures the screen successfully. If the key doesn’t work, move on to the next step.
2. Check for Driver Updates
An outdated or incompatible driver could be causing issues with the Print Screen key. Visit Dell’s official website and download the latest driver updates for your laptop model. Install the updates and test the Print Screen key again.
3. Try External Keyboard
If the Print Screen key still doesn’t work, try connecting an external keyboard to your Dell laptop and use its Print Screen key instead. This will help determine if the issue is specific to your laptop’s keyboard.
4. Check Save Locations and Clipboard Settings
If your screenshots are not saving or pasting correctly, check the default save locations and clipboard settings in your operating system. Ensure that the designated save location exists and has sufficient storage space. Additionally, verify that the clipboard is functioning properly.
5. Restart and Run System Updates
Restarting your Dell laptop can sometimes resolve minor software glitches. After restarting, check for any system updates available and install them. System updates often include bug fixes and performance improvements that can help resolve screenshot-related problems.
Follow the troubleshooting steps outlined above to address and fix screenshot issues on your Dell laptop. By resolving these problems, you’ll be able to capture and save screenshots effortlessly.
Troubleshooting Screenshot Issues
| Problem | Possible Solution |
|---|---|
| Print Screen key not working | Test functionality in different applications |
| Outdated or incompatible driver | Check for driver updates on Dell’s website |
| Try using an external keyboard | Connect an external keyboard and test the Print Screen key |
| Screenshots not saving or pasting correctly | Check save locations and clipboard settings |
| Restart and run system updates | Restart your laptop and install any available updates |

Best Practices for Using Screenshots on Dell Laptops
When using screenshots on your Dell laptop, it’s important to follow best practices to ensure optimal results. By considering the purpose of your screenshots and implementing effective screen capture tips and practices, you can enhance your screenshot-taking experience and improve the quality of your captured images. Here are some key best practices to keep in mind:
1. Select the Appropriate Type of Screenshot
Before capturing a screenshot, determine the type that best suits your needs. Whether it’s a full-screen capture, a specific window, or a selected area, choosing the right type will provide the desired outcome. This allows you to focus on the relevant content and avoid any unnecessary clutter in your screenshots.
2. Utilize Editing Tools
Enhance your screenshots by utilizing editing tools to refine and customize them. Crop out any unnecessary elements, add annotations or highlights to emphasize specific details, and adjust the image’s brightness or contrast if needed. These editing options will help you create visually compelling screenshots that effectively convey your message.
3. Organize and Store Screenshots
To ensure easy access and retrieval, organize your screenshots in a dedicated folder or create a specific naming convention. This allows you to quickly locate and use the screenshots when needed. By keeping your screenshots well-organized, you can eliminate any potential frustration of searching for a particular image.
4. Consider Privacy Concerns
When sharing screenshots with others, it’s important to consider privacy concerns. Before sharing, review the contents of your screenshots and remove any sensitive or personal information that you do not want to disclose. This ensures that you maintain privacy and protect sensitive data.
5. Use Proper Screenshot Etiquette
When sharing screenshots publicly or with colleagues, it’s essential to practice proper screenshot etiquette. Always obtain appropriate consent from individuals before sharing screenshots that include their information. Additionally, avoid sharing screenshots that may violate confidentiality agreements or disclose private data.
“Taking screenshots is a valuable tool for capturing and sharing information. By following these best practices, you can optimize your screenshot usage and create professional-looking images.”
By implementing these best practices for using screenshots on your Dell laptop, you can effectively capture and utilize images that enhance your productivity and communication. Whether it’s for work, presentations, documentation, or personal use, incorporating these tips will enable you to make the most out of your screenshot-taking capabilities.
Capturing Screenshots on Dell Tablets
When it comes to capturing screenshots on your Dell tablet, the process differs slightly from Dell laptops. Fortunately, it’s still a simple and straightforward task. To capture a screenshot on your Dell tablet, follow these steps:
- Press the Windows logo button and the volume down button at the same time. This combination will capture a screenshot of the entire screen.
- The captured screenshot will be automatically saved to the Pictures folder on your tablet.
If your Dell tablet is equipped with a physical keyboard that includes the Print Screen key, you can also use it to capture screenshots. Simply press the Print Screen key while on the screen you want to capture. After capturing the screenshot, you can follow the same steps mentioned earlier to access and manage your screenshots.
Remember:
To capture a screenshot on your Dell tablet:
1. Press the Windows logo button and the volume down button simultaneously.
2. Alternatively, use the Print Screen key on the tablet’s physical keyboard, if available.
3. Check the Pictures folder to access your captured screenshots.
Whether you choose to use the button combination or the Print Screen key, capturing screenshots on your Dell tablet is quick and convenient. Now you can easily save and share important moments or information from your tablet’s screen.
Using Third-Party Screenshot Tools on Dell Laptops
In addition to the built-in screenshot options on Dell laptops, you can also explore third-party screenshot tools for more advanced features and functionality. These tools offer additional editing and sharing options, allowing you to enhance your screenshot capturing experience. Here are some popular options:
- Greenshot: Greenshot is a versatile and user-friendly screenshot software for Dell laptops. It provides customizable hotkeys, various capture modes, and powerful editing capabilities. With Greenshot, you can easily capture screenshots, annotate them, and share them with others. This tool is compatible with Windows operating systems and offers a seamless user experience.
- Lightshot: Lightshot is another excellent choice for capturing screenshots on Dell laptops. It is a lightweight and easy-to-use app that allows you to capture any part of your screen quickly. Lightshot offers various editing tools, such as adding text, arrows, and shapes to your screenshots. You can also save your screenshots directly to your computer or upload them to the cloud for easy sharing.
- Snagit: Snagit is a comprehensive screenshot and screen recording software for Dell laptops. It offers a wide range of features, including customizable hotkeys, full-screen and region capture options, and advanced editing tools. With Snagit, you can capture high-quality screenshots, create GIFs, and even record videos of your screen. It is a powerful tool for professionals and creators who need precise control over their screenshots and recordings.
These third-party screenshot tools provide an array of features that can enhance your screenshot capturing and editing process. They offer more flexibility, advanced editing options, and seamless sharing capabilities. Choose the tool that suits your needs and preferences, and take your screenshot game to the next level.
Comparison of Third-Party Screenshot Tools for Dell Laptops
| Tool | Features | Compatibility | Price |
|---|---|---|---|
| Greenshot | Customizable hotkeys, multiple capture modes, powerful editing capabilities | Windows | Free |
| Lightshot | Quick capture, easy editing tools, cloud storage integration | Windows, macOS | Free |
| Snagit | Advanced capture options, comprehensive editing tools, screen recording | Windows, macOS | Paid (Free trial available) |
Advantages and Limitations of Different Screenshot Methods on Dell Laptops
Each screenshot method on Dell laptops has its own advantages and limitations. Understanding these differences can help you choose the method that best suits your needs and preferences.
Print Screen Key
The Print Screen key on Dell laptops offers a quick and straightforward way to capture screenshots. With a simple press of a button, you can capture the entire screen or an active window. This method is especially useful when you need to capture a full-page view or share a snapshot without any editing. However, it does not provide advanced editing features for customization.
Snipping Tool
The Snipping Tool on Dell laptops provides more flexibility in capturing specific areas of the screen. You can easily select and capture a portion of the screen, whether it’s a rectangular shape, a free-form area, or even a specific window. The Snipping Tool also offers basic editing options, such as highlighting and cropping, allowing you to enhance your screenshots. However, it may not have the extensive editing capabilities of third-party screenshot tools.
Third-Party Screenshot Tools
For more advanced features and customization options, you can explore third-party screenshot tools on your Dell laptop. These tools often offer additional editing functions, such as adding annotations, blurring sensitive information, or resizing the captured images. They may also provide options for capturing specific elements, such as long web pages or scrolling windows. However, using third-party tools may require installation and customization, and there may be a learning curve involved in getting familiar with their features.
Consider your specific needs and preferences when choosing a screenshot method on your Dell laptop. If you want a quick snapshot without any editing, the Print Screen key is a convenient option. For more precision and basic editing capabilities, the Snipping Tool is a suitable choice. If you require advanced editing features and customization options, exploring third-party screenshot software may be the way to go.
Conclusion
Capturing screenshots on Dell laptops is a simple and essential feature that allows you to save and share important moments on your screen. Whether you use the built-in Print Screen key, the Snipping Tool, or third-party screenshot software, you can easily capture and customize screenshots on your Dell laptop.
Select the method that best suits your needs and explore additional features for a seamless screenshot capturing experience. Experiment with different techniques and enjoy the convenience of capturing and sharing your screen moments.
With the ability to capture screenshots on your Dell laptop, you can save and share important information, document software issues, or create visual tutorials effortlessly. The built-in Print Screen key provides a quick and efficient way to capture your entire screen or active windows, while the Snipping Tool offers more versatility with its ability to capture selected areas. If you’re looking for more advanced features, third-party screenshot software can provide added functionality, such as customizable hotkeys and annotation tools.
Find the screenshot method that aligns with your needs and preferences. Whether you’re a professional needing precise captures or an everyday user looking for simplicity, Dell laptops offer various options to meet your requirements. Remember to organize your screenshots for easy access and consider privacy concerns when sharing sensitive information. Capture, customize, and share your screen moments with ease on your Dell laptop.
FAQ
How do I take a screenshot on my Dell laptop?
To take a screenshot on a Dell laptop, you can use the Print Screen key. Press the Print Screen key to capture the entire screen. If your Dell laptop doesn’t have a dedicated Print Screen key, you can use the Fn + Insert keys instead. The captured screenshot will be saved to the clipboard, and you can paste it into an image editor or document.
How do I capture a specific window on my Dell laptop?
To capture a specific window on your Dell laptop, press the Alt + Print Screen keys together. This will capture the active window only. After capturing the screenshot, you can paste it into an image editor or save it as a file.
Can I use the Snipping Tool on my Dell laptop?
Yes, Dell laptops have the Snipping Tool, a built-in Windows utility, that allows you to capture a selected portion of the screen. To open the Snipping Tool, click on the Start menu, type “snipping tool” in the search box, and select the Snipping Tool from the search results. From there, you can choose the type of snip you want and save the screenshot.
Are there any tips for capturing screenshots on my Dell laptop?
Yes, here are some tips for capturing screenshots on Dell laptops: to capture the entire screen, use the Windows logo key + PrntScrn key combination; to capture a specific window, use the Alt + PrntScrn keys together; and to capture a selected portion of the screen, use the Snipping Tool or third-party screenshot software. Remember to save your screenshots in a designated folder for easy access.
What can I do if I encounter issues with capturing screenshots on my Dell laptop?
If you encounter issues with capturing screenshots on your Dell laptop, you can try a few troubleshooting steps. First, ensure that the Print Screen key is functioning properly by testing it in different applications. If the key is not working, check for any driver updates or try using an external keyboard. If the screenshots are not saving or pasting correctly, check the default save locations and clipboard settings in your operating system. Additionally, restart your laptop and run any available system updates.
What are the best practices for using screenshots on Dell laptops?
When using screenshots on your Dell laptop, it’s important to consider the purpose of your screenshots and choose the appropriate type (full screen, window, or selected area). Use editing tools to enhance your screenshots, such as cropping unnecessary elements or adding annotations. Organize your screenshots in a dedicated folder for easy access and retrieval. If sharing screenshots with others, consider privacy concerns and remove any sensitive information.
How do I capture screenshots on my Dell tablet?
On Dell tablets, you can press the Windows logo button and the volume down button simultaneously to capture a screenshot of the entire screen. The captured screenshot is automatically saved to the Pictures folder on your tablet. Alternatively, you can use the Print Screen key located on the Dell tablet’s keyboard, if available.
Can I use third-party screenshot tools on my Dell laptop?
Yes, in addition to the built-in screenshot options, you can explore third-party screenshot tools for more advanced features. Some popular options for Dell laptops include Greenshot, Lightshot, and Snagit. These tools often provide customizable hotkeys, multiple capture modes, and built-in annotation tools for enhanced screenshot capturing and editing capabilities.
What are the advantages and limitations of different screenshot methods on Dell laptops?
The Print Screen key is quick and straightforward, allowing you to capture the entire screen or an active window. However, it may not offer advanced editing features. The Snipping Tool provides more flexibility in capturing specific areas of the screen and offers basic editing options. Third-party screenshot tools offer more advanced features but may require installation and customization. Consider your specific needs and preferences when choosing a screenshot method on your Dell laptop.